
Looking for a simple, cheap, and totally spooktacular way to decorate your yard for Halloween? This year, let your trees do the talking (or rather, the creeping)!
We’ve had so much interest in a specific idea from our 25 Spooktacular DIY Halloween Decorations for Your Outdoor Space listicle that we decided to give it a dedicated tutorial.
This Glowing Mummy Tree project is one of the easiest ways to transform your yard with minimum effort. It uses basic supplies, looks fantastic both day and night, and will make every trick-or-treater stop and stare. Best of all, it’s completely reversible and won’t harm your tree!
Here is exactly how to create this popular and viral decoration.
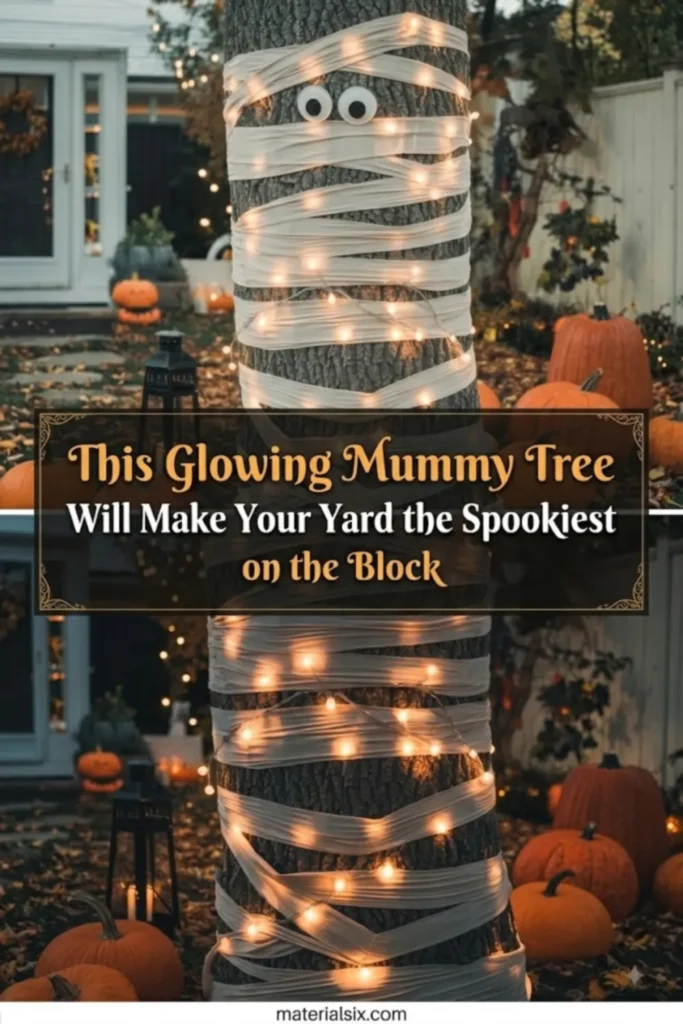
Recreate this iconic look with our step-by-step guide.
The Integrated Lights: The Secret Sauce
The image that went viral isn’t just a plain mummy wrap. It has one critical detail: integrated lights. This makes all the difference, creating an eerie, internal glow that makes the mummy wrap truly “come alive” at night.
We designed this tutorial to show you precisely how to integrate that lighting.
Supplies You Will Need
Most of these items are cheap and easy to find, either at a local store or in your own craft closet.
- A Tree with a Large Trunk: Ideally one that is visible from the street.
- Muslin Wraps or Cheesecloth: A large bolt (about 10 yards) is best. Avoid fragile options like toilet paper, as they won’t hold up outdoors. Look for something that is translucent and breathable.
- Warm White Fairy Lights (Battery-Operated is Ideal): Battery packs eliminate the need for extension cords across the lawn. A long string of 100+ lights is best.
- Giant Googly Eyes (6-8 inches): At least two for the face. You can find these at craft stores or make your own with paper plates and a black marker.
- Safety Pins or Tacks: For securing the wrap.
- Masking Tape: For securing light cords.
- Clear Fishing Line: For extra security (optional).
Step-by-Step Instructions
Follow these simple steps, and in less than 30 minutes, you’ll have a stunning decoration.
Step 1: Preparation
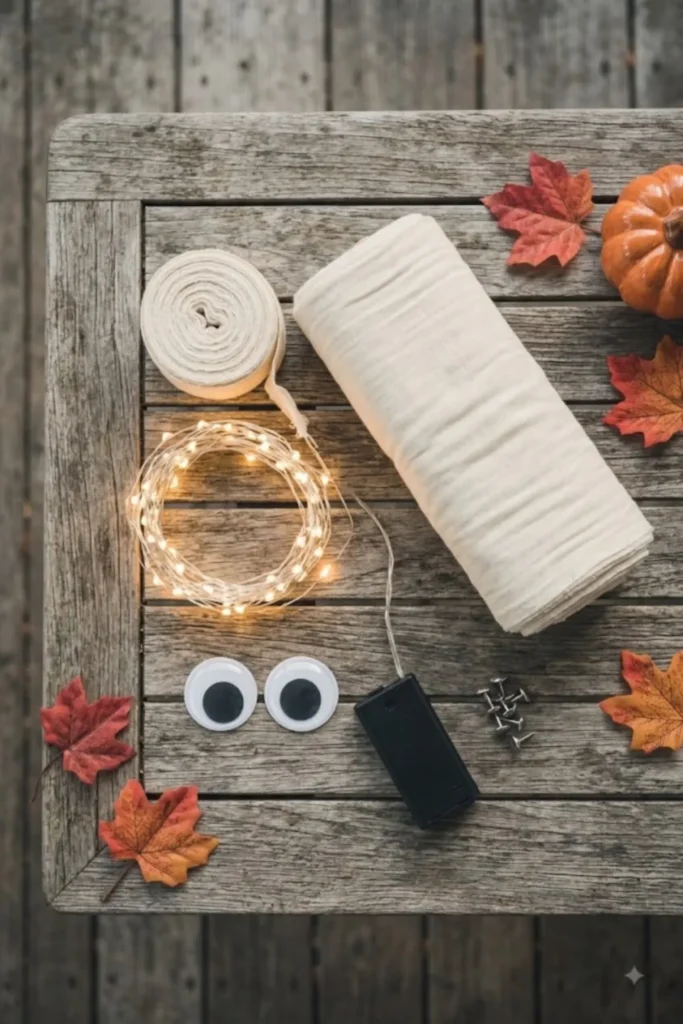
Gather all your supplies. Make sure your fairy lights work. Determine the best starting and ending point for your lights to conceal the battery pack (or outlet) at the base of the tree.
Step 2: The Base Wrap and Integrated Lighting
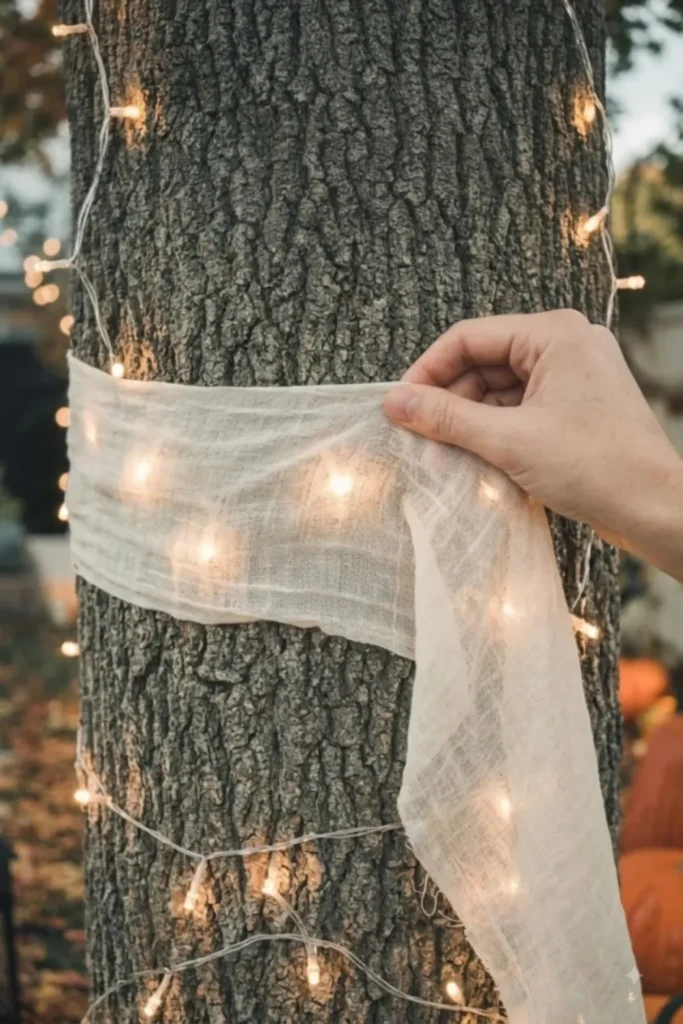
This is the key step. We will wrap the lights with the muslin for a truly integrated look.
Notice how the layout is planned, similar to how we’ll plan our wrapping path.
- Start at the base of the tree. Secure the end of your muslin wrap and the start of your light cord with a tack or safety pin.
- Begin wrapping the muslin. After one or two full loops, place a portion of your string lights down, then wrap the muslin over the lights.
- Continue this process as you go up the tree: wrap a layer, lay down lights, wrap the next layer over the lights. This “sandwiches” the lights within the layers, ensuring they shine through the fabric rather than being just wrapped on top.
A Tree-Friendly Tip: Be sure to keep the wrap snug but not overly tight. You want it to hold, not strangle the tree! Use masking tape to hold the light cord to the bark if you need to, as it is tree-safe.
Step 3: Fastening at the Top
Once you reach your desired height, make a final, secure wrap. Tuck the end of the muslin and secure it with a tack or a few safety pins.
For Extra Security: We recommend taking a piece of clear fishing line and making a few tight loops at the very top and very bottom of your mummy wrap for a secondary securement band. This helps it resist any wind.
Step 4: Adding the Eyes
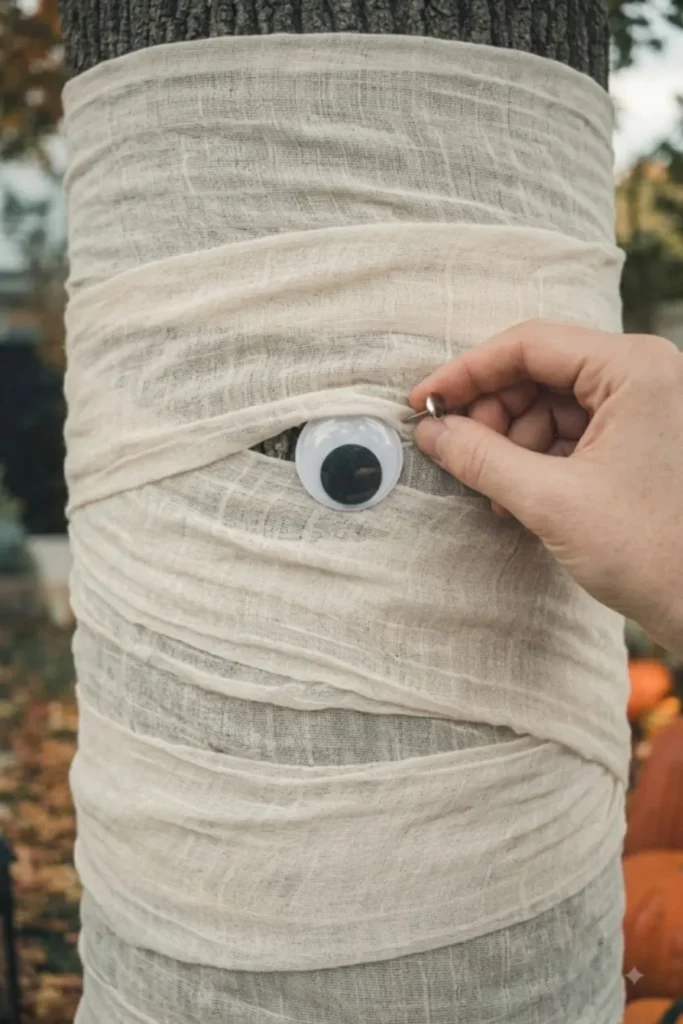
This is the most critical visual element. Above a ‘forehead’ fold in the muslin, decide on your placement. Secure the giant googly eyes to the wrap with tacks.
- Budget alternative: You can make eyes by cutting large circles from a paper plate and coloring a black center. These are lightweight and easy to secure with tacks.
Step 5: Final Draping and Light Check
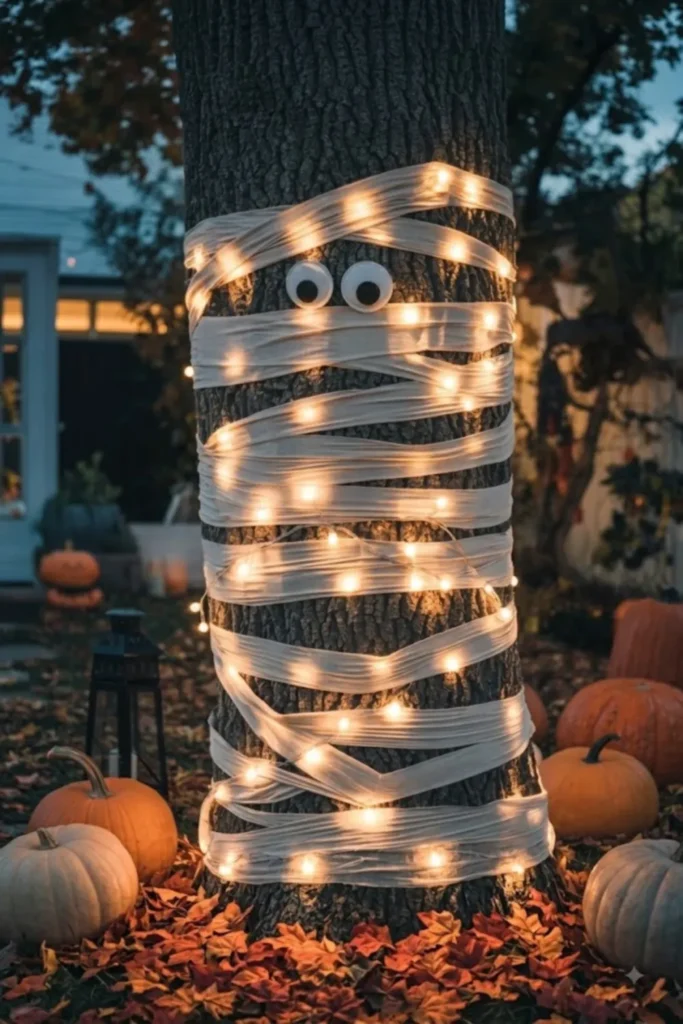
Turn on your lights and see how it looks! Adjust the muslin slightly to make sure the lights are evenly distributed. Add a few loose, draping pieces of muslin for added texture and a more authentic, ancient look.
Think of the final drape of the leaves as you think of the final drape of your muslin wraps.
Pro-Tips for Success
- Go Battery-Operated: We cannot emphasize this enough. It is safer, looks cleaner, and is so much more convenient than running cords. Just make sure to have extra batteries!
- Translucent Fabric is Key: If you use too thick a fabric, the lights won’t shine through. Muslin or a loose-weave cheesecloth are your best bets.
- Tree Choice Matters: A larger, more visible tree trunk is far more impactful than a smaller one.
- Reversibility: When you’re ready to take it down, simply unwind. You can reuse the muslin and the eyes next year!
Happy Halloween! If you make this, we’d love to see it. Tag us on social media or drop a comment below!
1 thought on “The Glowing Mummy Tree: An Easy DIY Halloween Outdoor Decoration”
Comments are closed.