
You sit down to make a birthday card, and five minutes later you’re opening drawers for the paper trimmer, digging through a tote for cardstock, and wondering where the good scissors went. You may have plenty of storage already. What’s missing is a place for the things you use together, close enough to grab while you work.
Start by looking at where you actually cut, sew, paint, or assemble projects. A narrow ledge beside your chair can make paint colors easier to compare. Flat trays give cardstock a place to lie without burying it under other supplies. And a low shelf behind your table can hold an entire project between sessions so you can clear the work surface without sorting everything back into separate bins.
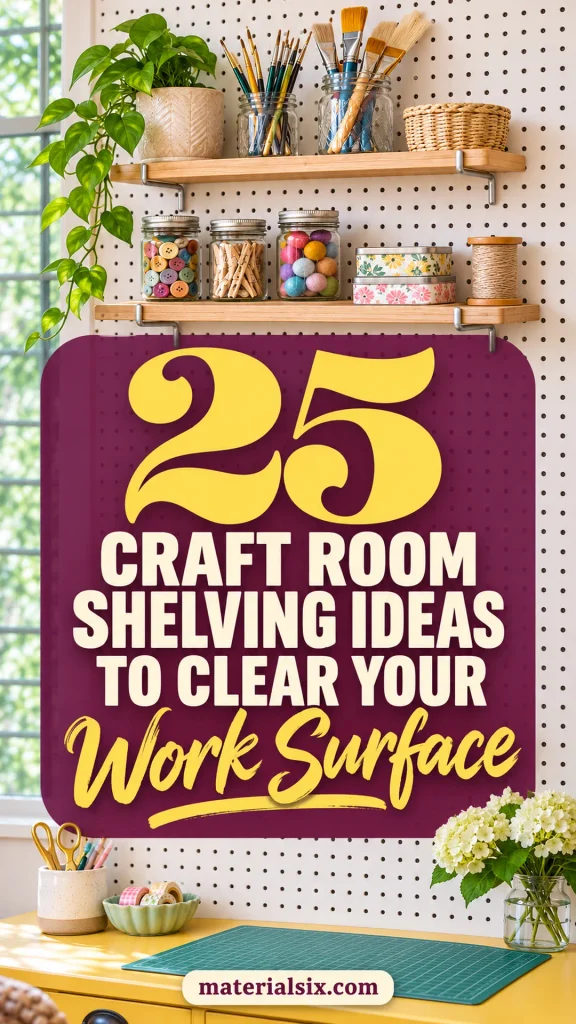
These craft room shelving ideas cover everything from a single wall above your desk to a shared family craft room. Pick the shelf that solves the interruption you run into most often.
1. Float Your Everyday Tools Above the Desk
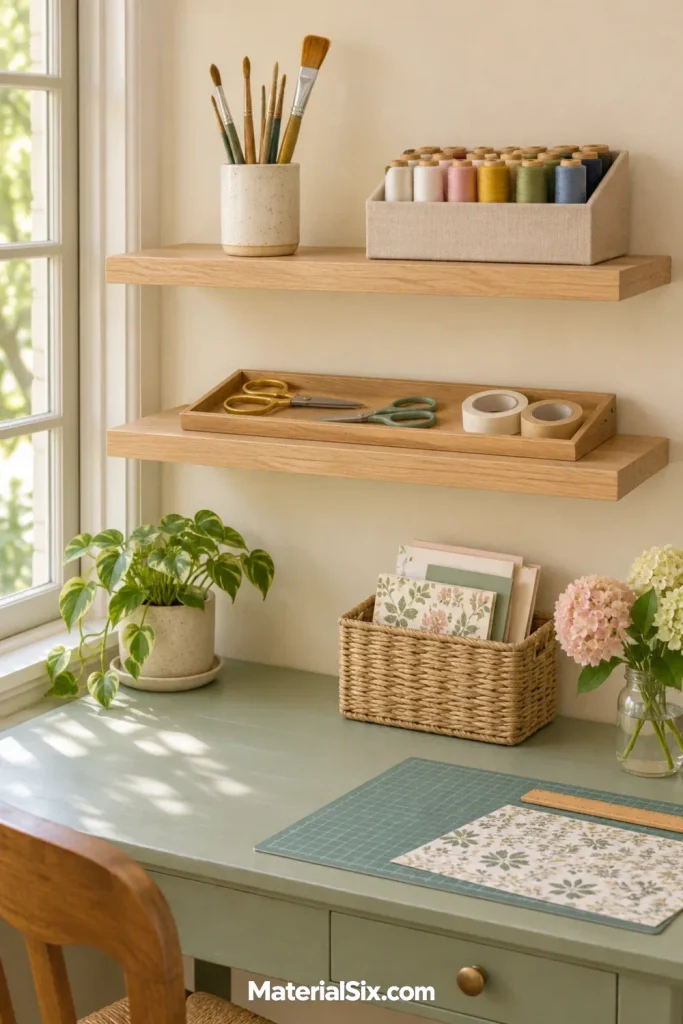
A pair of shallow floating shelves can put scissors, tape, and the glue you reach for every day right over your work surface. Keep those tools on the lower shelf in an open tray you can pull down with one hand. Use the upper shelf for lighter items you reach for less often, such as spare brushes or an extra roll of tape.
Before choosing a height, sit in your usual chair and try reaching to the proposed shelf location. Leave space below for a task lamp or tall cutting mat, and keep the shelf shallow enough that it leaves your work area open.
2. Give Changing Supplies Adjustable Shelf Heights
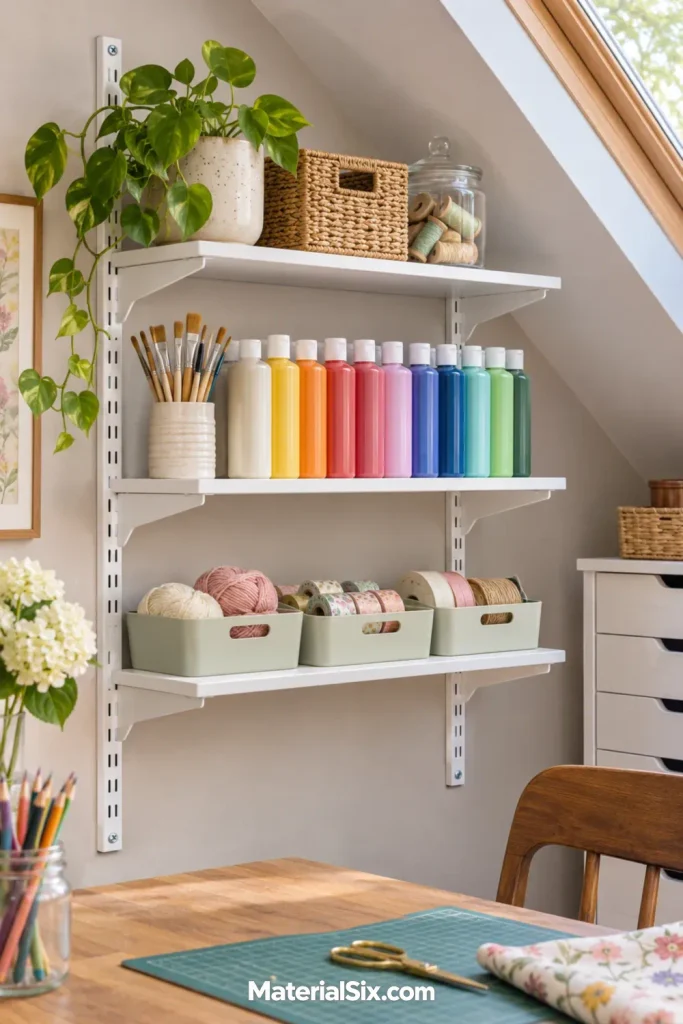
Wall-mounted standards and adjustable brackets let you change the spacing between shelves as your supplies change. You might leave a tall opening for paint bottles today and move a shelf down later to make room for shallow trays. White standards against a pale wall can keep the arrangement feeling light in a small room.
Lay out the supplies you own and measure the tallest items with lids or pumps in place. Include enough clearance to lift them straight out. Group supplies that require similar shelf heights to keep a single tall bottle from dictating the spacing across the entire wall.
3. Fill Cubby Shelves With Open-Front Bins
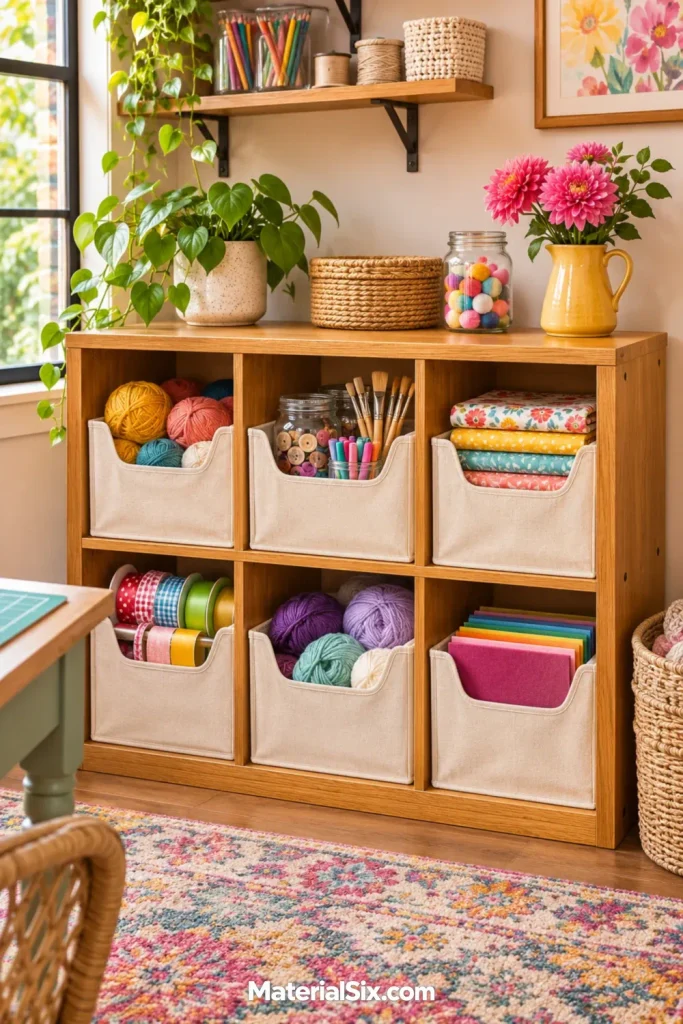
A low cube organizer gives you a series of compartments at a height you can reach standing or sitting nearby. Open-front bins make those compartments work for loose materials such as felt scraps, embroidery hoops, and packets of craft foam. You can grab a single piece or slide the entire bin out when you need to spread materials across the table.
Check the height of each bin’s opening as well as its exterior dimensions. A deep bin with a tall front can hide small items at the bottom. Give odd-shaped supplies their own cubby if a bin makes them harder to reach.
4. Line Up Acrylic Paints on Picture Ledges
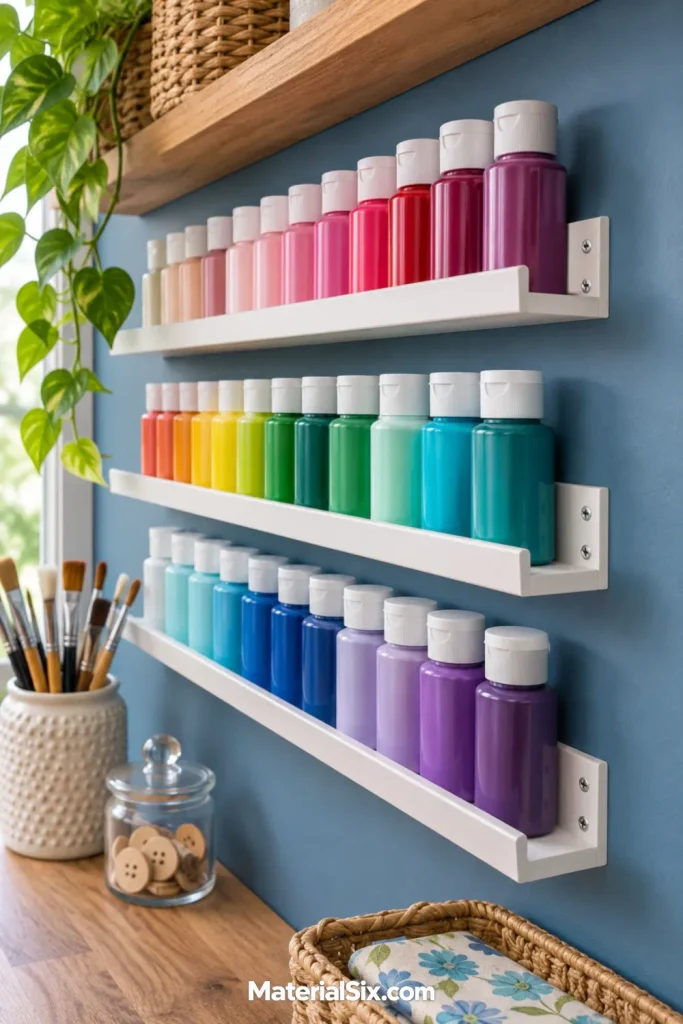
Acrylic colors are easier to compare when each bottle sits in a single row. A slim picture ledge gives small bottles their own shallow shelf, and the lip helps keep them from sliding forward as you reach for a neighboring color. A pair of ledges against a muted blue wall makes a small paint station easy to scan.
Group colors roughly by family, then give your most-used neutrals the easiest spot to reach. Check the usable depth inside the ledge’s lip before buying. Larger jars or bottles with wide bases may need a deeper shelf elsewhere.
5. Hang Ribbon Spools Beneath a Shelf
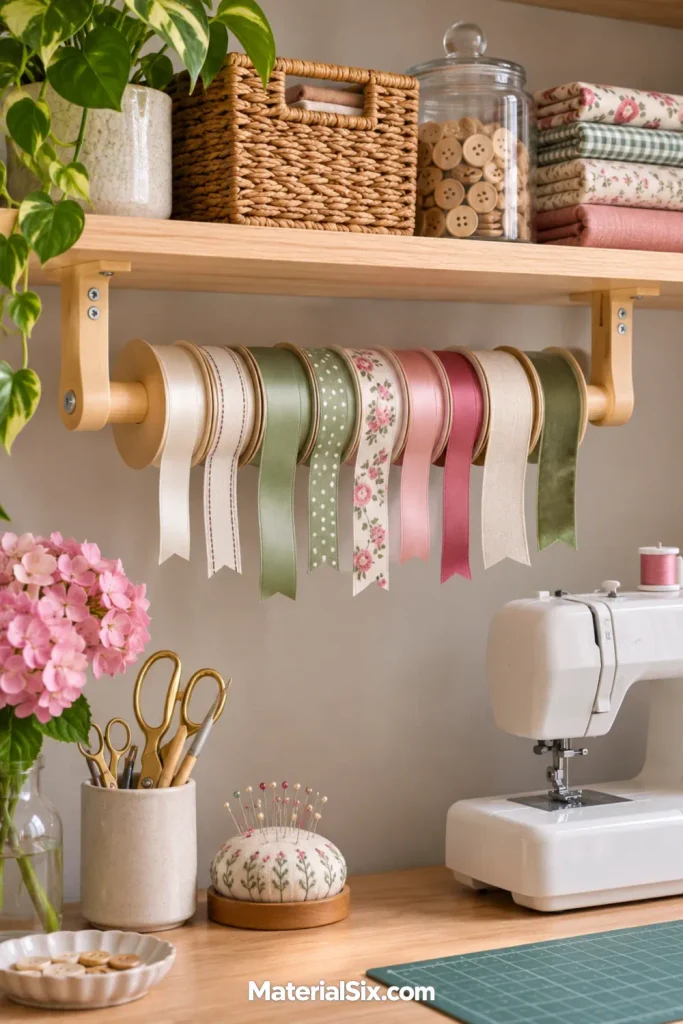
Use the underside of a shelf to hold ribbon on a horizontal dowel. Spools sit side by side, leaving the shelf surface available for fabric, a pin cushion, or a sewing kit. Place the rod close enough to the work area that you can pull a ribbon tail over the table and trim the length you need.
Choose a setup with an accessible removable rod so you can replace an empty spool. Leaving a little space between rolls makes it easier to turn one without catching the ribbon next to it. A separate shallow tray works well for short offcuts.
6. File Folded Fabric Upright
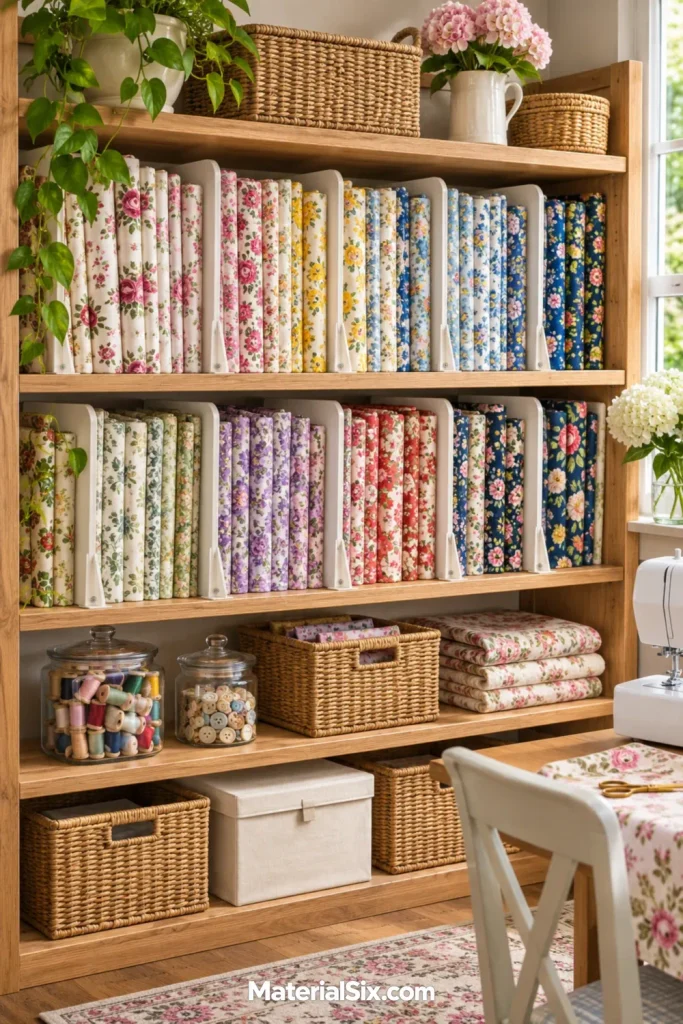
Arrange folded quilting cotton upright on a shelf so the edges show each print, much like books lined up by their spines. Rigid dividers keep short groups standing when you pull a piece from the middle. This arrangement is especially useful when you want to compare several fabrics for a quilt without taking down an entire stack.
Fold pieces to a consistent depth for the shelf you have. Keep small remnants in a nearby basket because they tend to slip between larger pieces. On a sunny wall, move fabrics you want to preserve away from direct light or store them behind a door.
7. Stack Clear Drawers for Beads and Findings
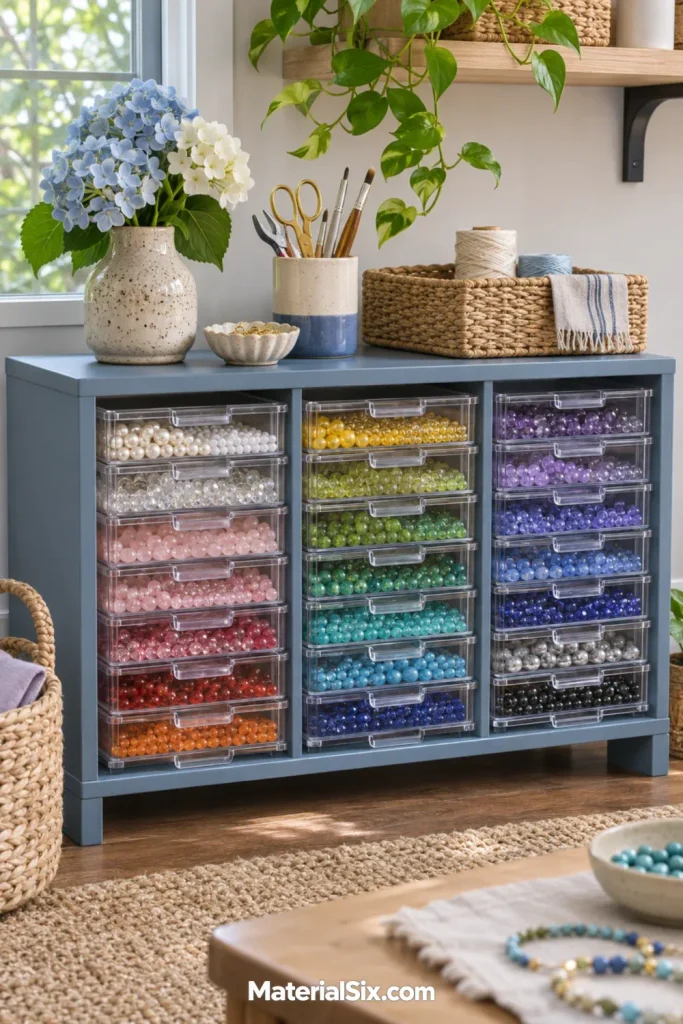
Give small beads, clasps, and jewelry findings a set of shallow clear drawers on a shelf near your work mat. Transparent fronts make color groups visible at a glance. Inside, divided inserts keep tiny components from migrating into the next compartment when you slide a drawer out.
Leave space in front of the unit to pull a drawer all the way forward. Position it at a height where you can see into an open drawer comfortably. If you often work with a handful of sizes or finishes, give those components the front compartments so you can reach them first.
8. Shelve the Side Wall of a Craft Closet
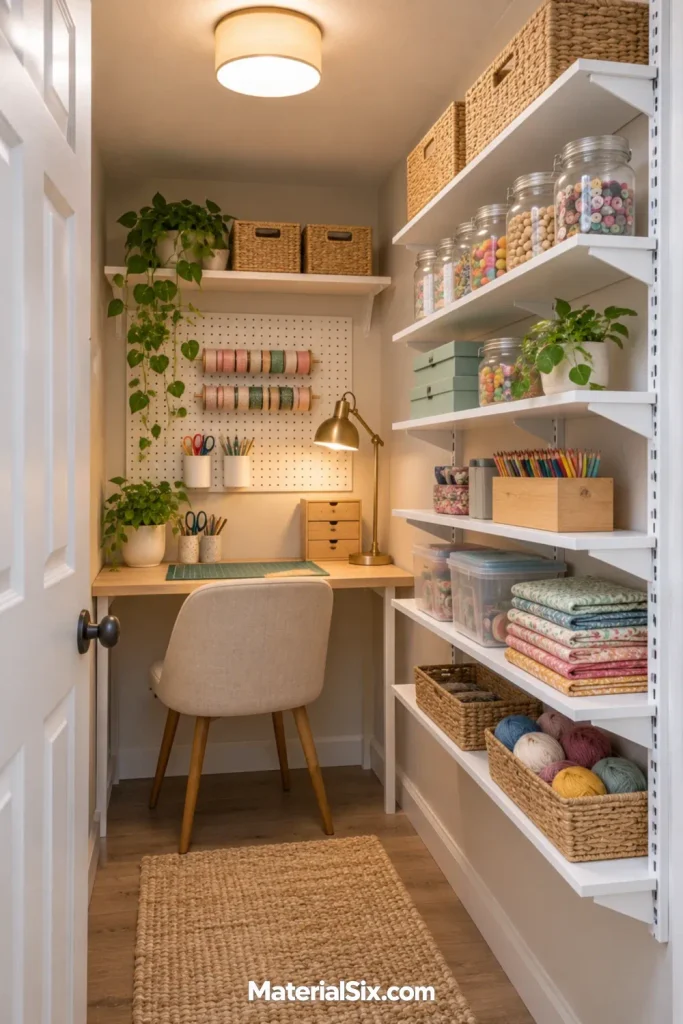
A closet can hold a compact craft desk at the back with shallow shelves on one side. This puts lightweight supplies beside you and leaves the back wall open for task lighting or a pinboard. From outside the closet, the shelves can also be less visually prominent than storage directly above the desk.
Check the arrangement with the chair pulled out and any existing doors open. A small shelf is only useful if you can turn and reach it comfortably. Use shallow containers for items like thread, tape, and glue sticks, and reserve bulky stock for a deeper shelf elsewhere.
9. Stand Flat Vinyl Sheets in Vertical Slots
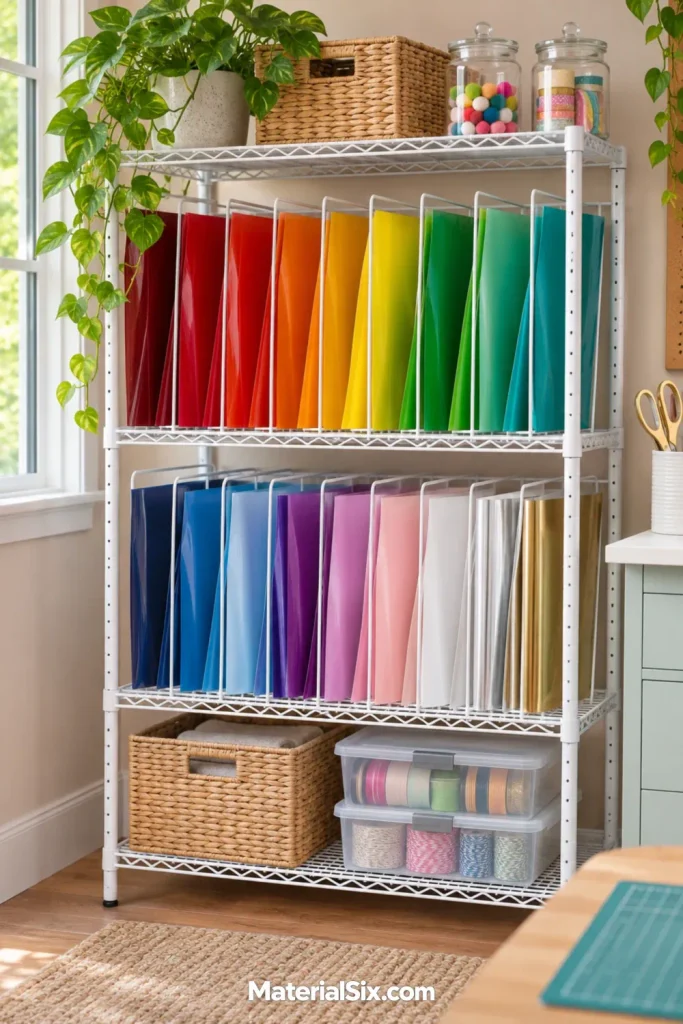
A shelf with vertical dividers keeps flat adhesive vinyl sheets upright so you can slide out a color without lifting the whole stack. It works especially well beside a cutting station where you swap among adhesive vinyl, transfer tape, and specialty sheets. Sorting by material type can save time when several finishes look similar from the edge.
Choose openings tall and deep enough to support the sheets without bending their corners. Leave a little extra room to slip your fingers around a sheet or folder. Store rolls separately in a holder suited to their shape so they stay out of the flat-file slots.
10. Keep Cardstock Flat in Shallow Trays
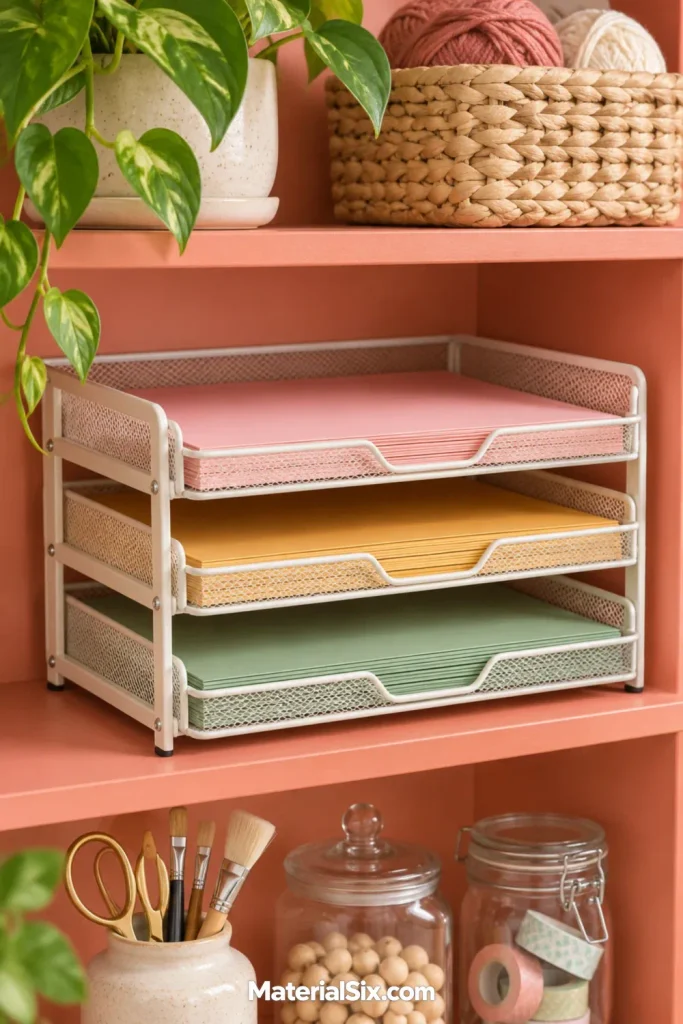
Stack shallow paper trays on a shelf near your paper trimmer to keep cardstock flat and reachable. Each tray can hold a small range of colors or a particular paper weight. Open fronts make it easy to pull out a sheet and slide the unused portion back in after cutting.
Measure your largest paper first. A tray sized for letter paper will leave 12-by-12-inch scrapbook sheets hanging over the edge. Leave space above each stack for your fingers, and give usable scraps their own tray so small pieces stay easy to find without getting lost among full sheets.
11. Wrap Shelves Around an Inside Corner
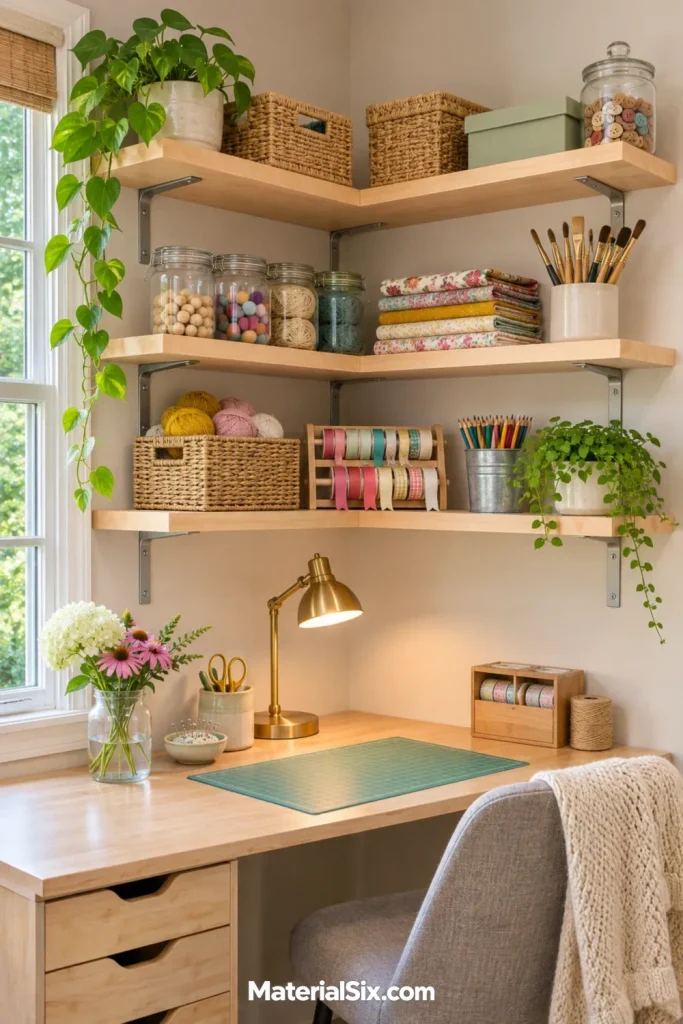
Two short runs of shelving that meet in an L can make an awkward corner above a worktable useful. The longest reach is usually right where the walls meet, so place lightweight backups there. Use the outer ends for the supplies you need during a typical project, such as marking tools or fabric clips.
The two sides can serve different tasks. Keep cutting and measuring supplies over one end of the table and finishing supplies over the other. Use a cardboard outline to test how far the shelves would project before committing, especially if the desk doubles as a computer station.
12. Slip a Narrow Shelf Tower Beside Your Desk
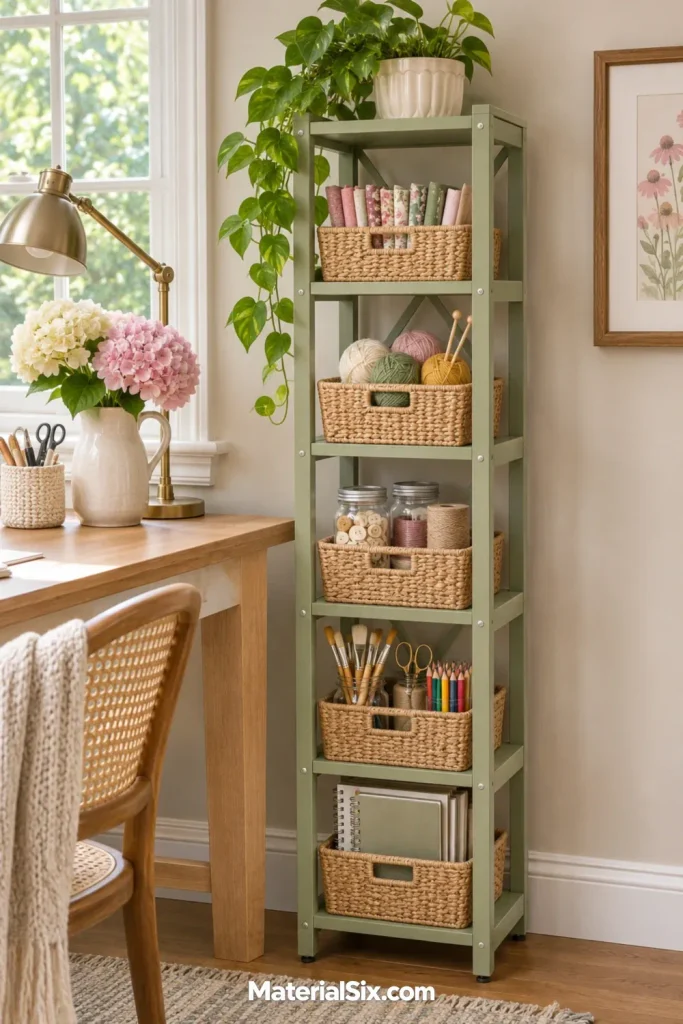
That slender gap between a desk and a wall may be wide enough for a shelf tower. A slim sage-green unit with small handled baskets adds storage for stamp pads, brush rolls, or embroidery tools without taking up desk space. A tall shelf gives you several levels to work with even when the footprint is modest.
Measure at the baseboard as well as above it, and allow room to pull baskets straight out. Keep the items you reach for most at desk or shoulder height. Follow the unit’s anchoring instructions and use the bottom shelves for heavier contents.
13. Roll a Three-Tier Cart Up to Your Worktable
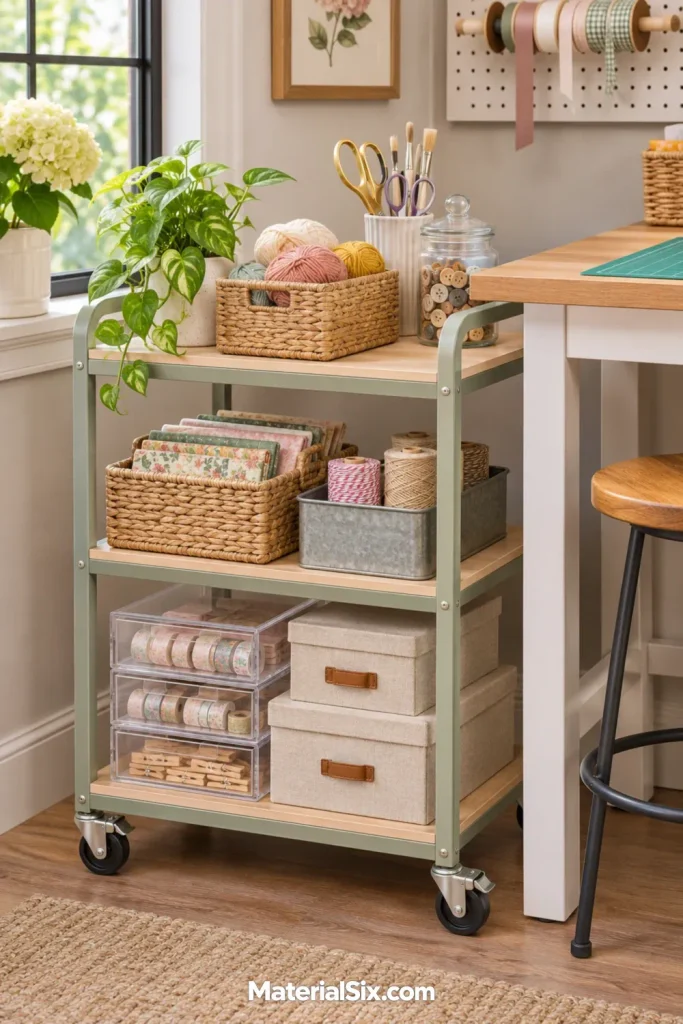
A rolling shelf cart is useful when your craft space changes with the project. Bring it alongside the dining table for card making, then move it out of the way when you’re done. Give the top tier to the tools in current use, with refills or paper on the lower levels.
Open shelves make it easy to reach supplies from either side. If your cart has locking casters, use them when it’s parked. Check that the cart can travel between its storage spot and your work area without catching on rugs or leaving you to squeeze around furniture.
14. Add Solid Liners to Wire Shelves
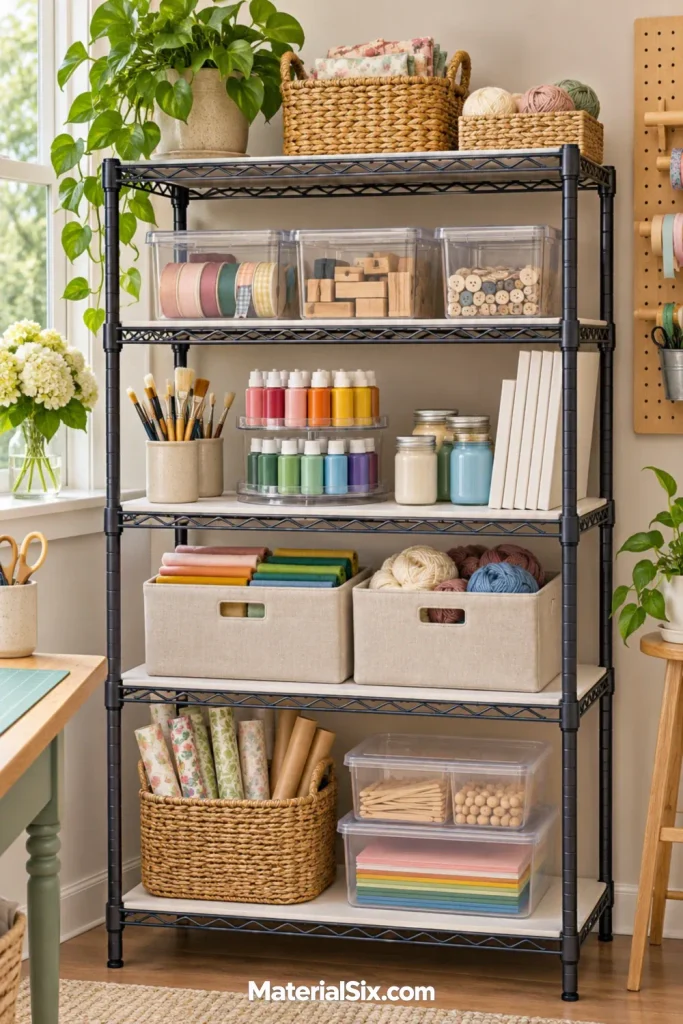
A metal wire rack can hold large craft bins, but narrow paint bottles and jars can wobble across the gaps. Add a fitted solid liner where you want to keep small items. The shelf then has a continuous surface for supplies you grab individually, while the rack still gives you the open look and flexibility of freestanding shelving.
Measure the usable surface between the posts and choose a liner that sits flat. Keep larger totes on the lower levels and give a waist-height shelf to frequently used containers. A wipeable liner makes sense wherever paint bottles or glue tend to leave drips.
15. Display Washi Tape on Clear Acrylic Shelves
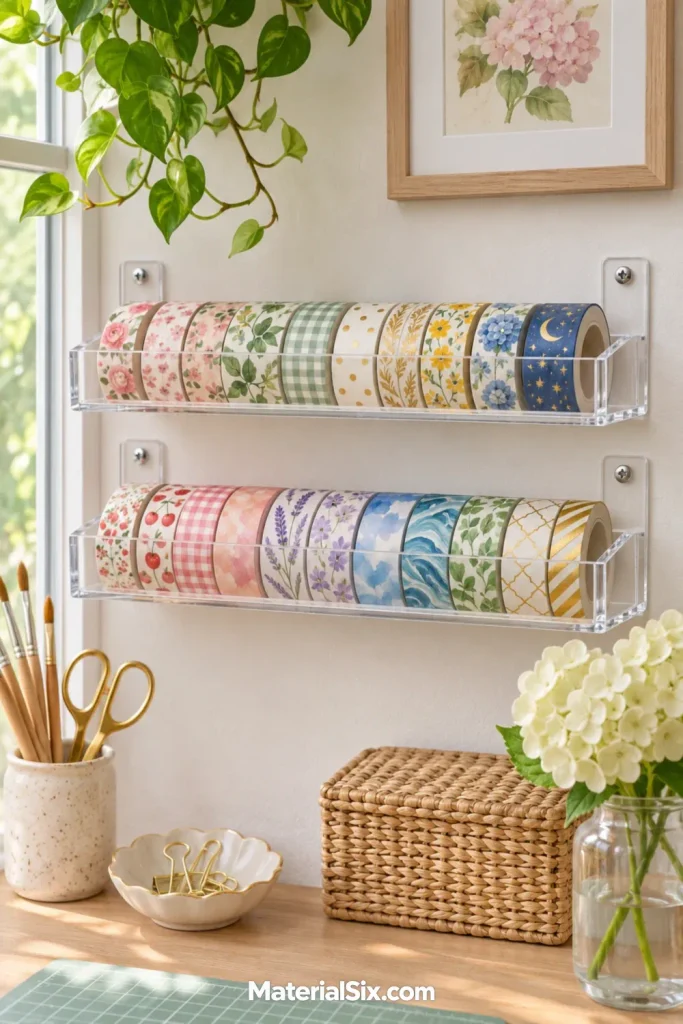
Acrylic shelves let the patterns on washi tape stand out, especially on a light wall where the shelf edges almost disappear. Arrange rolls upright in short groups so you can spot the stripe, floral, or solid color you need. Mount the shelves beside a journaling desk or above a small paper-craft station.
Look for a front lip and enough depth to hold your widest rolls comfortably. A small gap between groups makes it easier to lift one roll without disturbing the row. Use the most accessible ledge for current favorites and a nearby bin for duplicate rolls or seasonal designs.
16. Tilt Sewing Patterns Forward on a Display Shelf
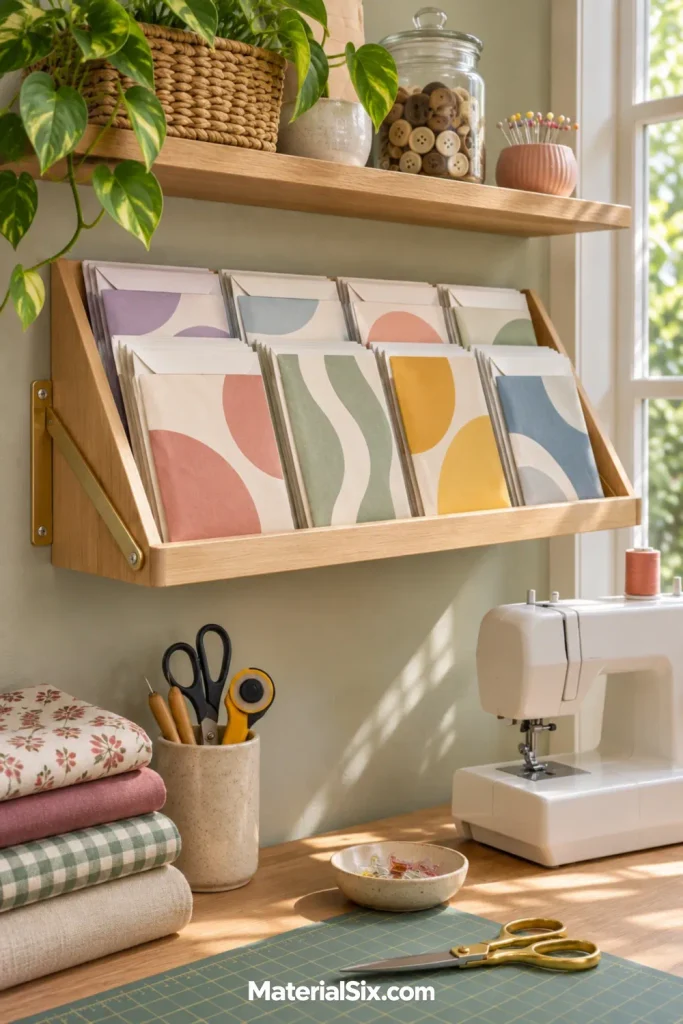
A sloped display shelf with a front lip keeps sewing pattern envelopes upright and facing out. Seeing the cover makes it easier to compare garment shapes or pull the pattern you planned to cut next. It also gives current projects a visible spot when the rest of your pattern collection lives in a filing box.
Keep the display to a few envelopes so each one can slide out independently. Choose a shelf with a lip high enough to hold lightweight packets in place. If you trace or reuse a pattern, tuck its pieces back into the envelope or a matching sleeve before returning it to the shelf.
17. Park Unfinished Projects on a Shelf Behind You
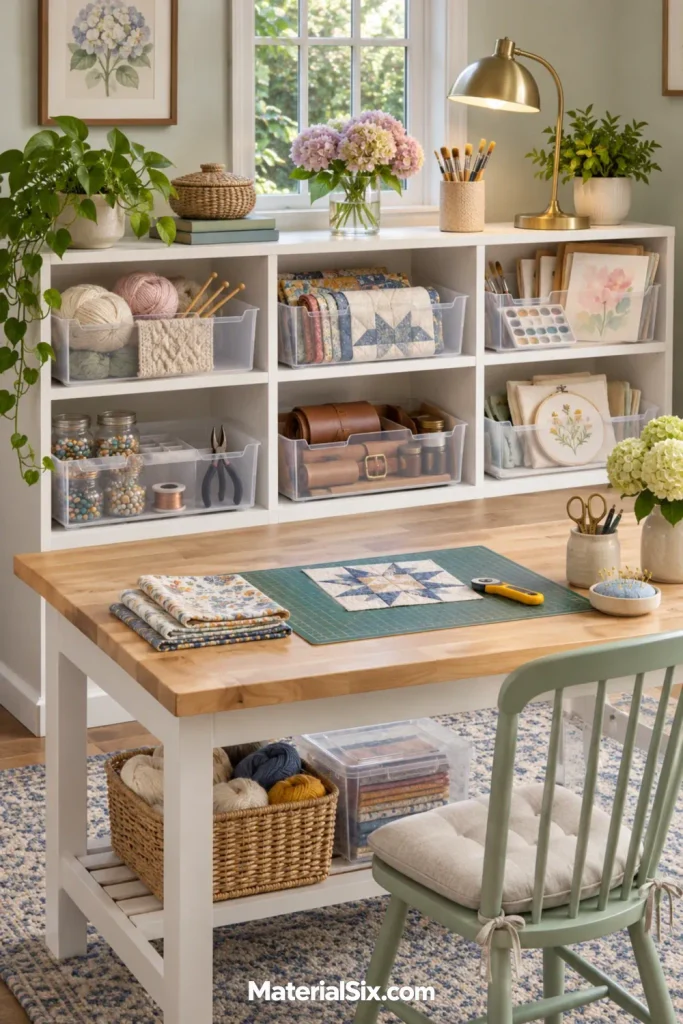
Put a low open bookcase behind your main worktable and give each project its own bin. When you need to clear the table, gather the relevant materials into the bin and slide it onto the shelf. The next time you sit down, the pieces, thread, and instructions are ready to come out together.
Leave an empty bay or an extra bin for the next project. That little bit of capacity helps keep loose materials from spilling into other kits. A shelf beside the table works just as well if a bookcase behind you would leave too little room to pull out your chair.
18. Make a Low Craft Shelf Kids Can Use
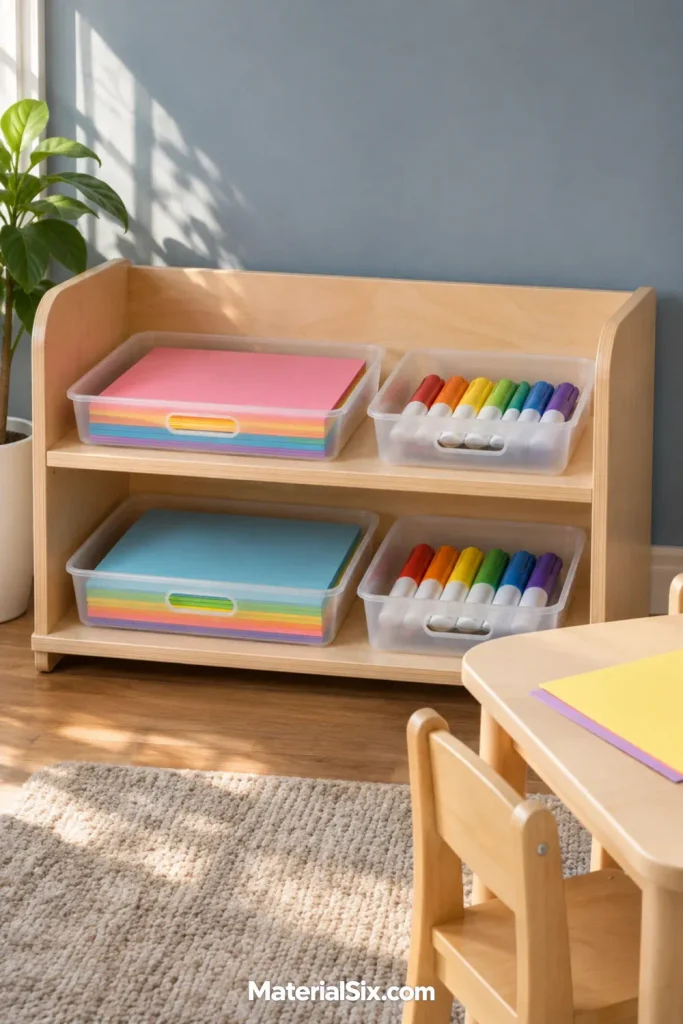
A low shelf with open tubs can give children a spot to choose and put away their everyday craft supplies. Set out paper, washable markers, or age-appropriate materials in separate containers. A tub that can come all the way out is easier to carry to the table than a deep basket full of mixed supplies.
Keep the selection small enough to put back in a minute or two. Put sharp tools, small parts, and materials that require adult supervision in separate secured storage. Use a stable shelving unit and follow its installation instructions, including any recommended anchoring.
19. Use the Wall Beneath a Window
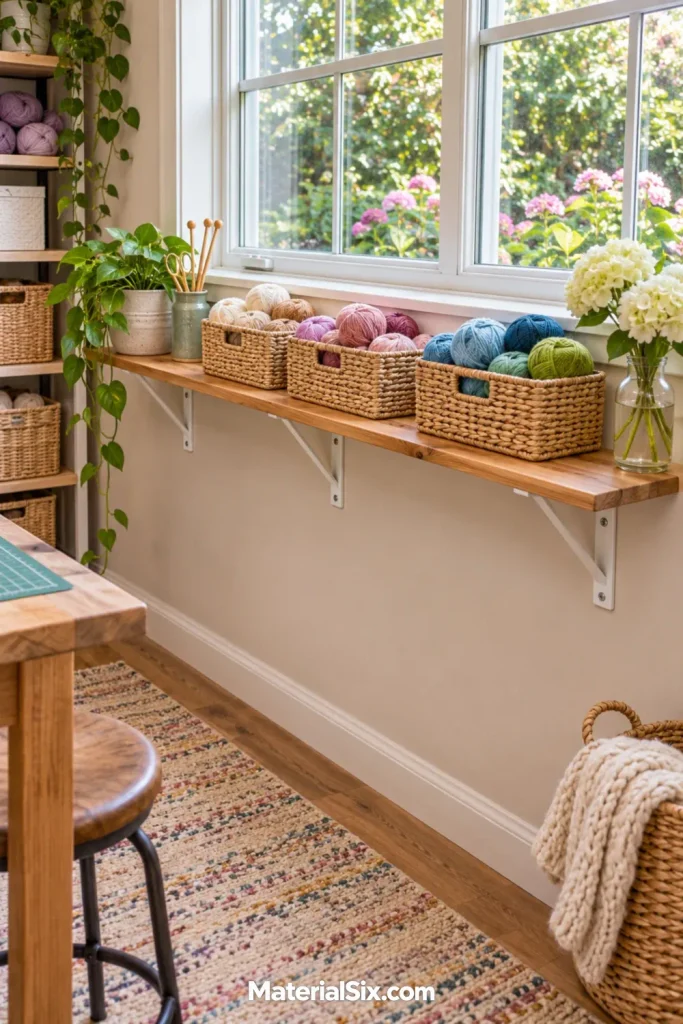
A slim shelf just beneath a window can bring a little-used stretch of wall into your craft setup. Lightweight baskets of yarn or cloth supplies sit within easy reach when the worktable is nearby. The lower position also keeps the window clear and leaves the brighter wall space open.
Make sure the shelf and baskets clear any opening sash, floor vent, or radiator. Keep the shelf narrow in a room where you walk past it regularly. For a window with strong afternoon sun, use the spot for supplies you rotate often and keep delicate papers or fabrics elsewhere.
20. Turn a Glass-Front Hutch Into Visible Storage
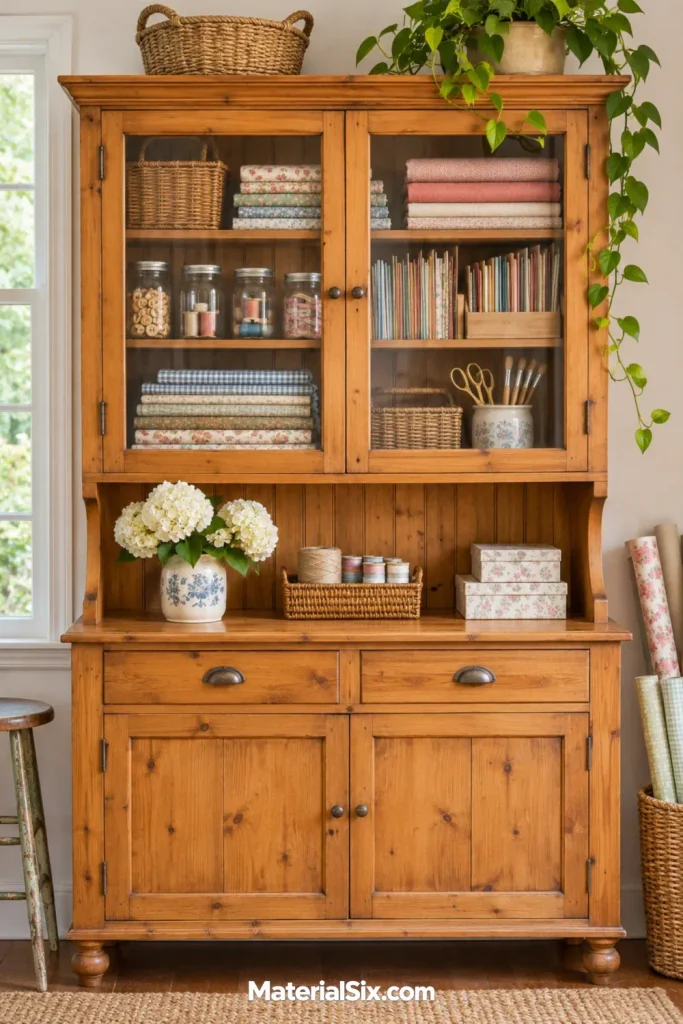
A glass-front hutch can make folded fabrics, paper boxes, and small project kits easy to find while keeping dust off the contents. Use the hutch counter as a place to set down a tray while you pull materials from the cabinet above. The warm wood of a secondhand piece can give a craft room a furniture-like feel.
Check how far the doors swing and leave space beside them. Arrange lighter, frequently used supplies on the lowest shelf behind the glass. Deep shelves can hide small items in back, so use pullout trays or place small containers in a single row.
21. Clip Small Shelves Onto a Pegboard
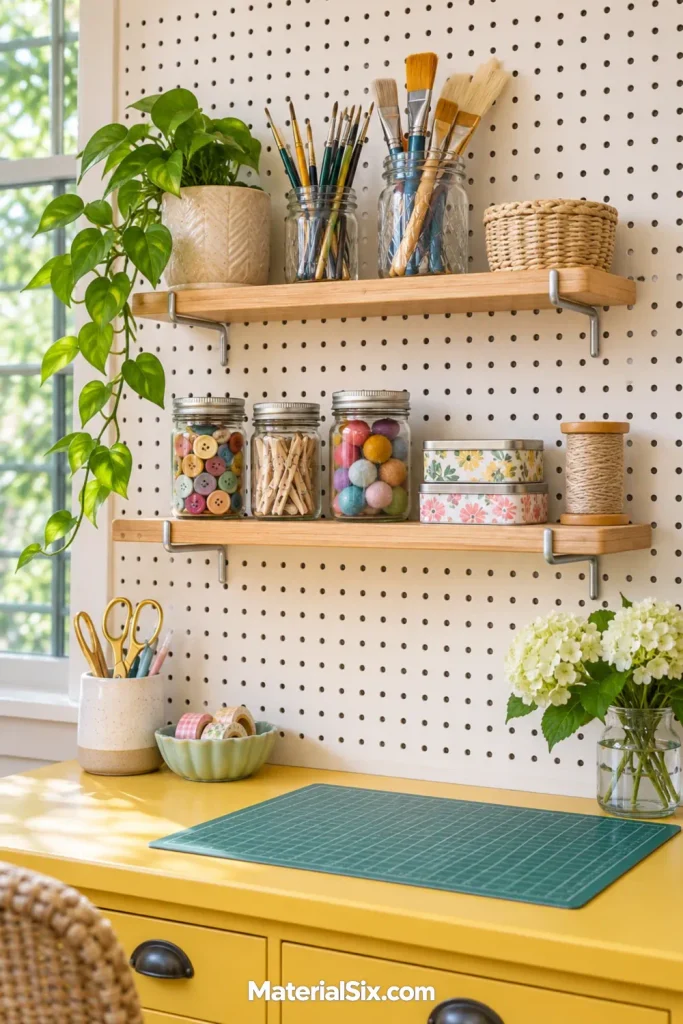
Add a couple of shelves to a pegboard above your bench and you can move jars, tape, and other small supplies as your work area changes. This works well when you already use hooks for scissors and rulers but need a flat surface for objects that cannot hang. The board keeps tools and supplies in a single reachable area.
Choose shelves and mounting hardware that match your pegboard system. Observe its load limits and place heavy refills on a lower, sturdier shelf. Leave some open space around the small shelves so you can lift a jar without bumping into a hook above it.
22. Scoop Small Supplies From Tilted Bins
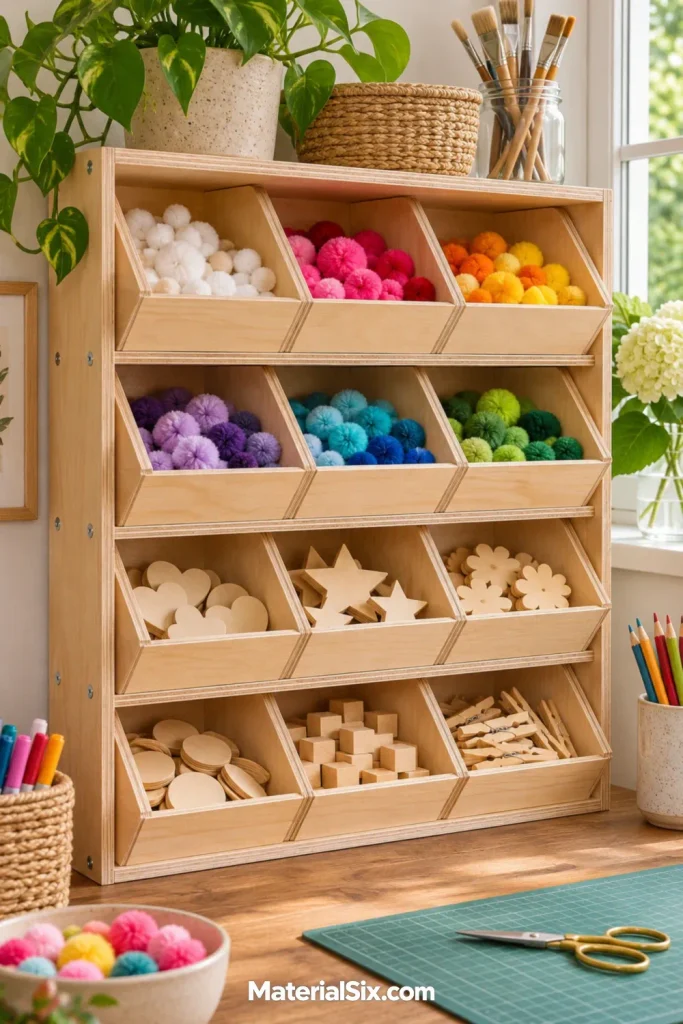
Angled open-front bins on a shelf put loose pom-poms, wooden shapes, and similar craft supplies where you can see and pinch out a few at a time. The sloping fronts show the contents when you’re standing at the workbench. You can move an entire bin to the table when a project needs more than a handful.
Use one material per bin and leave a little space at the top to keep pieces from spilling out. Place the row low enough to see into it. For very fine supplies such as glitter, use a closed container that can come down to the work surface.
23. Give Your Cutting Machine a Dedicated Shelf
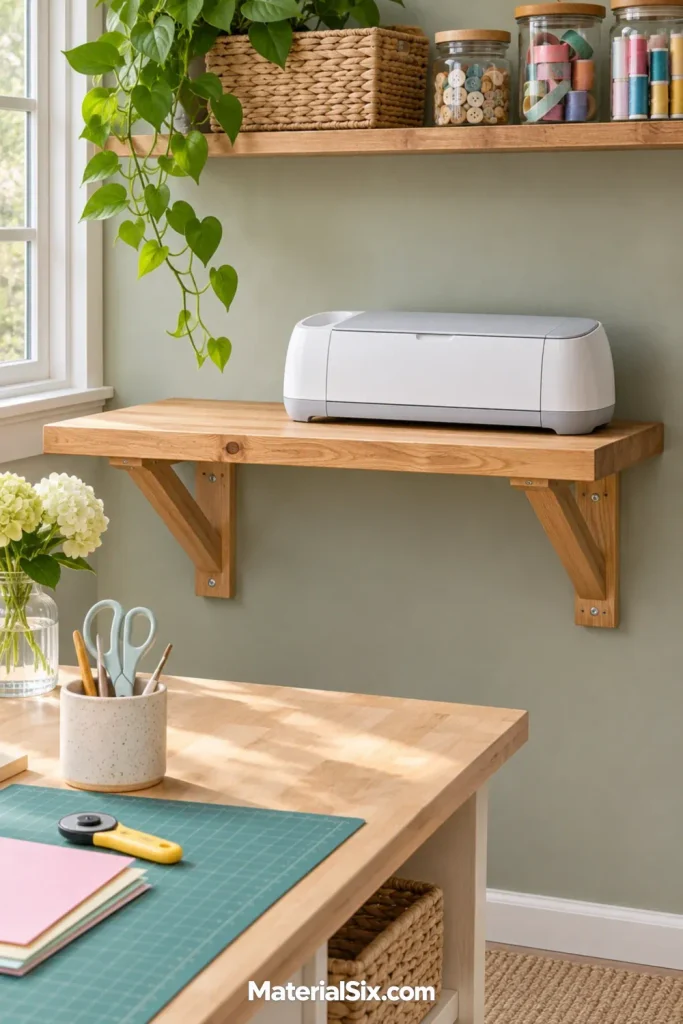
A dedicated shelf can free desk space while keeping your electronic cutting machine close to the worktable. Put the machine on a sturdy shelf at a height that lets you grip it comfortably. Use a nearby vertical file for mats and a small tray for weeding tools so you can gather everything in one trip.
Decide if the shelf is for parking the machine or for running it. If you plan to use it there, follow the manufacturer’s guidance for clearance, including room for the mat to feed in both directions. Keep cords out of the way of the moving mat and walking area.
24. Turn an Alcove Into a Project Tray Station
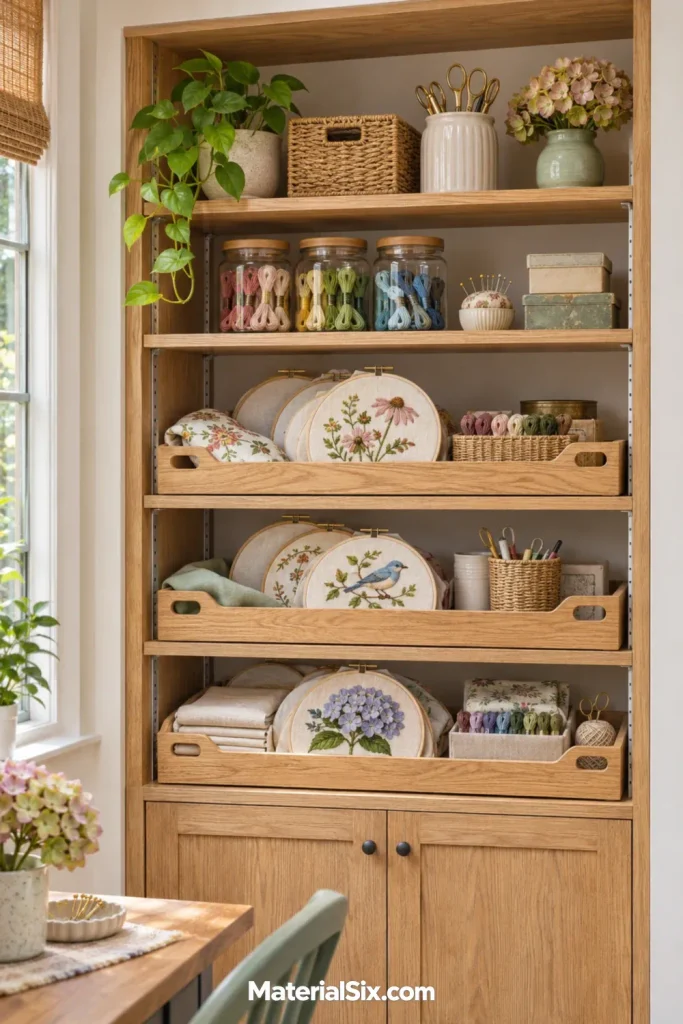
Recessed shelves can hold handled trays that carry an entire activity from the wall to your table. One tray might contain an embroidery hoop, fabric, and the thread colors you’ve picked. Another could hold a small paper project. The alcove keeps the trays tucked out of the main path while their handles stay easy to reach.
Check that the trays slide out without catching on the sides, and leave clearance above tall handles. A shallow tray makes it easier to see what you gathered. If two people share the room, give each person a shelf or a dedicated row.
25. Put Refills Above and Everyday Baskets at Hand Height
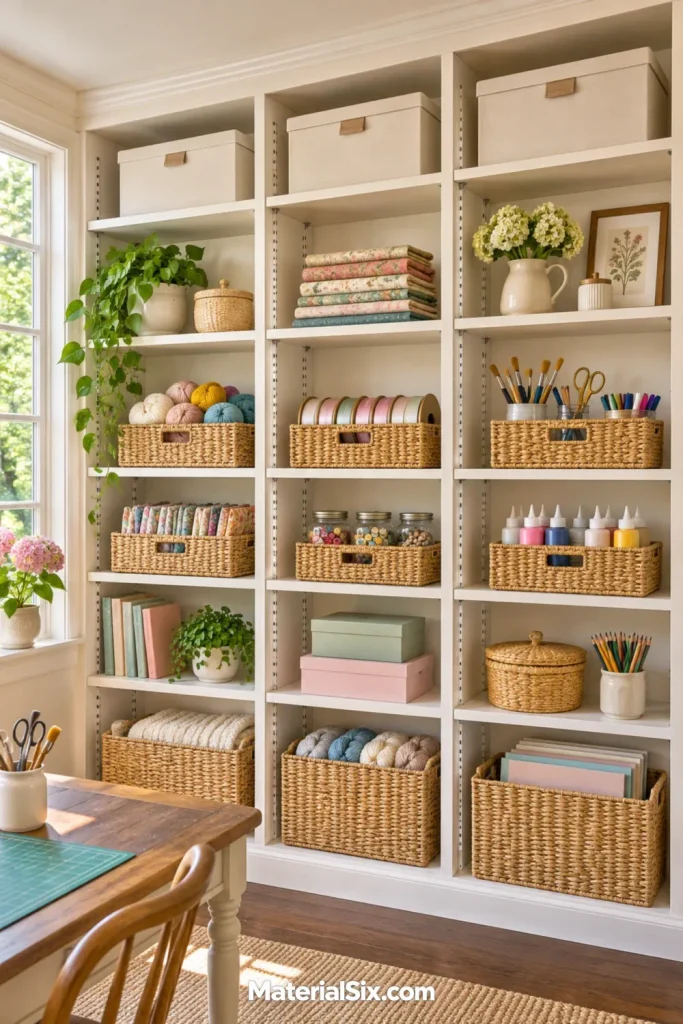
Use a tall bank of shelves to separate the supplies you reach for mid-project from the extras you need occasionally. Open baskets near waist or chest height can hold everyday yarn, tape, and paper packs. Lightweight lidded boxes up high can hold spare materials or seasonal supplies.
Sort the middle shelves according to how you actually work. Put the most-used basket near the table end, even if that means separating it from matching baskets across the room. Keep heavy bulk supplies lower down and leave an easy spot for returning items so the worktable stays clear between sessions.
Choose a Shelf Based on How You Work
Sit or stand where you do most of your crafting and name the three things you interrupt a project to fetch. Then look for the closest clear spot for them. Pick a shelf around the shape of what needs to fit.
- Flat sheets and mats benefit from trays or vertical dividers sized for your largest piece.
- Tiny parts are easier to handle in shallow drawers or divided inserts.
- Projects in progress need removable trays or bins you can carry to your work surface.
- Supplies you grab one at a time do well on shallow ledges or in open-front bins.
Set one empty container where you plan to keep it and try reaching for it while sitting, standing, or pulling your chair out. That quick test can tell you more about the layout than adding another row of shelving.
Frequently Asked Questions
How deep should craft room shelves be?
Measure the largest item you intend to put on each shelf, including handles and lids. Small bottles can fit on a narrow ledge, while flat paper trays and cutting machines need more depth. Leave enough space to grab or lift each item comfortably.
How much space should I leave between shelves?
Start with the tallest container for that opening. Add enough space to get a hand around it and lift it over any bin lip. Test with the actual container before installing multiple shelves at equal intervals.
What shelving works in a rental craft room?
A freestanding unit or rolling cart can put supplies near the desk without a wall-mounted shelf system. Check your lease before making holes and follow any anchoring requirements for the furniture you choose.
How can open craft shelves look less cluttered?
Give each shelf a specific job and limit the number of containers. Use solid bins for mixed scraps or spare packaging, and keep the supplies you choose by color or pattern visible. Leave a little open space for the items you’re using this week.
Conclusion
Start with the supply that most often sends you away from your worktable. Put it somewhere you can reach and return it in one motion, whether that’s a paint ledge, a cardstock tray, or a small basket on a nearby shelf. Use the new spot for a few projects before expanding. You’ll see which other supplies belong within reach and which can go farther from the work surface.