
Wood pumpkins DIY fall crafts offer a practical way to use leftover lumber while making seasonal decor that suits your home.
The challenge is choosing a project that matches your tools, available materials, and decorating style.
This collection includes everything from simple 2×4 pumpkins and painted wood slices to reclaimed barnwood silhouettes and larger porch displays.
Use the ideas to compare finishes, construction methods, colors, and sizes before deciding which wooden pumpkins are worth making this fall.
1. Chunky 2×4 Wood Pumpkin Trio
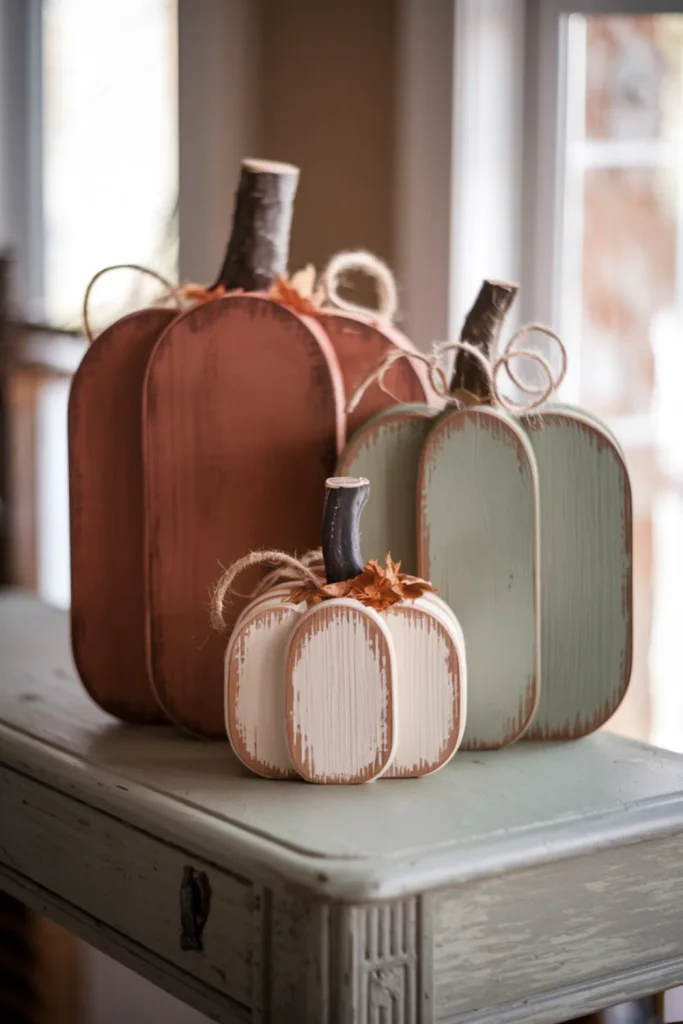
Straight cuts make 2×4 wood pumpkins DIY projects especially approachable for beginning woodworkers.
Short blocks in staggered heights form a convincing pumpkin patch when painted burnt orange, creamy white, and muted sage.
Visible grain, twig stems, and loosely curled jute keep the squared shapes from looking too rigid.
Sand every cut edge before painting, particularly when the pumpkins will be handled by children or moved between rooms.
For a balanced mantel or console display, place the tallest block toward the back and offset the two smaller pieces rather than lining them up evenly.
2. Reclaimed Barnwood Pumpkin Silhouettes
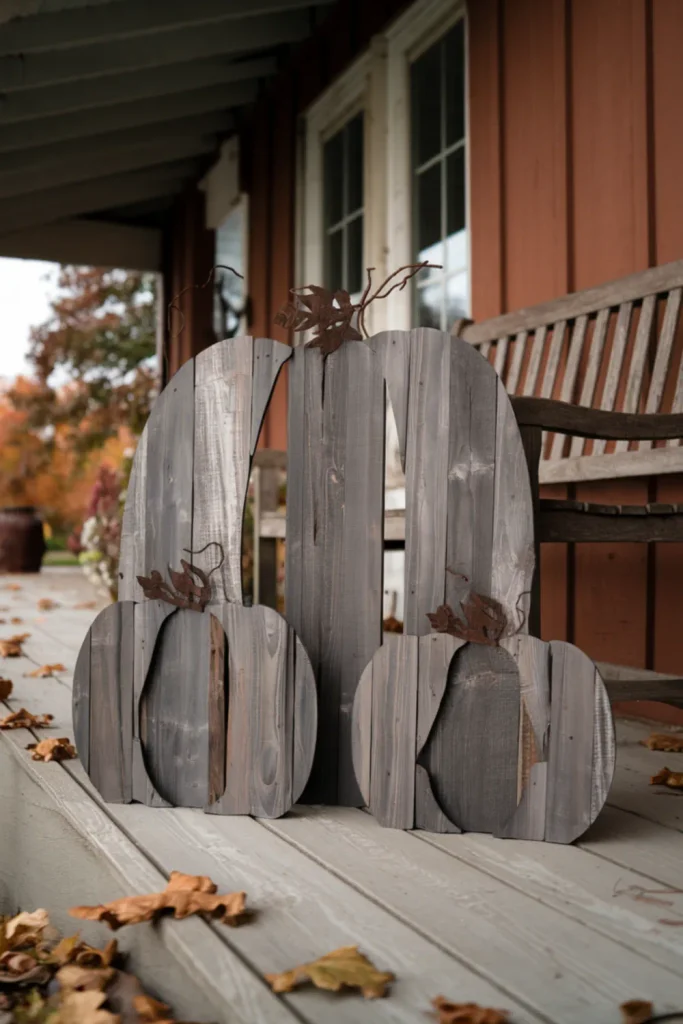
Weathered gray boards give reclaimed wood pumpkins much of their character before the crafting begins.
Nail holes, color variation, and rough grain suit larger silhouettes displayed against brick, siding, or a simple porch bench.
Joining several narrow planks also makes it possible to create a wide pumpkin without buying a broad board.
Check old barnwood carefully for loose nails, splinters, and soft areas before cutting.
Because reclaimed lumber may continue to shed or crack, brush it clean and apply a matte exterior sealer if the finished pumpkins will spend fall on a covered porch.
3. Whitewashed Scrap Wood Pumpkins
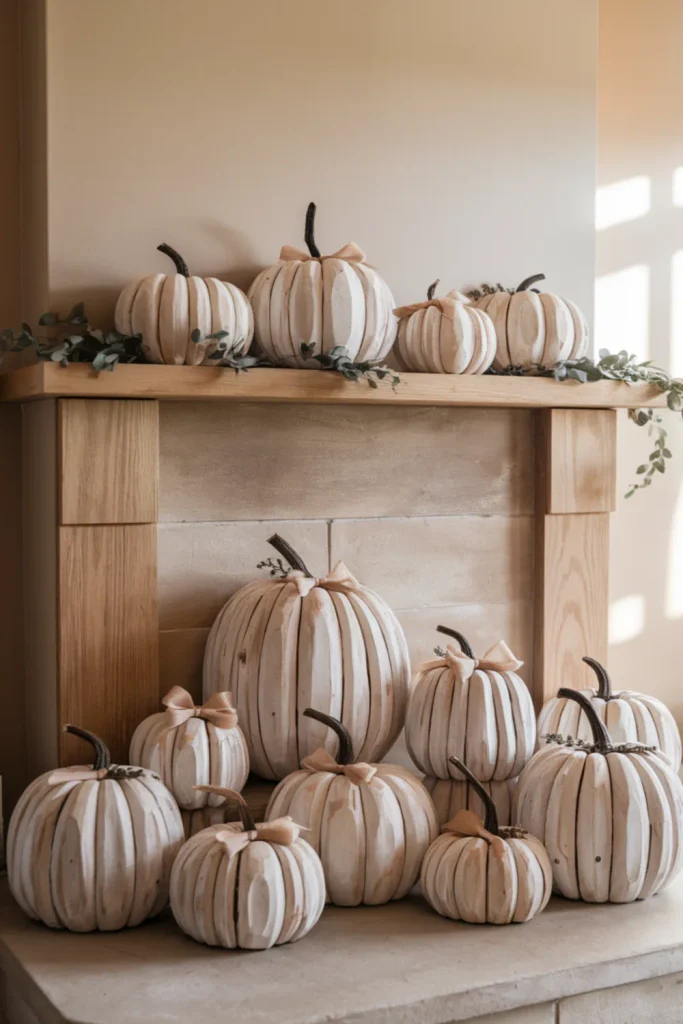
Leftover pine boards look more coordinated once they share a thin whitewashed finish.
Rather than hiding every knot, the diluted paint lets the wood grain show through and gives these scrap wood pumpkins a relaxed farmhouse look.
Natural branch stems, linen bows, and eucalyptus sprigs provide enough detail for a mantel without making the arrangement busy.
Mix several widths and heights, but repeat one stem or ribbon material across the group.
Apply whitewash gradually because an overly opaque first coat is difficult to reverse and can make the project resemble solid painted blocks.
4. Stacked Pallet Wood Pumpkin
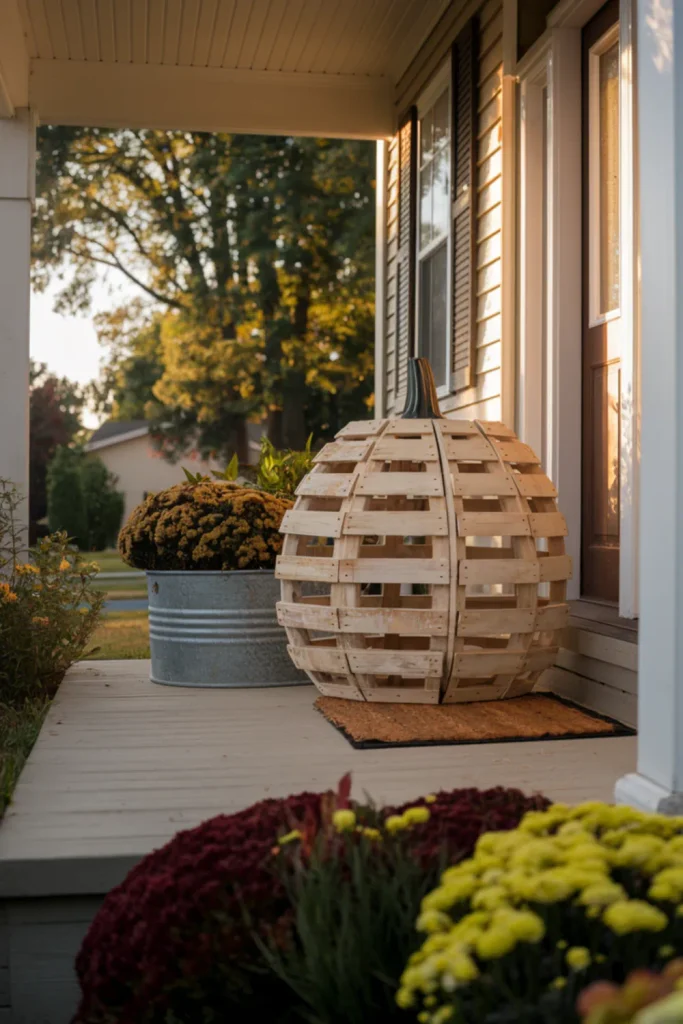
Horizontal pallet slats emphasize the rounded shape of a large wooden pumpkin while preserving every saw mark and weathered color change.
Alternating natural brown, faded rust, and cream boards gives this pallet wood pumpkin enough contrast to stand alone beside a front door.
Build the silhouette on a sturdy backing rather than relying on edge-to-edge joints, which may separate as outdoor humidity changes.
A broad, flat base also helps prevent tipping.
Before using salvaged pallet wood, confirm that it is clean and safely marked for reuse instead of choosing boards with unknown stains or chemical exposure.
5. Muted Chalk-Painted Wooden Pumpkins
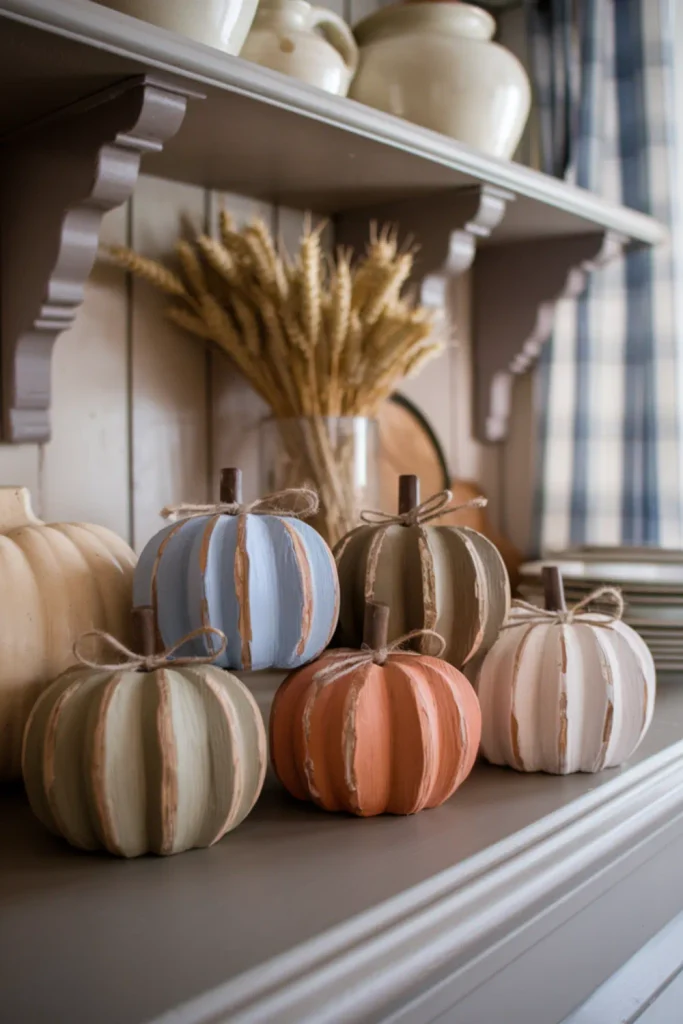
Not every fall display needs bright orange.
Dusty blue, warm taupe, olive, clay, and antique white give painted wooden pumpkins a quieter look that works well on kitchen shelves or open cabinetry.
Matte chalk paint also covers mismatched scrap lumber with little surface preparation, although deeply rough boards should still be sanded first.
Lightly distress only the corners and raised edges so the finish appears worn rather than randomly scratched.
When arranging several colors, repeat the same simple twig stems and keep nearby accessories neutral.
That consistency prevents a small shelf from feeling crowded.
6. Primitive Wood Pumpkins With Peg Stems
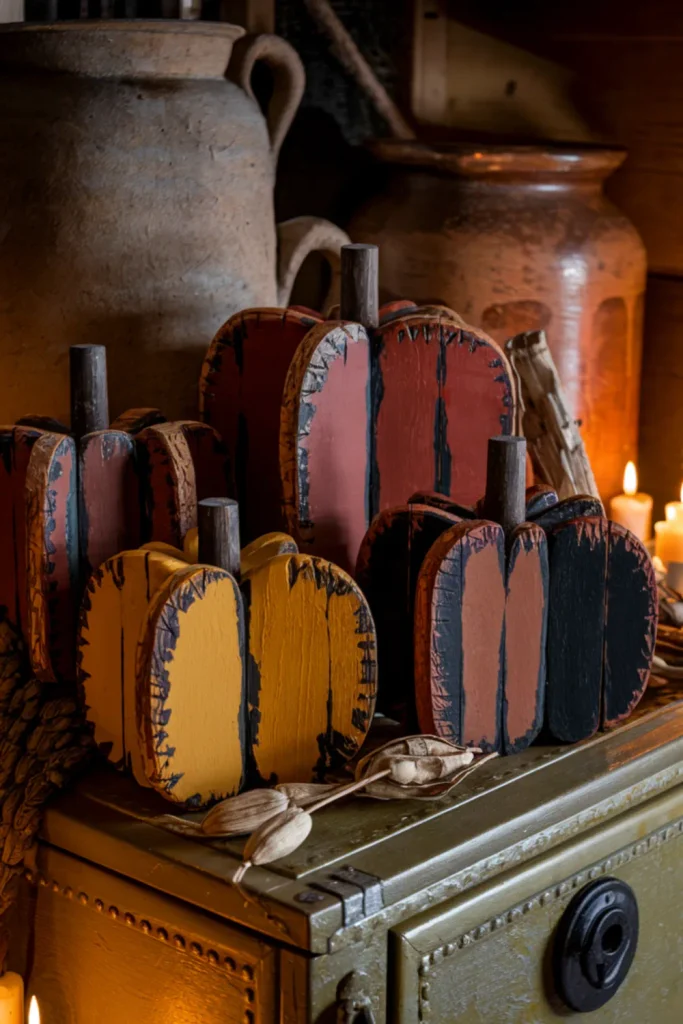
Uneven edges are an advantage when making primitive wood pumpkins from rough-sawn lumber.
Deep mustard, brick red, tobacco brown, and blackened orange finishes highlight cracks and saw marks that would be flaws in a cleaner project.
Wooden peg stems reinforce the early American country style while remaining sturdier than narrow twigs.
Apply dark wax sparingly around the edges and recessed areas; coating the whole surface can make the colors look muddy.
These rustic wood pumpkins fit naturally beside stoneware, baskets, or dried seed pods, especially when their heights and shapes remain slightly irregular.
7. Wood-Slice Pumpkins With Bark Edges
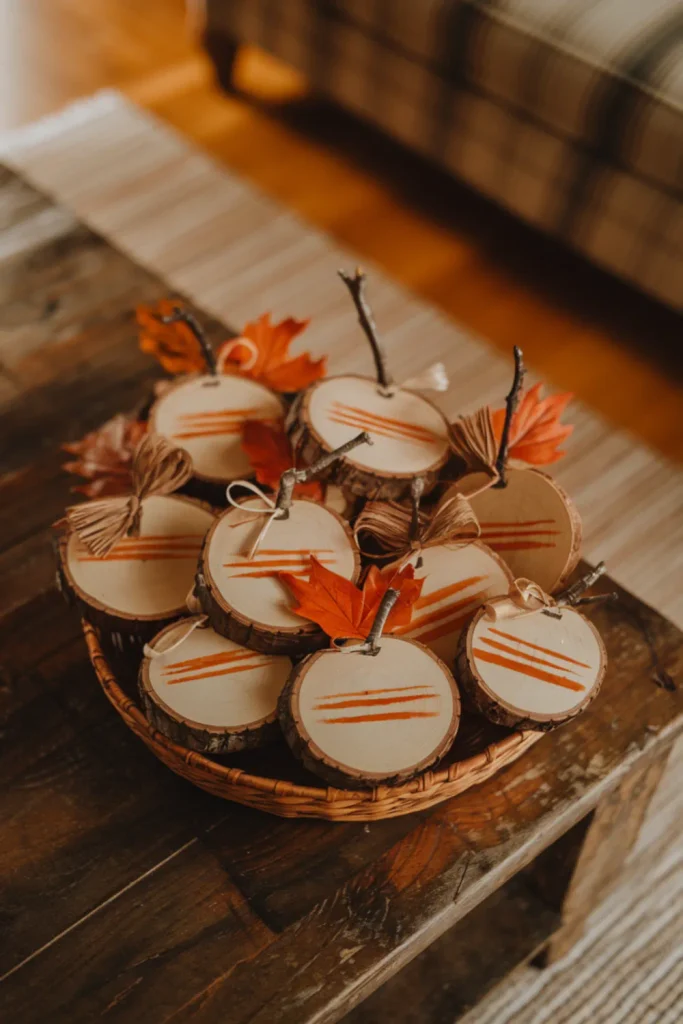
Round wood slices already have the outline needed for quick pumpkin crafts.
Keeping the bark attached gives each piece a dark natural border, while translucent orange or cream paint preserves the growth rings beneath it.
Smaller slices can fill a tiered tray or woven basket without requiring much display space.
Use fully dried slices because fresh wood may crack, shrink, or loosen its bark after painting.
A short twig stem and one restrained raffia bow are usually enough decoration.
Sand the front face smoothly, but leave the perimeter untouched to maintain its woodland texture.
8. Layered Plywood Pumpkin Cutouts
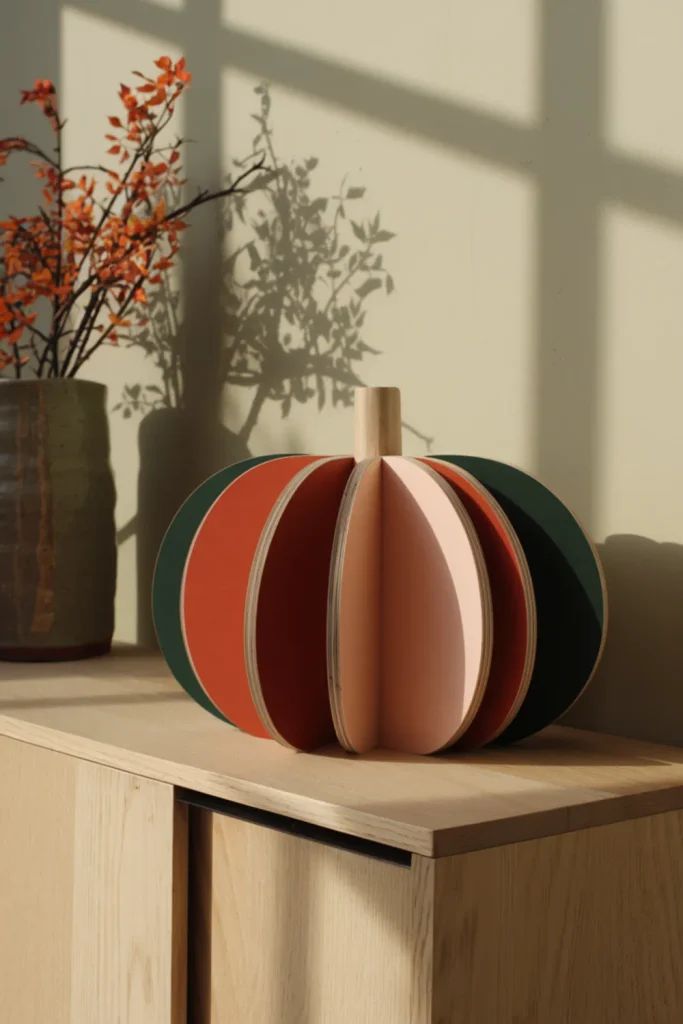
Layering several curved plywood cutouts produces depth without making the finished pumpkin especially heavy.
Exposed plywood edges form graphic contours, while terracotta, blush beige, and forest green fronts suit more contemporary fall interiors.
This version of DIY wooden pumpkins works well on sideboards and shallow shelves where chunky lumber would project too far.
Cut and sand all layers together when possible so their curves align cleanly.
Before gluing, test the overlap from a few feet away; placing each layer too close to the next can hide the dimensional effect that makes the design distinctive.
9. Fence-Picket Pumpkin Porch Sign
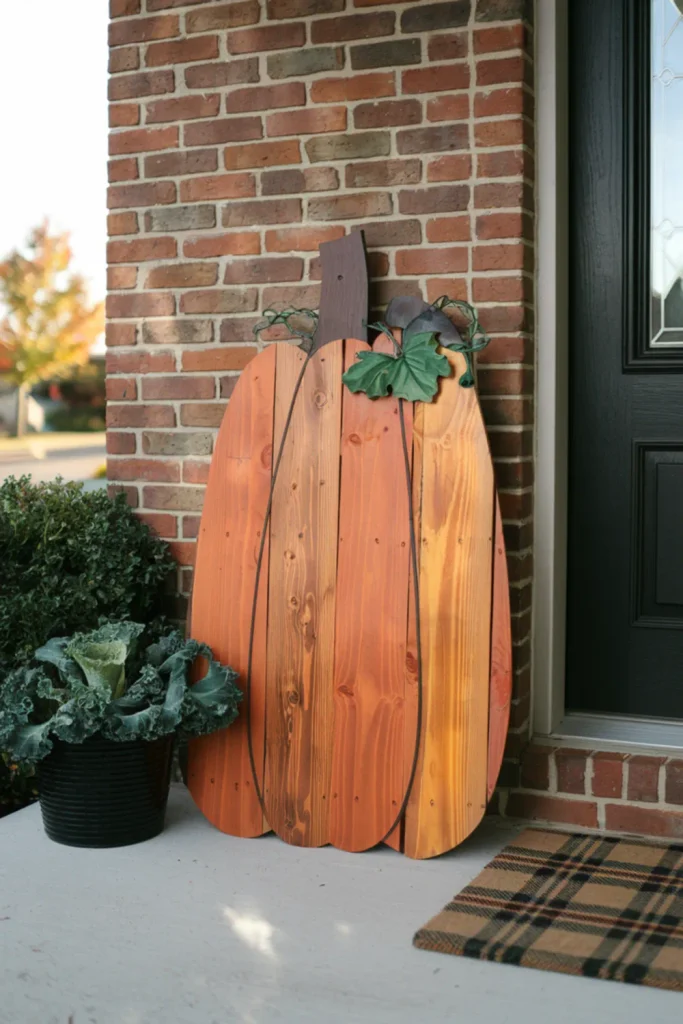
Need a fall decoration that remains visible from the sidewalk?
Five cedar fence pickets can form a tall pumpkin silhouette without requiring a large or costly sheet of wood.
Cutting the outer boards shorter creates the curve, while an orange-brown stain keeps the cedar grain visible.
This porch pumpkin looks strongest beside a door or brick wall where its height has a clear backdrop.
Secure the pickets to horizontal braces on the back and keep screws away from freshly cut edges.
Use an exterior-rated finish, even under cover, since porch humidity can still cause untreated boards to warp.
10. Mini Scrap Wood Pumpkin Place-Card Holders
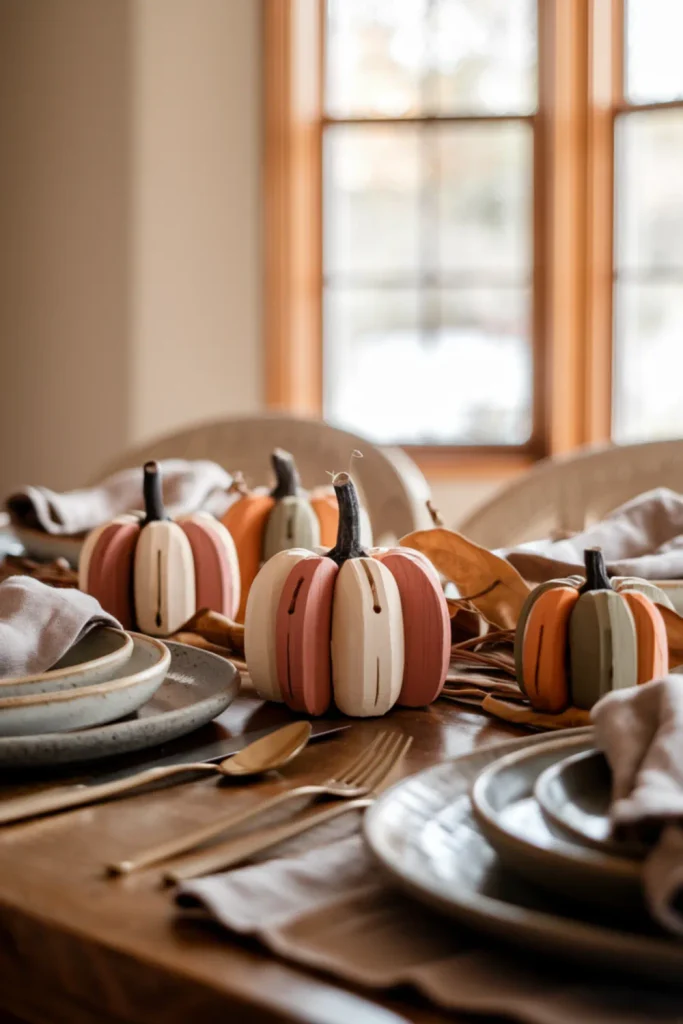
Tiny offcuts become useful table decorations when shaped into mini scrap wood pumpkins.
Softened cubes in cream, persimmon, and olive can hold place cards during a fall meal, then return to a tray or shelf afterward.
Cutting the card slot before painting usually gives a cleaner line and reduces the chance of chipping the finished surface.
Keep the base flat and test each holder with cardstock before setting the table; a deep or angled slot may hide a guest’s name.
Rounded corners also make these small pieces more comfortable to handle and store together.
11. Rustic Pumpkin Garland From Wood Rounds
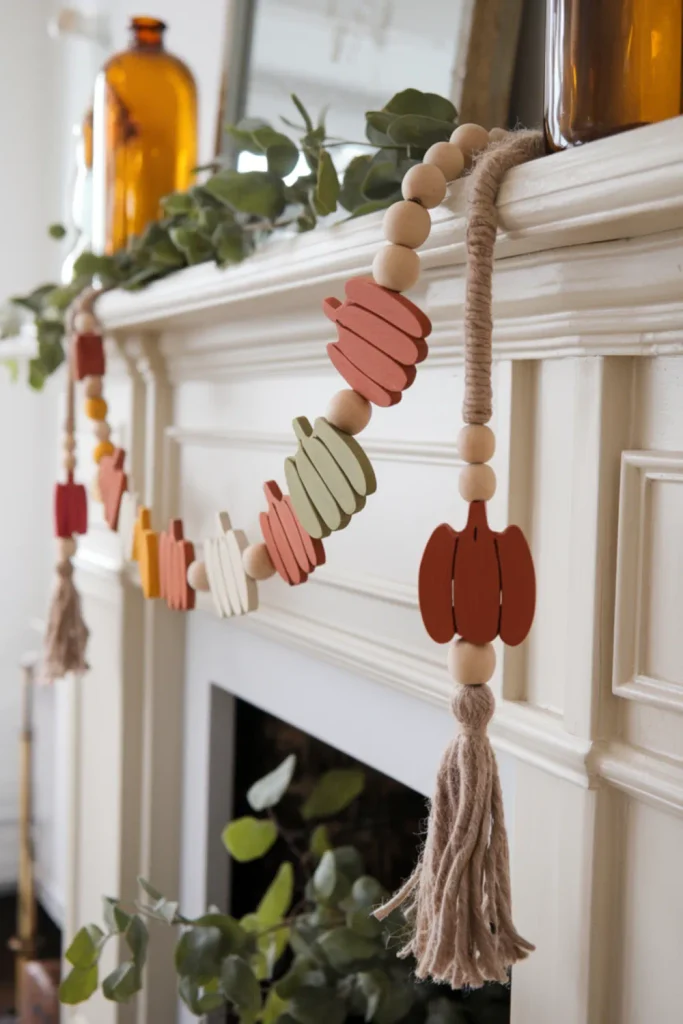
Thin scraps that cannot support a freestanding craft are often just right for a wooden pumpkin garland.
Small painted shapes alternating with unfinished wood beads create a light strand for a mantel, shelf, or open doorway.
Rust, mustard, cream, and sage provide variety while the repeated bead color holds the design together.
Drill hanging holes before painting to avoid damaging the finish, and space the pumpkins far enough apart that their edges do not overlap.
Since wood is heavier than paper or felt, attach the garland to secure hooks rather than balancing it loosely near breakable accessories.
12. Reversible Pumpkin and Everyday Wood Blocks
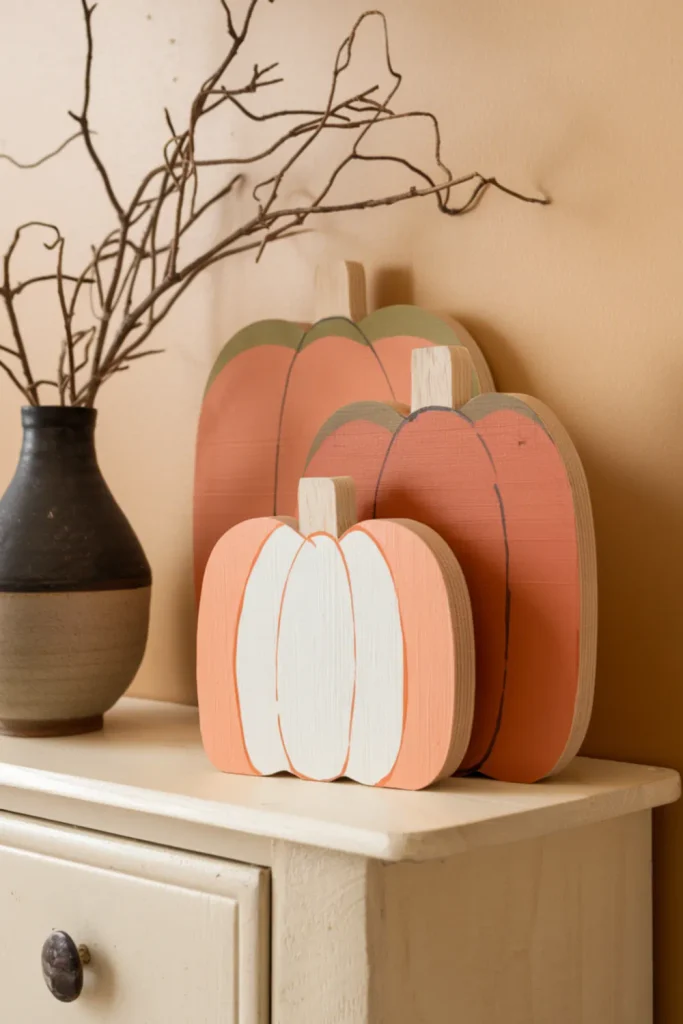
Seasonal storage becomes easier when one set of wood blocks serves more than one purpose.
Paint pumpkin details on one face, then leave the reverse side natural or finish it in a simple year-round color.
Removable stems allow the pieces to stack neatly once fall is over.
These freestanding wood pumpkins also suit renters because they require no wall holes or permanent installation.
Keep raised decorations away from the reversible faces so the blocks sit flat in either direction.
Before cutting storage boxes or bins, measure the finished height with the stems removed, not while they are attached.
13. Fluted Wood Pumpkin With Scalloped Ribs
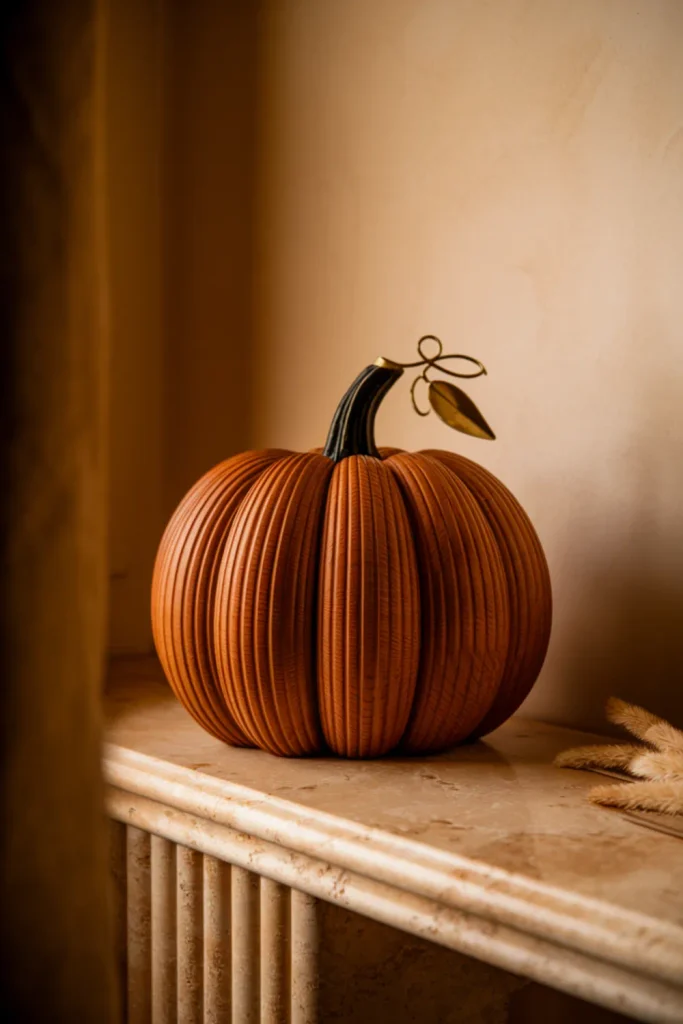
Clean spacing is what makes a fluted wooden pumpkin look carefully crafted rather than crowded.
Narrow half-round molding creates deep ribs across a plywood base, and directional lighting emphasizes every ridge.
A cinnamon-brown finish paired with a dark oak stem feels refined enough for a modern console or dining-room shelf.
Lay out the center strip first, then work outward equally on both sides to keep the pattern symmetrical.
Because small spacing errors become obvious near the curved edges, dry-fit all molding before applying glue.
This fall wood project suits intermediate crafters comfortable with accurate measuring and repeated cuts.
14. Mosaic Scrap Wood Pumpkin
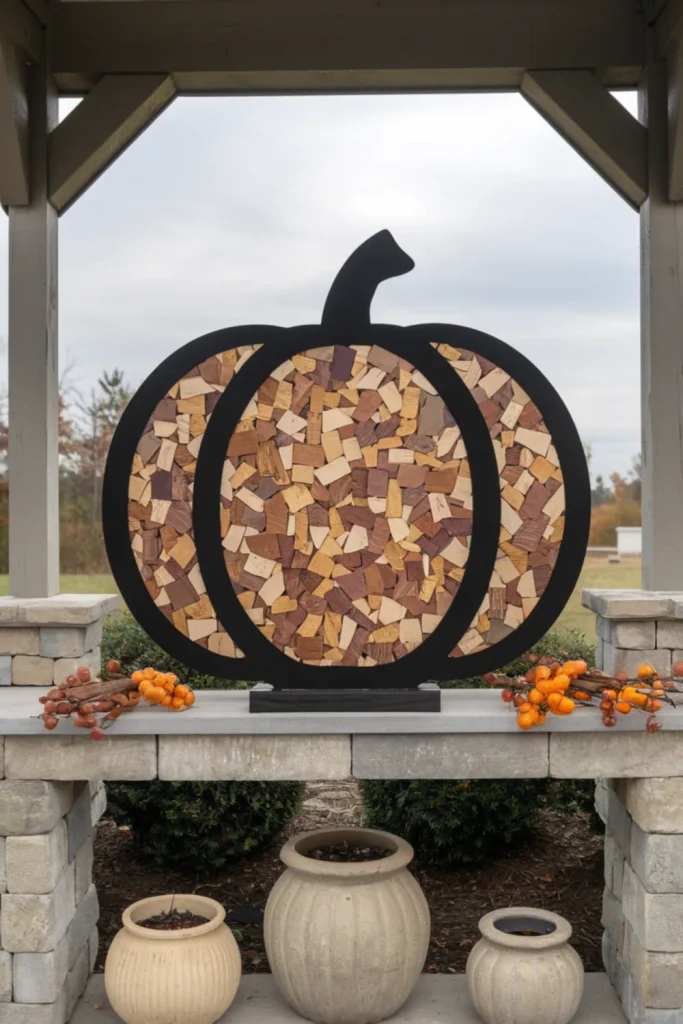
Very small wood remnants can become a detailed pumpkin mosaic instead of ending up in the waste bin.
Pine, walnut, cedar, whitewashed pieces, and muted orange fragments form a patchwork surface with plenty of natural variation.
A dark outline helps the mixed materials read as one clear pumpkin silhouette.
Arrange the pieces on a plywood backing before gluing and photograph the layout for reference if they need to be removed during assembly.
Avoid using thick and thin scraps together unless their backs can be leveled, since an uneven finished surface collects dust and is harder to seal.
15. Plaid-Painted Wooden Pumpkin Set
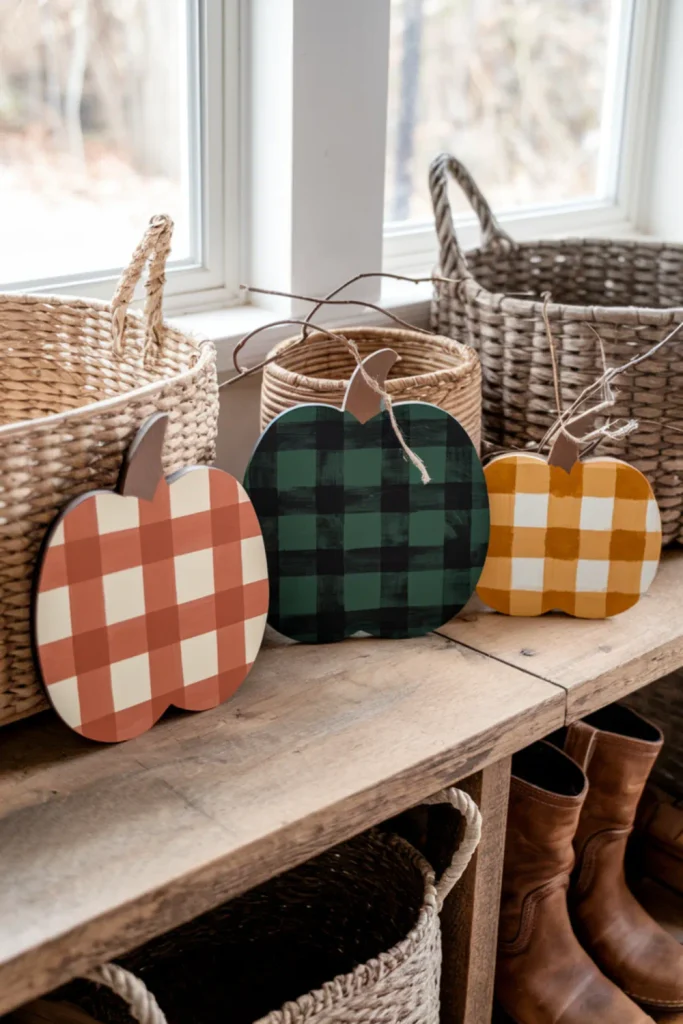
Plaid gives basic wooden pumpkin cutouts a recognizable pattern without changing the construction method.
Cream-and-rust gingham feels lighter, while forest green tartan or mustard checks provide deeper contrast for a mudroom or entry display.
Painter’s tape helps establish straight bands, but each paint layer should dry fully before the next set of lines is added.
Otherwise, lifted edges and smeared intersections can make the pattern look untidy.
Use only two or three related designs within one arrangement, then repeat the same twig stems and distressed edge treatment so the painted wood pumpkins still feel connected.
16. Tall 4×4 Wood Pumpkins for Porch Steps
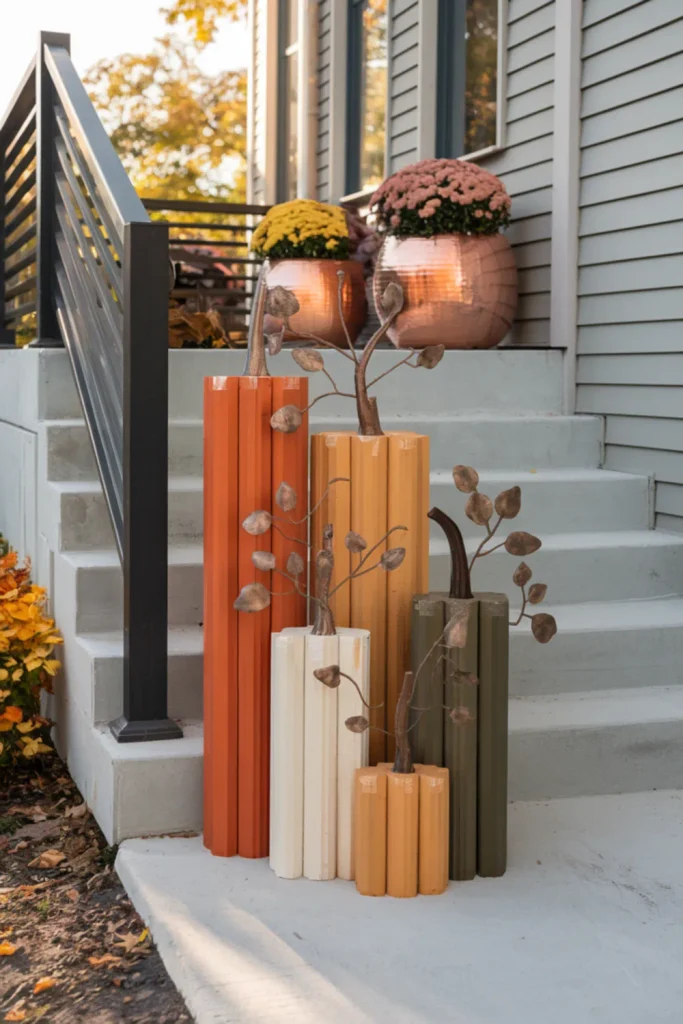
Wind can quickly expose the weakness of lightweight porch decorations.
Pumpkins cut from 4×4 lumber have enough weight for steps and exposed entries, while varied post heights keep the squared shapes from feeling repetitive.
Burnt orange, cream, mustard, and olive provide a broad fall palette that remains easy to coordinate with mums and outdoor planters.
Make sure every bottom cut is level before painting, since even a slight angle can cause a tall piece to rock.
Add exterior sealer to the end grain, where wood absorbs moisture faster than it does across the painted sides.
17. Decoupage Wood Pumpkins With Vintage Paper
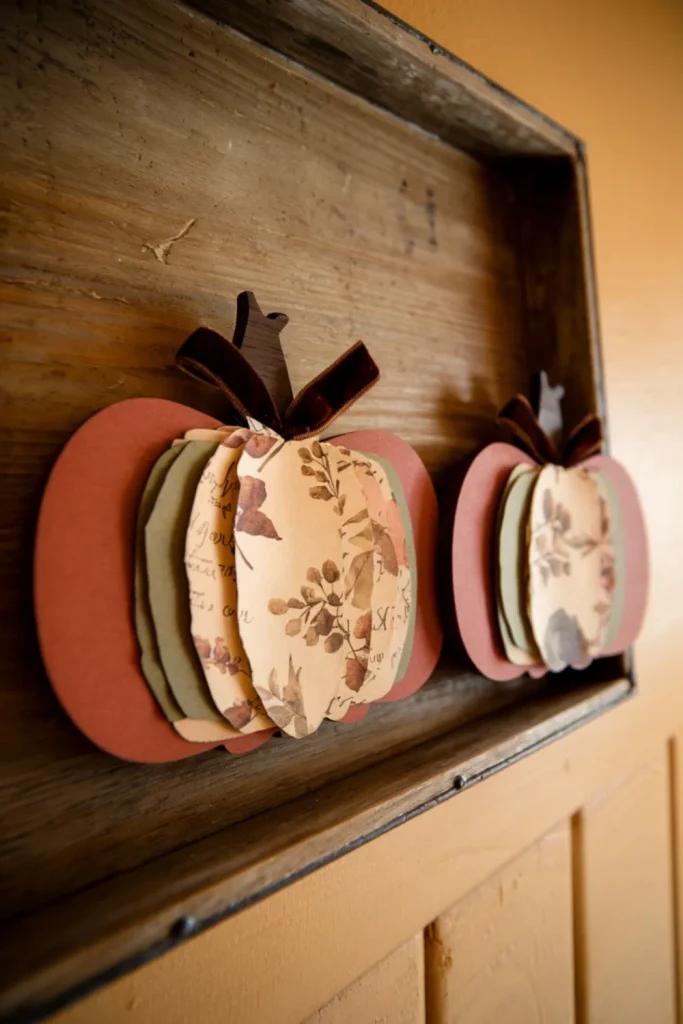
Patterned paper offers more detail than paint alone, especially on small wooden pumpkin silhouettes.
Faded botanical prints in rust, olive, ochre, and parchment work naturally with dark stems and narrow velvet ribbon.
These wooden pumpkin crafts fit inside a display tray or among books where their layered surfaces can be viewed closely.
Tear or cut the paper slightly inside the wood edge so it is easier to seal without lifting.
Smooth each section from the center outward to remove trapped air, and allow the adhesive to dry before applying wax or another protective topcoat.
18. Natural Log Pumpkins With Branch Stems
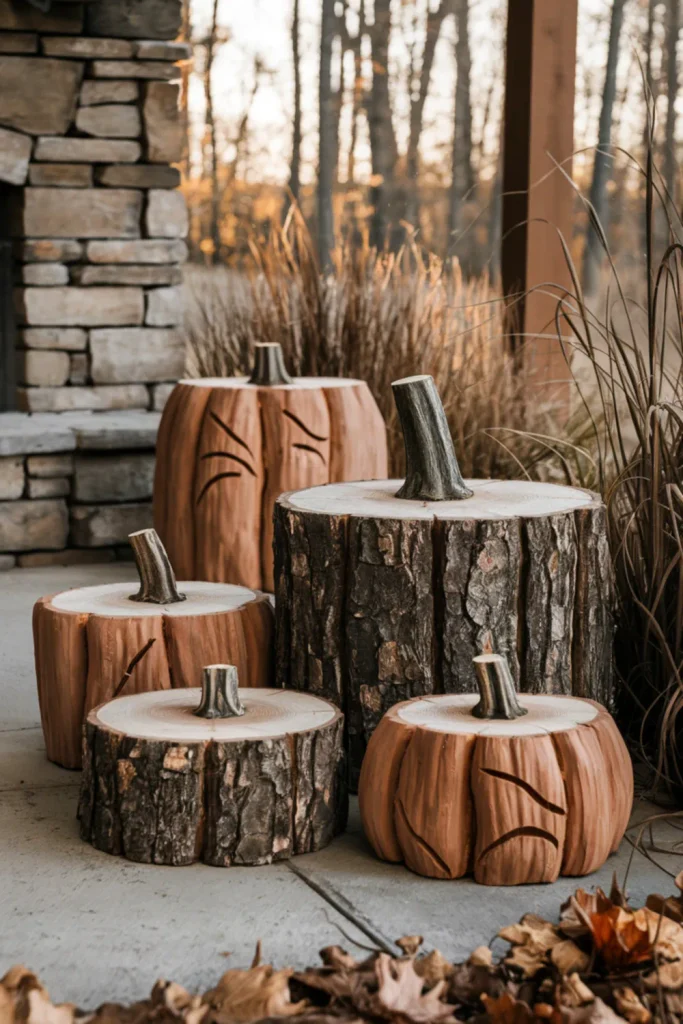
Fallen logs need very little decoration to suggest a rustic pumpkin patch.
Short sections in several diameters provide natural variation, while bark-covered sides and branch stems preserve their woodland character.
Shallow grooves across the exposed face can suggest pumpkin ribs without covering the grain with paint.
Use seasoned, dry wood rather than freshly cut logs, which may shrink, split, or release moisture indoors.
Each piece also needs a broad, level bottom because the weight makes wobbling difficult to correct later.
These pumpkins made out of wood work especially well near a stone hearth or sheltered patio.
19. Scalloped Cedar Pumpkin Garden Stakes
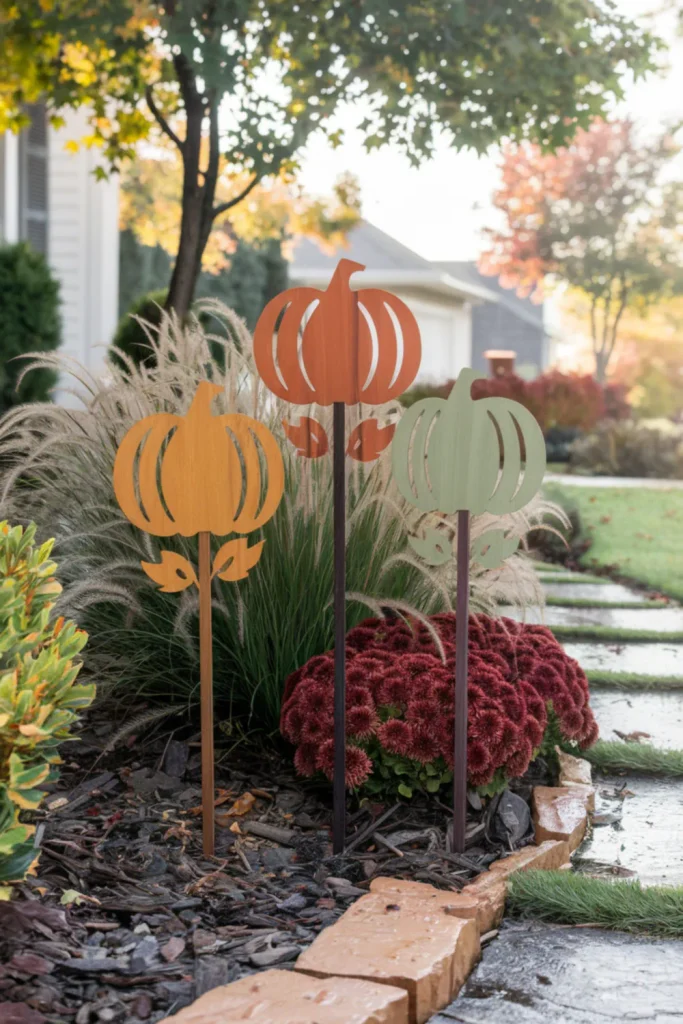
Outdoor beds often need fall decorations that remain visible above mulch and low plants.
Cedar pumpkin stakes solve that problem with lightweight silhouettes in warm orange-brown, honey, and muted green finishes.
Set them among ornamental grasses or chrysanthemums rather than spacing them in a straight row; uneven placement feels more like a small pumpkin patch.
Seal every cut edge and keep painted wood slightly above damp soil when possible.
For firmer installation, make the stake long enough to extend several inches into the ground, but check for irrigation lines before pushing it into a landscaped bed.
20. Burned-Wood Pumpkin With Botanical Details
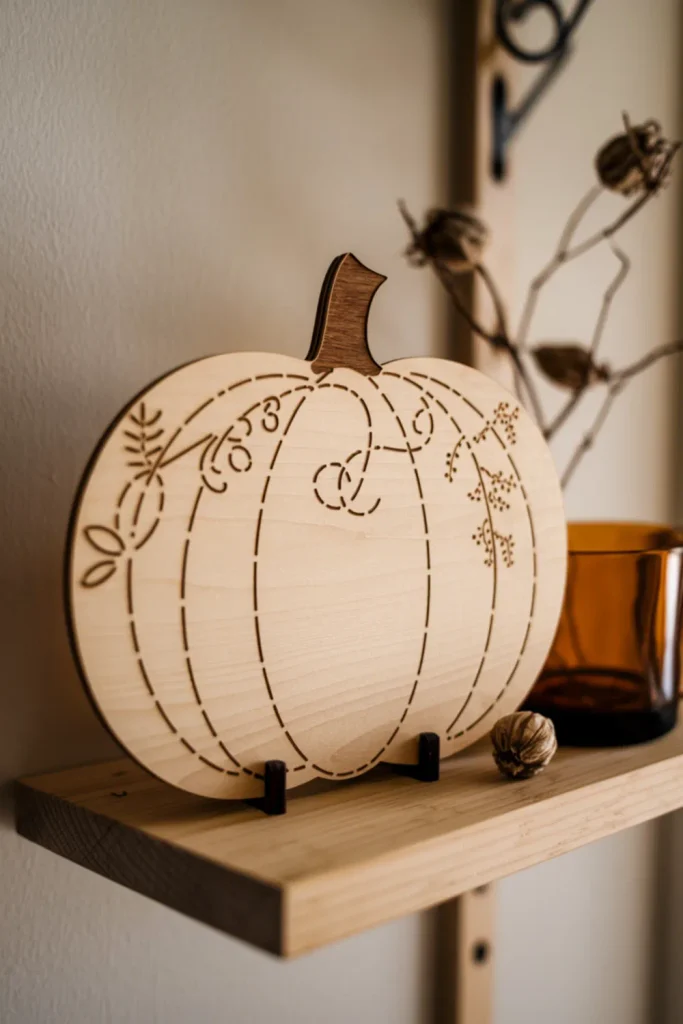
Leaving pale basswood mostly unfinished allows burned botanical lines to become the main feature.
Curved ribs, trailing leaves, and small sprigs give the pumpkin definition while preserving its natural grain.
This approach suits fall wood art displayed on shelves where the fine marks can be seen at close range.
Practice heat and line weight on an offcut from the same board before working on the final shape, since different woods scorch at different rates.
Keep the design away from knots, which can interrupt smooth lines, and finish the piece with a clear matte sealer rather than a dark stain.
21. Copper and Terracotta Painted Wood Pumpkins
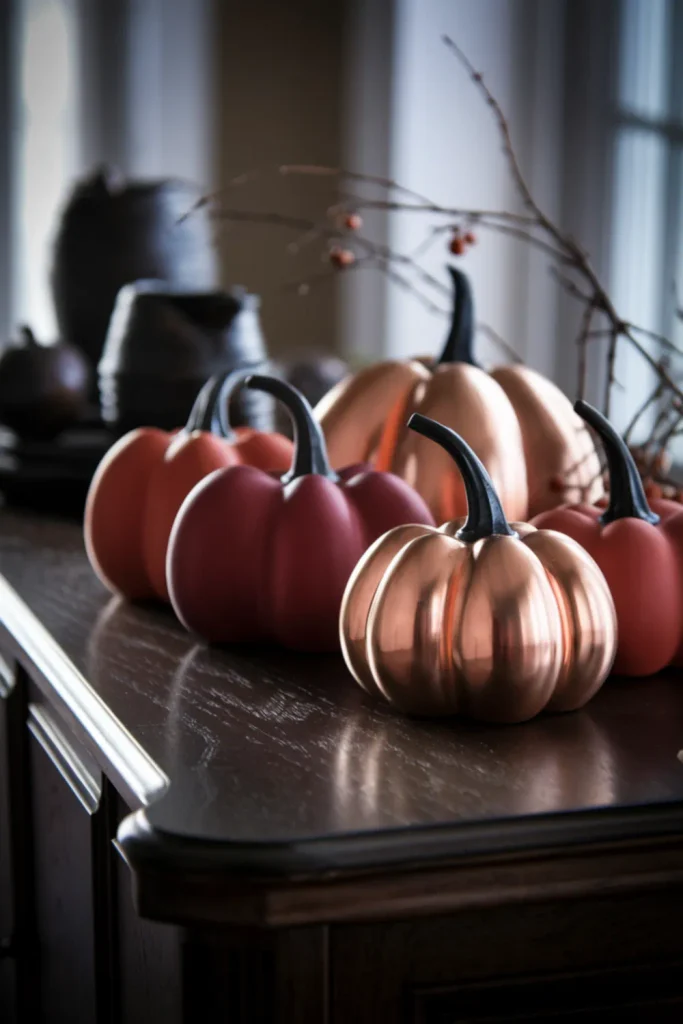
Metallic paint has more impact when it appears once within a mostly matte collection.
Pair one softly brushed copper pumpkin with terracotta and deep auburn pieces, then use blackened wood stems to connect the group.
The contrast suits a dining-room sideboard or dark mantel where directional light can catch the copper surface.
Avoid covering rough lumber with a reflective finish because every dent and sanding mark will become more noticeable.
Start with a smooth base coat, apply metallic paint in thin layers, and rotate the pumpkins during placement so the reflective piece does not dominate the whole arrangement.
22. Curved Pallet Wood Pumpkin Basket
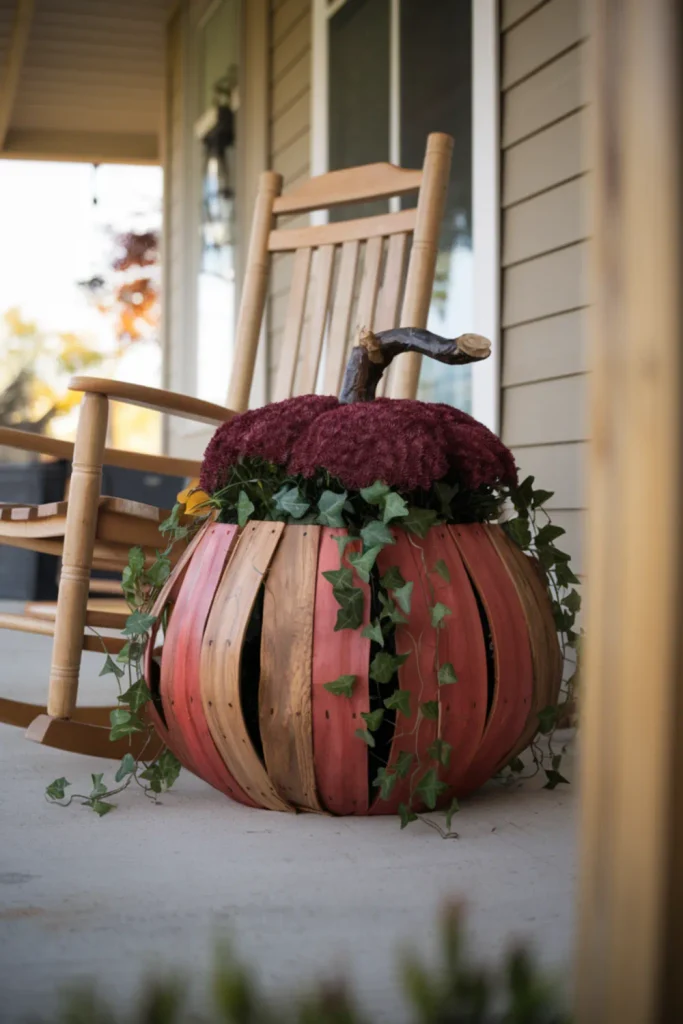
Why make another purely decorative pumpkin when it can also hold a seasonal plant?
Narrow pallet slats arranged around a concealed container create a rounded pumpkin basket for mums, ornamental kale, or trailing ivy.
An orange wash unifies the reclaimed boards without hiding their weathering.
Keep the nursery pot removable so water and damp soil never sit directly against the wood.
A small liner or saucer will also protect a covered porch floor.
When shaping the basket, leave enough room around the inner pot for easy lifting rather than building the slats tightly against its rim.
23. Minimalist Arched Wood Pumpkin Pair
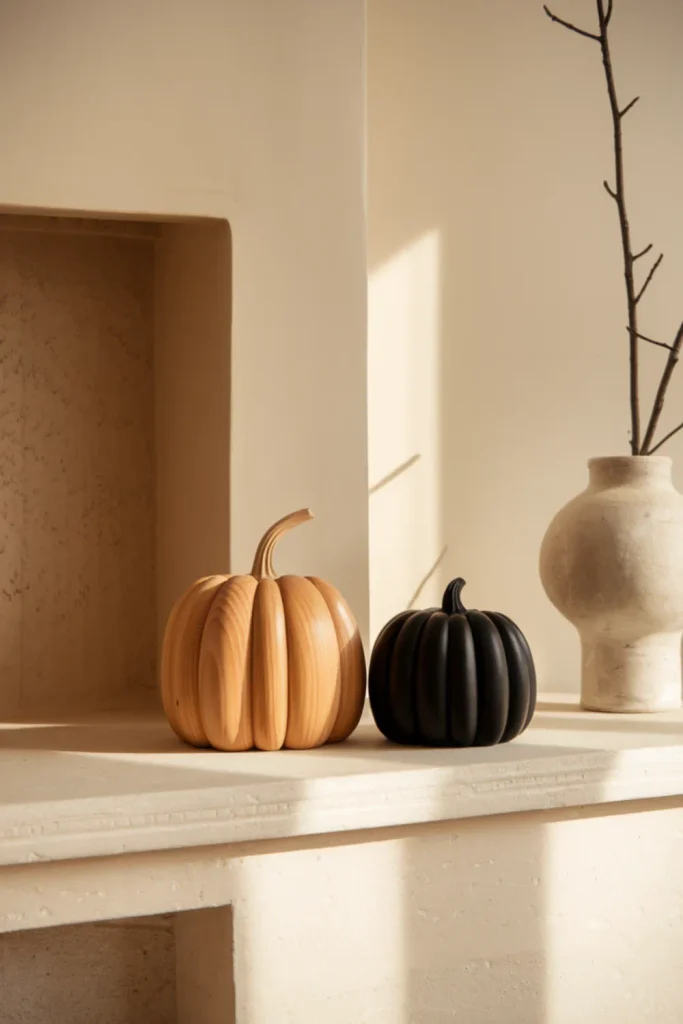
Modern rooms usually benefit from fewer details and stronger silhouettes.
Smooth arched panels in natural white oak and matte black suggest pumpkins through shallow routed grooves rather than painted faces or layered bows.
Displaying only two pieces leaves enough open space for their contrasting finishes to register clearly.
Route the grooves before cutting the final outer shape, when the board is easier to clamp and control.
Since minimalist wood pumpkin ideas depend on clean workmanship, fill unwanted dents and sand with the grain.
A clear low-sheen finish protects the oak without giving it a glossy appearance.
24. Stacked Scrap Wood Pumpkin Topiary
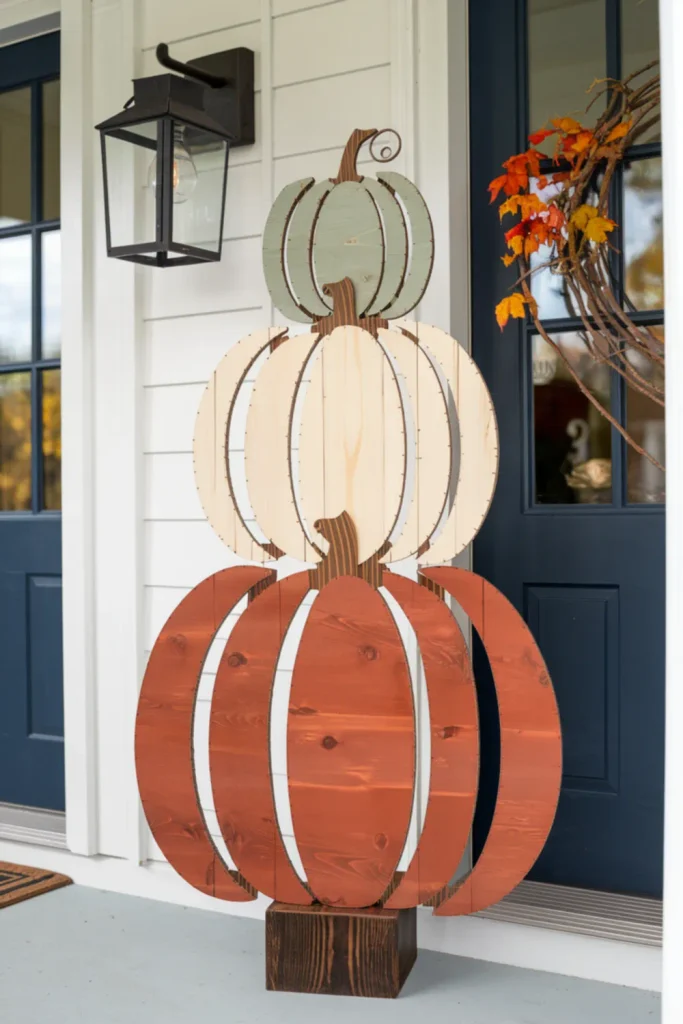
Limited porch floor space makes a vertical pumpkin topiary especially useful.
Three scrap wood silhouettes in rust, cream, and sage create the height of a larger display while occupying only one compact base.
Changing the size of each pumpkin prevents the stack from resembling three identical signs.
Stability matters more than hidden hardware, so connect the pieces through a strong rear support and anchor them to a weighted pedestal.
Test the assembled topiary on a level surface before placing it beside the door, and move it under cover when severe wind or heavy rain is expected.
25. Mixed-Wood Pumpkin Patch Display
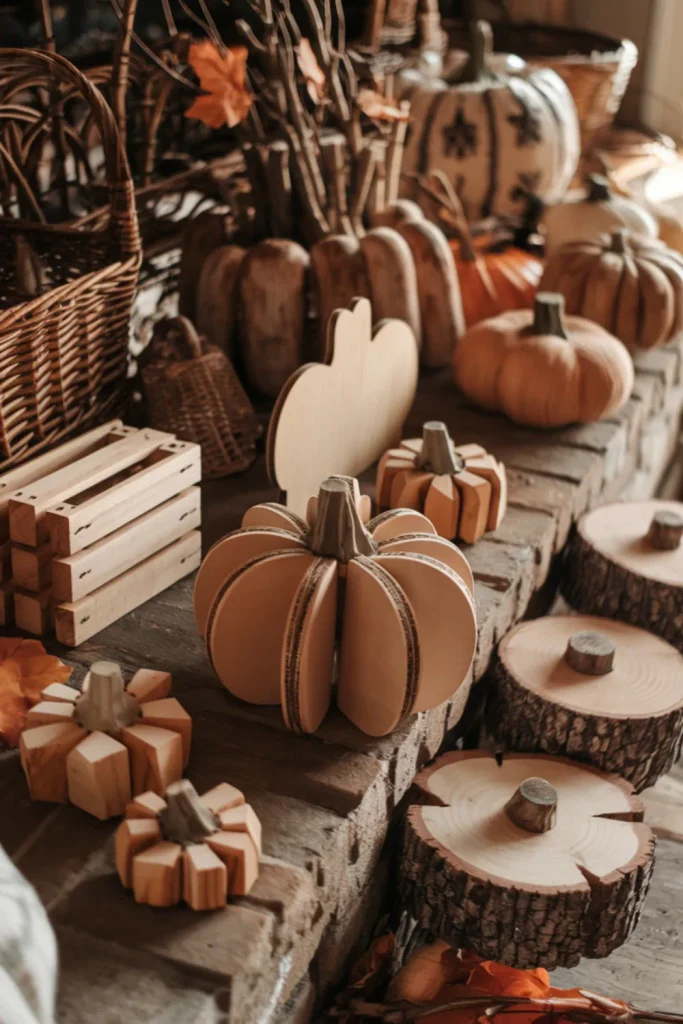
Mixing several construction styles produces a richer fall display than repeating one wooden pumpkin design.
Chunky 2×4 blocks, pallet slats, smooth plywood, bark-edged slices, and reclaimed barnwood can share one hearth when the colors remain consistent.
Burnt orange, cream, olive, walnut, and muted mustard create enough variety without separating the collection into unrelated groups.
Arrange the largest pumpkin off-center, then fill lower gaps with smaller pieces instead of making a straight row.
This wood pumpkins DIY fall crafts display also offers a practical way to combine leftover projects from several crafting sessions into one coordinated seasonal scene.
Conclusion
Narrow your choice by considering the wood you already have, where the project will be displayed, and how much cutting it requires.
Simple block designs are a sensible starting point, while pallet silhouettes and stacked porch pumpkins provide more impact outdoors.
Whichever wood pumpkins DIY fall crafts you choose, make one sample first to test the proportions, paint color, and stability before building a full set.