
A bag of wood rounds can leave you wondering what to make beyond another painted ornament. The shape works for much more: small gifts, useful desk accessories, layered wall decor, and Christmas decorations with a handmade feel. These wood slice crafts cover several techniques, from painting and decoupage to assembling larger pieces from smaller rounds.
You can choose a project around the slices you already have, whether they are tiny discs or one substantial slab. Each idea includes a material or construction detail to help you plan. Start with a simple surface design, or choose a project that puts your drilling and assembly skills to work.
1. Botanical Wood Slice Wall Art
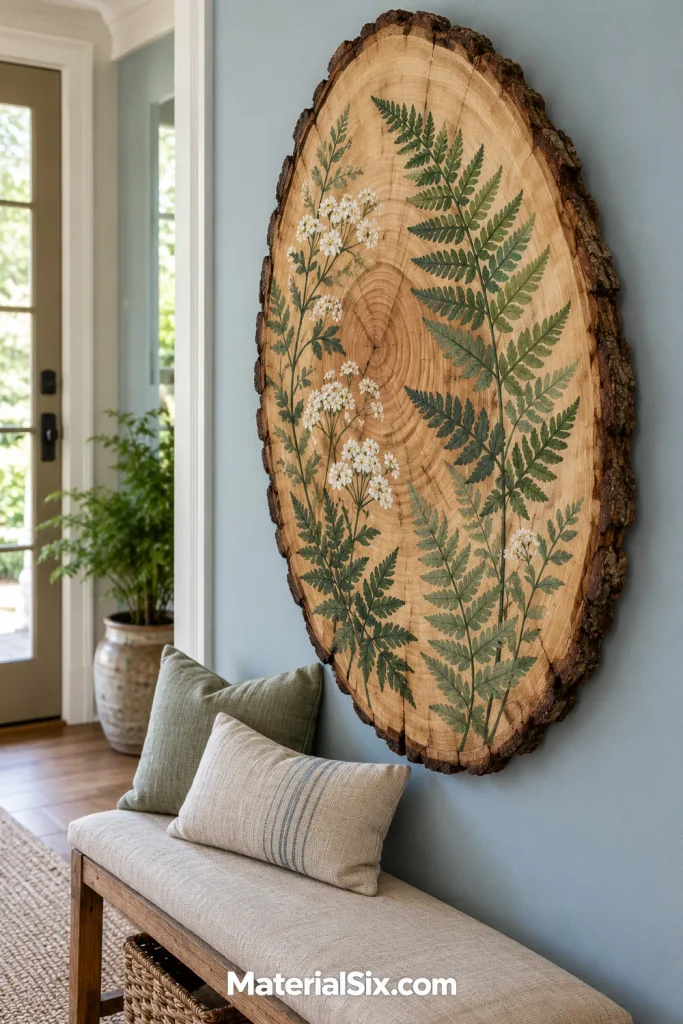
Give a larger slice room to stand on its own with a painted arrangement of fern fronds and small wildflowers. An oval piece works especially well for a narrow entryway wall, while a round slice suits a reading nook or a spot above a small console.
Sketch the stems lightly before painting, leaving some growth rings visible between the leaves. A limited palette keeps the design from competing with the bark. Choose hanging hardware appropriate for the finished piece and wall surface, attaching it to solid wood on the back. This is a decorative painting project, so you can keep the brushwork loose and expressive.
2. Pressed-Flower Wood Slice Decorations
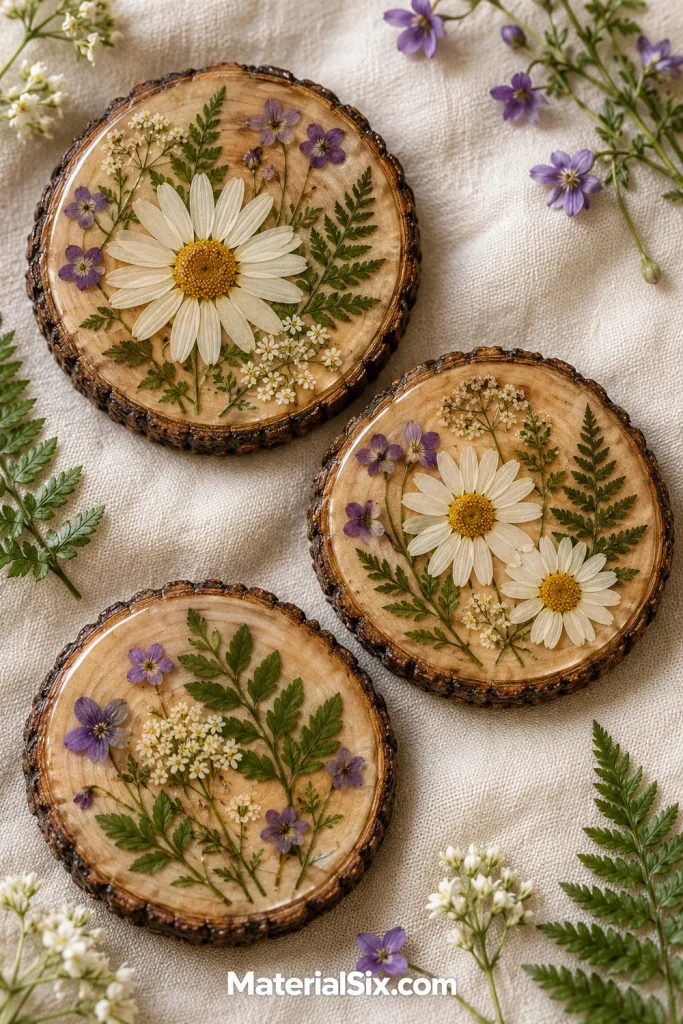
Pressed flowers bring a different texture to wood slice art without requiring detailed painting. Arrange fully dried daisies, tiny blossoms, and fern pieces across a smooth wood face, leaving a narrow natural border. A few overlapping stems create a little botanical arrangement that looks thoughtful on a shelf or beside a bedside lamp.
Plan the placement before attaching anything, then use a decoupage medium labeled for your materials. Test it on a spare flower and scrap slice first to check for color changes. Keep these pieces as decorative accents rather than drink coasters, since delicate petals and their coating may not suit regular moisture or handling.
3. Painted Wood Slice Coasters
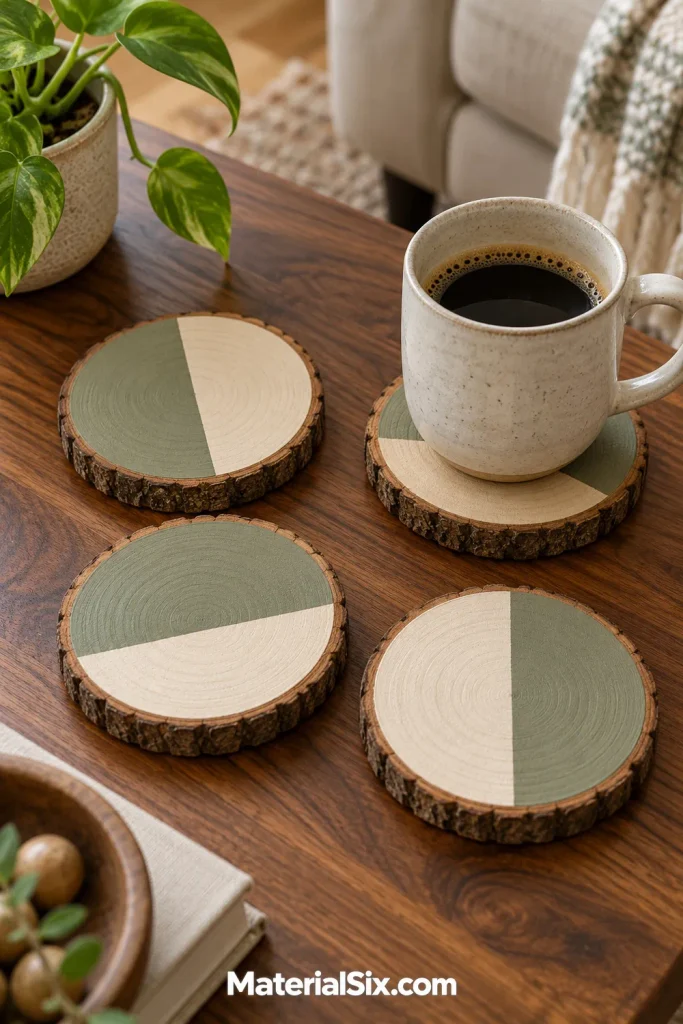
Simple painted shapes make a matching coaster set without hiding all the grain. Try overlapping semicircles in sage, clay, and cream, keeping the same colors across four slices. The repeated palette ties the set together even when the bark outlines differ.
Select slices with flat, evenly sanded faces and enough width to support your usual mugs. Thin cork backing can help keep a rough underside away from the table. Choose a finish whose manufacturer lists suitability for the expected moisture and temperature exposure, and follow its cure instructions before use. Test the completed surface with your own cups before gifting the set.
4. Mini Wood Slice Magnets
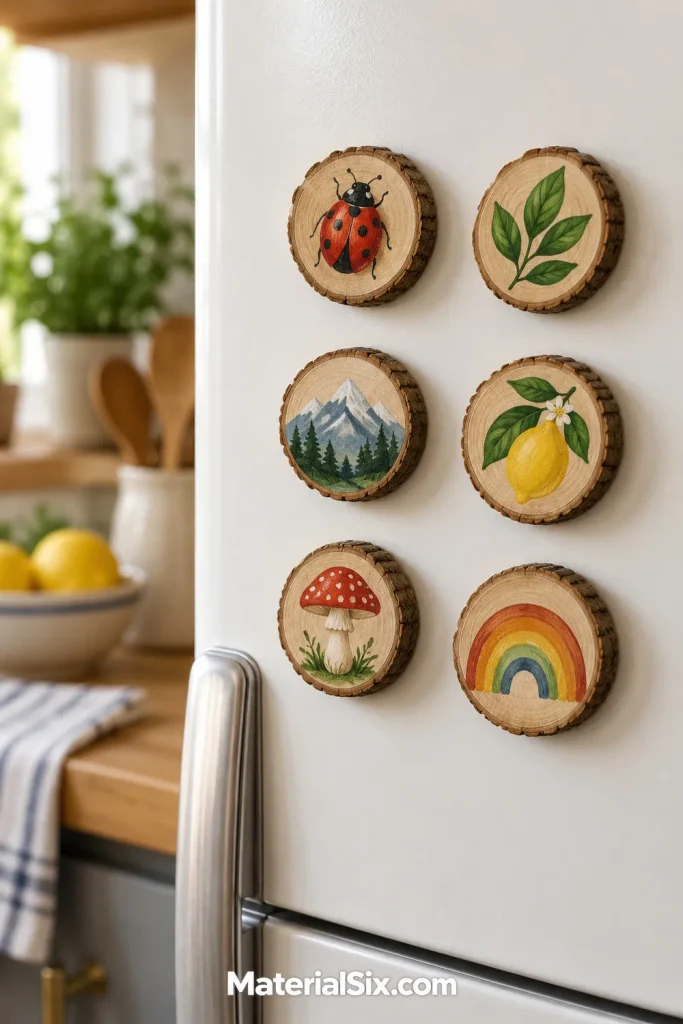
Tiny wood rounds are a useful canvas for refrigerator magnets because a single bold shape can fill each one. Paint a lemon, mushroom, leaf, mountain, or ladybug rather than trying to fit a detailed scene onto a small surface. Keep several colors in common for a coordinated kitchen display.
Use lightweight slices with flat backs and attach craft magnets with adhesive labeled for both materials. Let the bond cure according to its directions before placing them on the fridge. Check that each magnet supports its slice without sliding. Package a few together as a small handmade gift, keeping loose magnets away from young children.
5. Photo Wood Slice Ornaments

Small photos give wood slice ornaments a personal focus. A pet portrait, vacation landscape, or family snapshot can sit inside a visible ring of natural wood. Choose an image with a clear central subject so it still reads when trimmed to fit a small round.
Print a paper template first to test the crop before cutting your chosen photo. Select a decoupage medium compatible with the print and test for ink bleeding on a spare copy. A drilled hanging hole and twine loop keep the outline simple. If you want a date, add it discreetly to the back after the front has dried.
6. Painted Winter Scene Ornaments
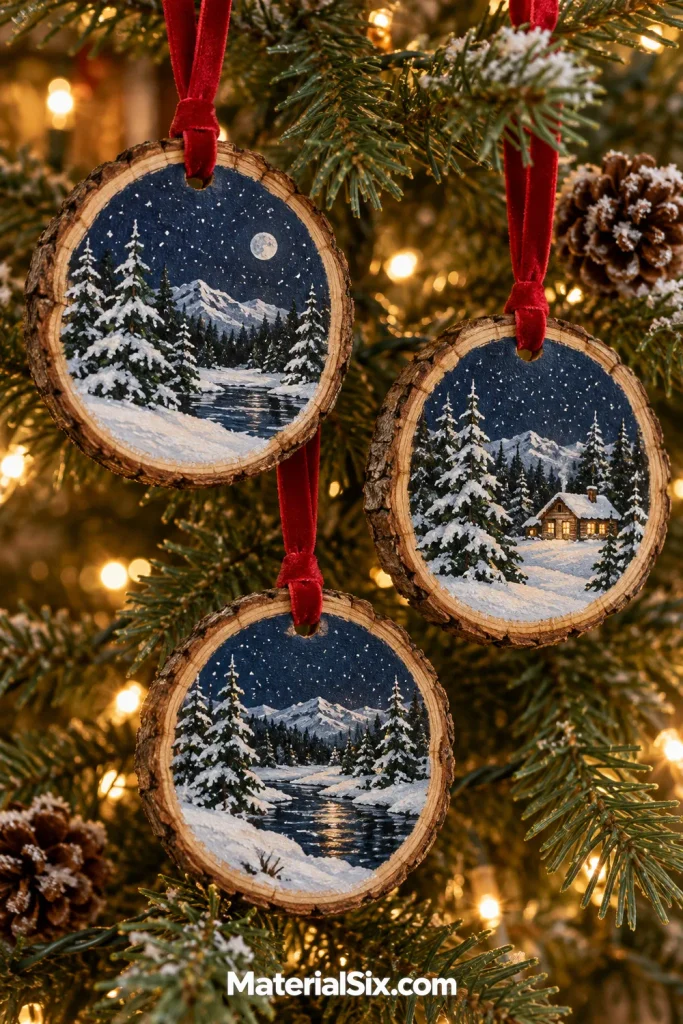
A snowy evergreen scene turns a small wood round into a miniature piece of Christmas art. Use a deep blue background, a few dark tree silhouettes, and small white marks for snow. Leave the bark exposed so the painted center feels framed without extra trim.
Work from broad background shapes toward smaller details, allowing each paint layer to dry as directed. You do not need identical trees across the set; repeating the sky color and ribbon makes the collection feel connected. Choose thin slices for tree ornaments, and check their weight on the branches where you plan to hang them before making a large batch.
7. Wood-Burned Pattern Ornaments
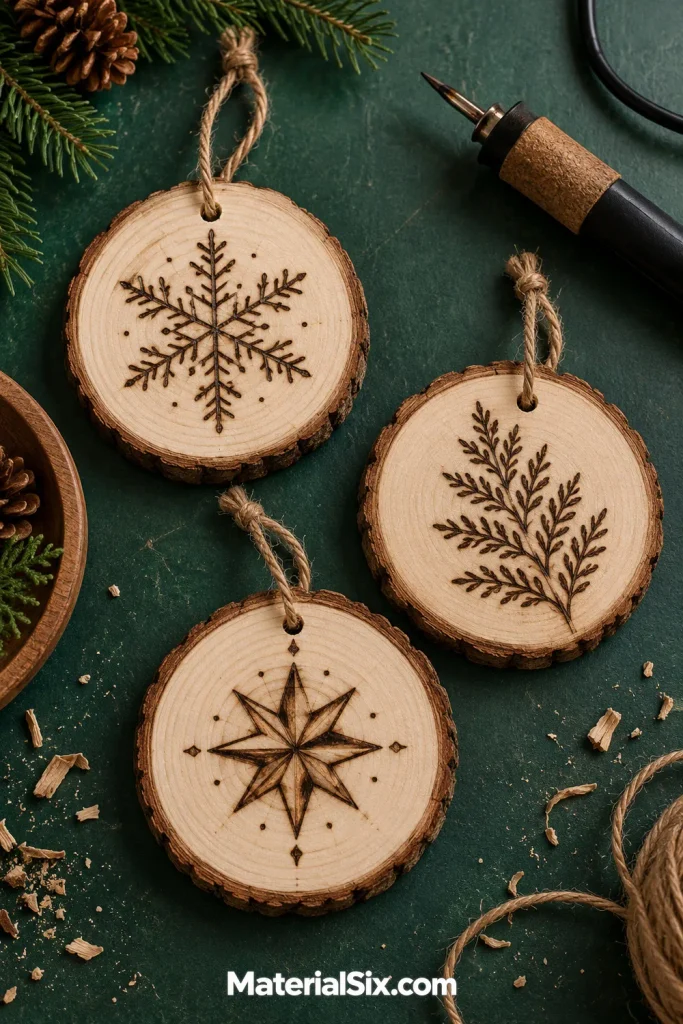
Wood burning creates a darker, more restrained look than painted Christmas ornaments. A fern sprig, snowflake, or geometric star can follow the center of a small slice while the natural grain remains visible. Plain jute loops suit the simple pattern and warm wood tones.
Choose untreated, unfinished wood sold as suitable for pyrography, and practice your design on a spare piece before working on the ornaments. Follow the tool maker’s instructions for ventilation, heat, and handling, with a secure heat-resistant rest for the pen. This is a tool-based project for adults, rather than a craft to hand to children with the painting supplies.
8. Stacked Wood Slice Snowmen
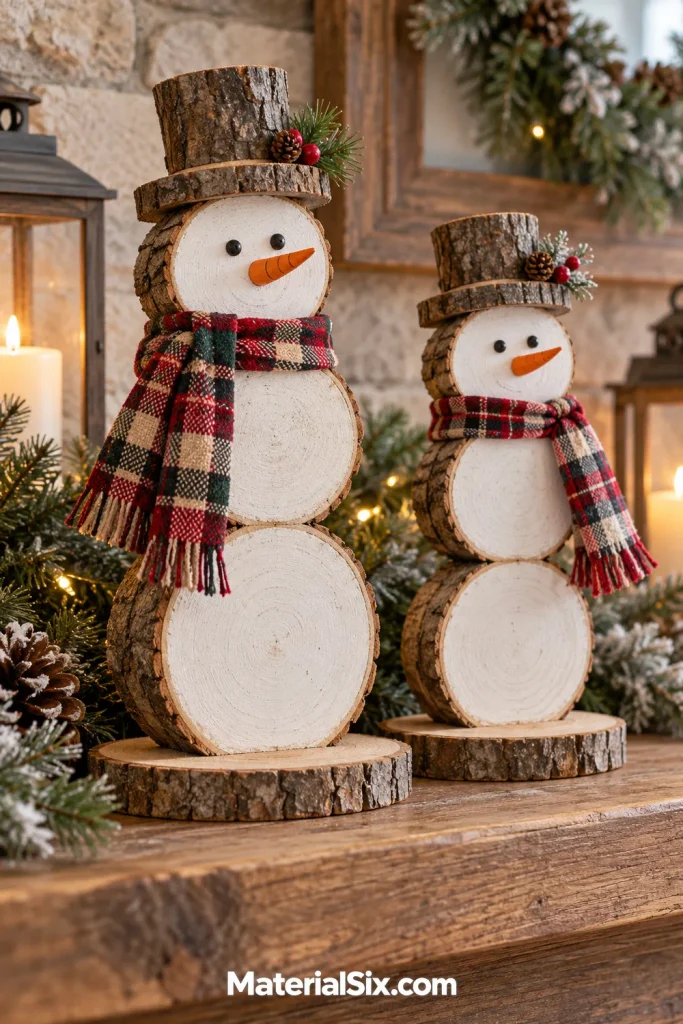
Three graduated rounds create a snowman silhouette that you can display on a shelf all winter. Paint the centers white, then add small eyes, an orange carrot nose, and a narrow fabric scarf. Let the bark outline show around each section to keep the wood visible.
Plan a concealed backing strip that supports all three rounds, rather than relying only on glue between their narrow edges. Attach that backing to a broad wooden foot so the decoration can stand steadily. Keep the face simple and the accessories lightweight. A pair with different scarf fabrics makes a coordinated display without needing separate construction plans.
9. Wood Slice Reindeer Decorations
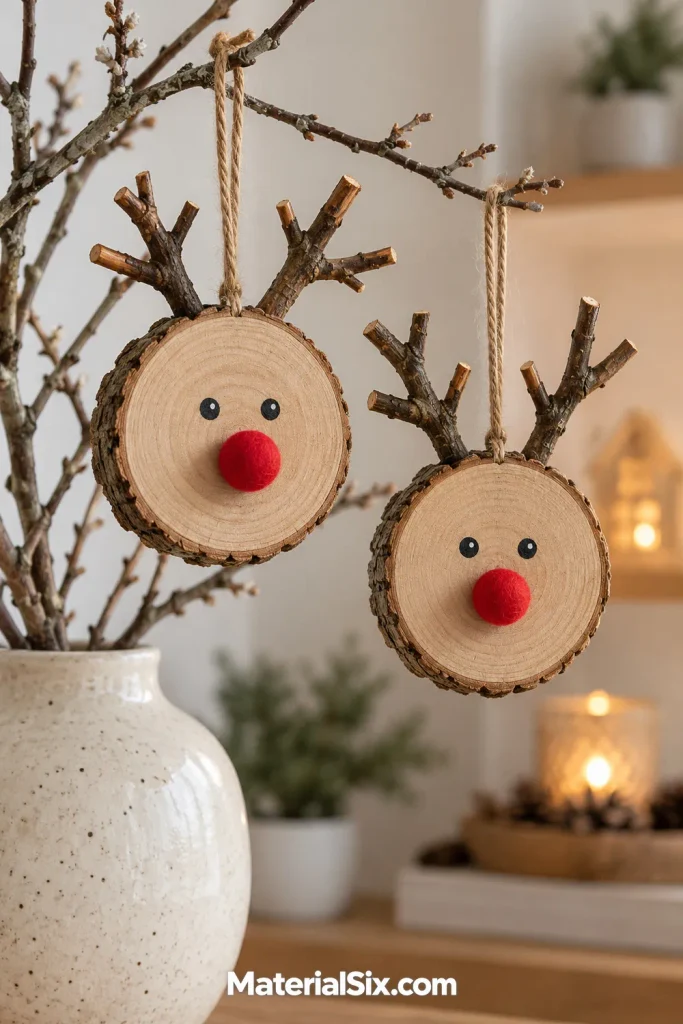
A single round becomes a reindeer face with twig antlers and a small red felt nose. This approach suits smaller slices and uses the wood itself as the face, so there is less painting than a full ornament scene requires. A pair hanging from a branch arrangement gives a side table a playful Christmas accent.
Lay out the antlers behind the slice before attaching them, checking that the two sides look balanced. Use clean, dry twigs and an adhesive suited to the materials. Add a secure hanging loop and keep the finished decorations out of children’s reach, since the noses and twig pieces are small detachable parts.
10. Wood Slice Garland
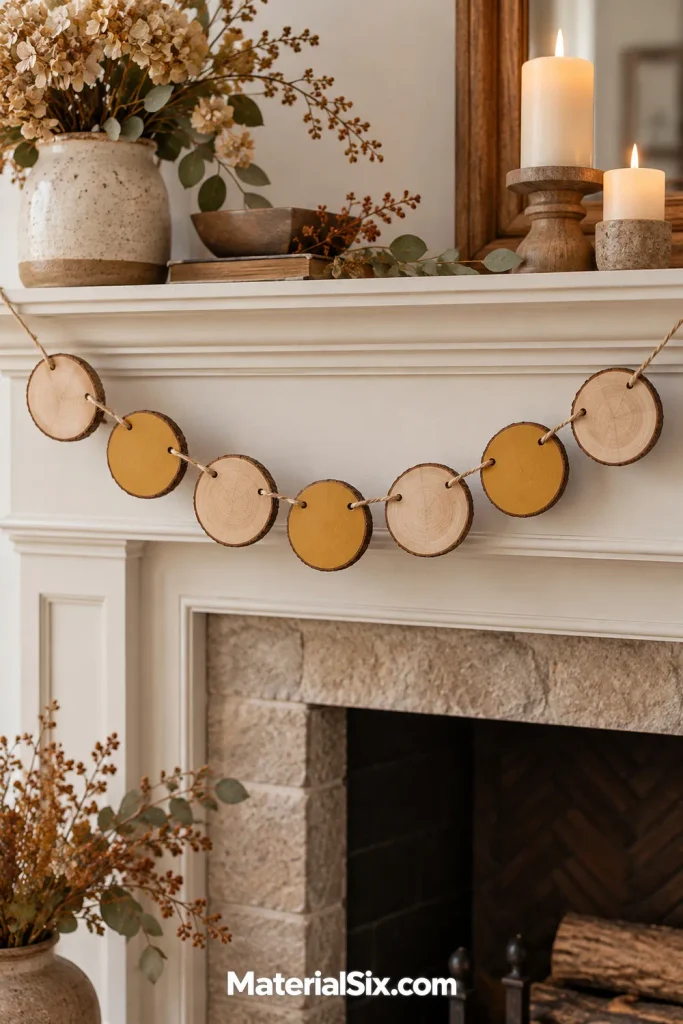
Stringing small rounds into a garland puts their irregular edges on display. Alternate natural slices with a few painted ones in a muted accent color, such as ochre or deep green. The result can stretch across a mantel, shelf edge, or party backdrop without needing a message on every disc.
Two holes near the top of each round help the faces stay oriented along the cord. Choose thin slices to limit the overall weight, and dry-fit the spacing on a table first. Secure the garland to suitable supports at both ends. Above a fireplace, keep all wood, cord, and decorations outside the appliance’s required clearance area.
11. Layered Wood Slice Wreath
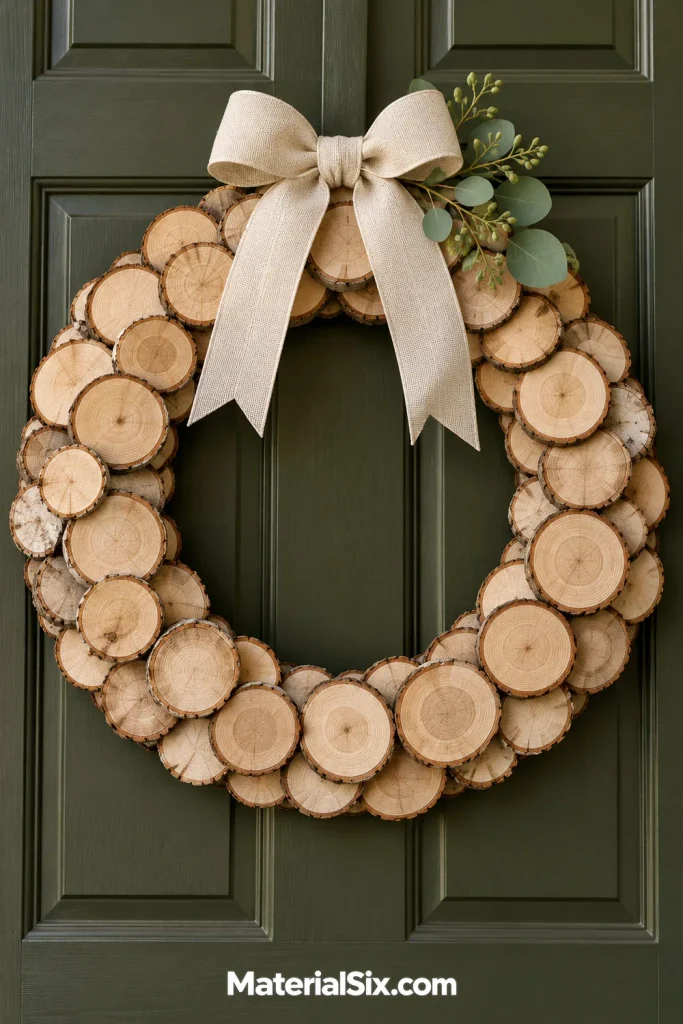
A wood slice wreath gets its depth from overlapping pieces rather than a large bundle of greenery. Arrange one layer around a sturdy ring backing, then stagger a second layer over the gaps. Small differences in diameter make the outline feel organic while the circular center keeps it orderly.
Lay out the full design before bonding the pieces, and choose adhesive compatible with the wood and backing. A single linen bow and a short eucalyptus sprig leave most of the texture visible. Match the hanger to the completed weight. Display it indoors or in a sheltered entry unless every component is specified for the outdoor conditions it will encounter.
12. Wood Slice Place Card Holders
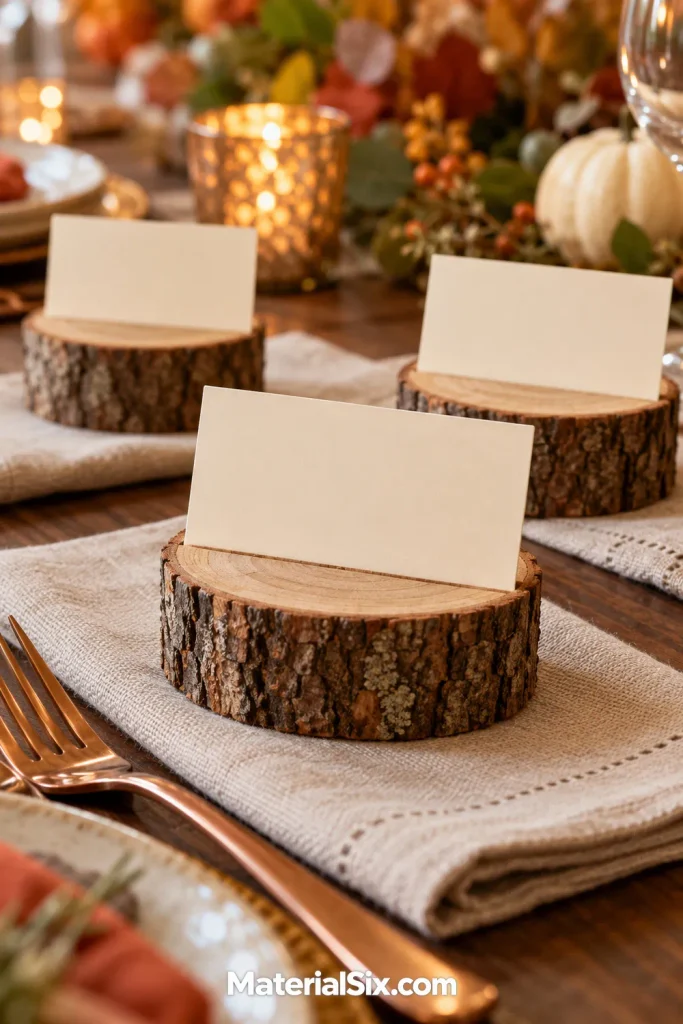
Thick rounds with a narrow slot across the top make understated place card holders. They work with linen napkins, ceramic dishes, and simple floral arrangements because the visible wood acts as a small natural accent. You can reuse the bases for different gatherings by changing the cards.
Choose rounds that sit flat, and size the slot to your cardstock using a scrap test piece. Leave enough wood beneath the cut to keep the base intact. If you are not comfortable making controlled saw cuts, buy pre-slotted blanks. Keep the holders outside the plate, where bark and any loose fibers will not touch the food.
13. Wire Photo Holders on Wood Slice Bases
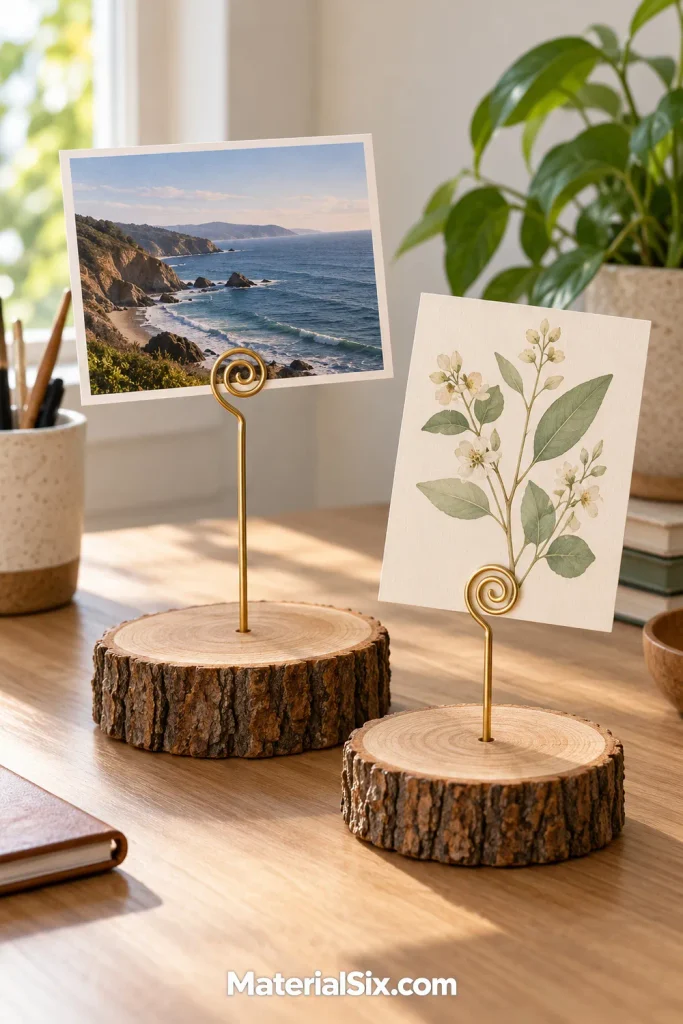
A wood slice base and curled wire stem create a small desktop display for photos or art prints. Unlike a hanging ornament, this version lets you swap the image whenever you like. Brass-colored wire looks warm against the wood, while black wire gives the same idea a more graphic finish.
Use a thick, flat base and keep the stem fairly short so a small print does not make it top-heavy. Match the drilled hole to the wire and secure it with a compatible adhesive. Curl the upper end into a clip, turning any sharp tip inward. Test the balance with the intended card before placing it on a busy desk.
14. Large Wood Slice Clock
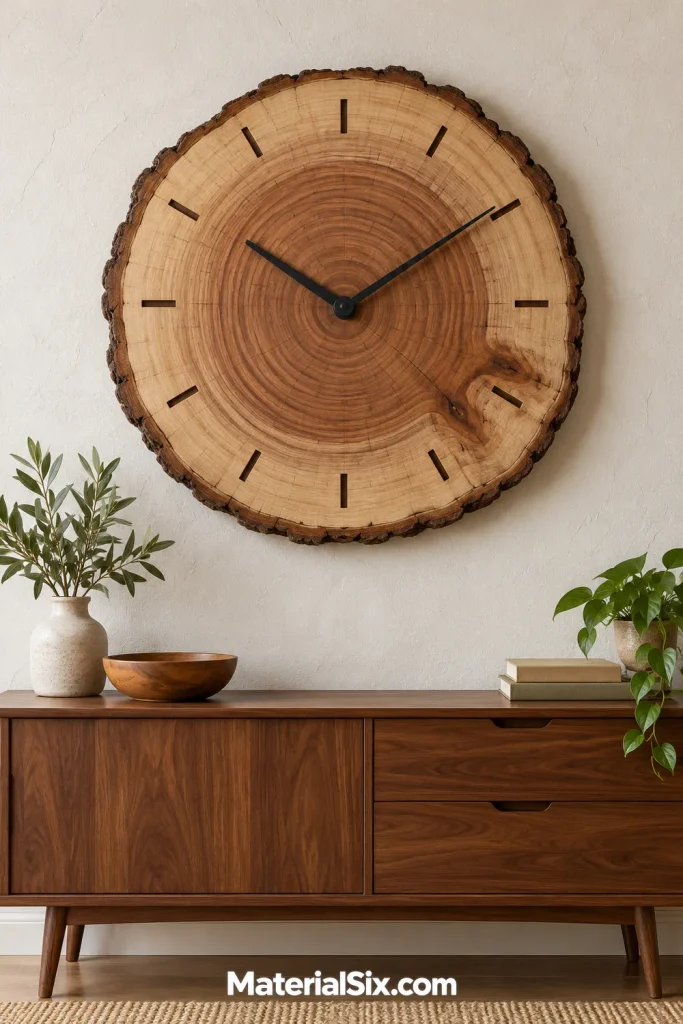
One substantial round can become a clock that lets the growth rings carry most of the design. Slim black hands and simple hour marks provide contrast without covering the wood. This large wood slice project suits a quiet wall above a console, where its uneven outline can stand apart from rectangular furniture.
Measure the slice before choosing a clock kit, especially the thickness at the center. The movement’s shaft must fit the wood and allow the hands to attach with clearance. Follow the kit’s drilling and installation instructions, and use wall hardware suited to the full weight. Choose a piece with a sound center for the movement.
15. Wood Slice Mirror Frame
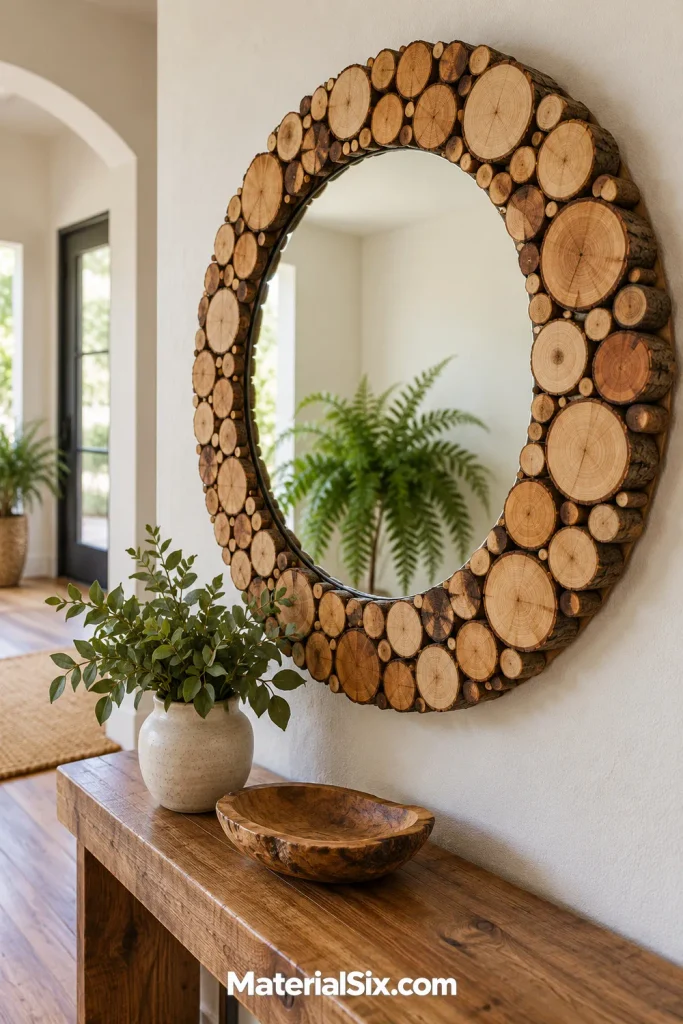
Small rounds arranged around a mirror make a textured frame with more presence than a single painted slice. Mix a few diameters, but keep the wood tones similar so the border feels connected. The circular shapes work well with a round mirror in a natural entryway or bedroom.
Build around a backing and mirror assembly designed to support the finished weight. Treat the slices as decorative facing, not as the structure holding the glass. Lay them out before attaching them, keeping the reflective center clear. Use adhesives specified for the surfaces involved and hanging hardware appropriate to the complete assembly. This project needs more planning than a small tabletop craft.
16. Wood Slice Tabletop Christmas Tree
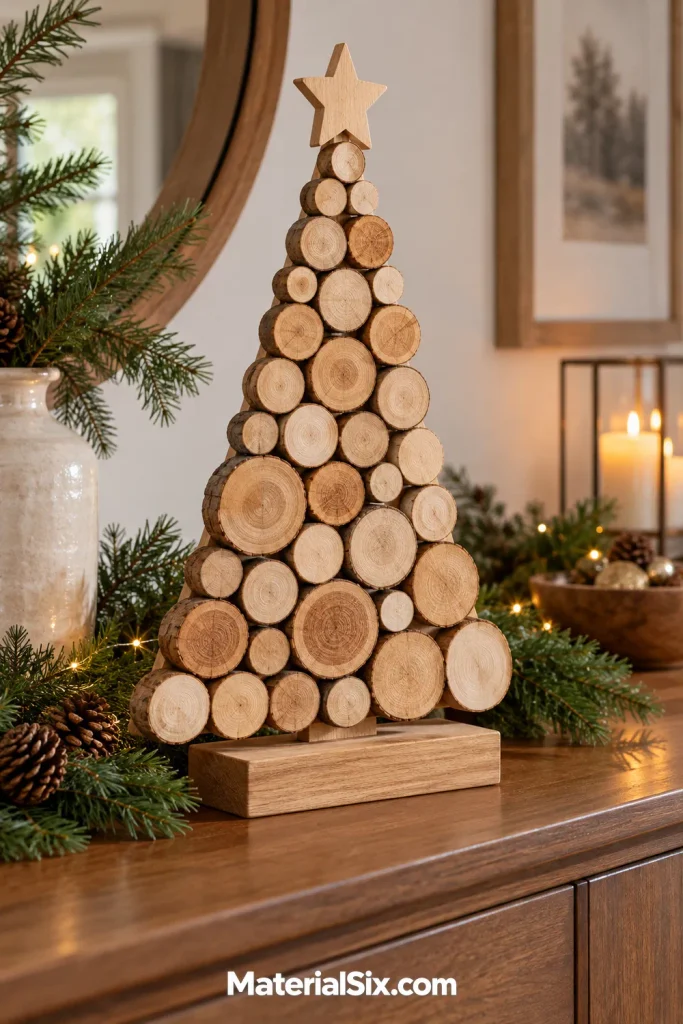
Arrange small rounds in graduated rows to make a triangular Christmas tree silhouette. The repeated circles give the tree texture, while the overall shape stays easy to recognize. A plain wooden star at the top is enough decoration when the wood grain is the main feature.
Attach the rounds to a shaped backing rather than joining them only where their edges touch. A broad foot supports the upright panel, and a tabletop-sized version is easier to display than a tall one. Try the arrangement flat before assembly, adjusting the gaps between rows. Keep the finished tree on a stable surface away from candles and other heat sources.
17. Wood Slice Key Rack
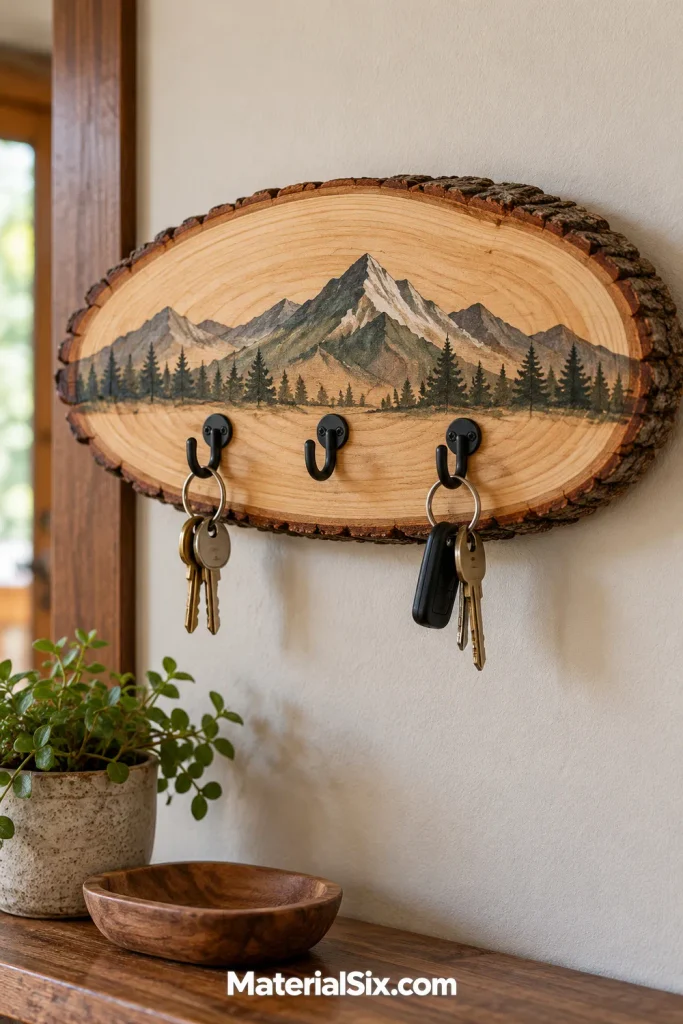
An elongated slice offers space for a few hooks without needing a large entryway organizer. Keep the center mostly natural, or paint a small mountain motif above the hardware. The irregular bark edge gives a compact key rack some character beside a door or over a narrow console.
Choose a sound slice thick enough for the hook screws, then plan the hook spacing around the key rings you use. Pre-drill as appropriate for the selected hardware and wood. Secure the rack to the wall with fixings suited to the surface and intended load. Keep it for keys and other light items unless the complete assembly has a stated higher capacity.
18. Symbol-Painted Plant Markers
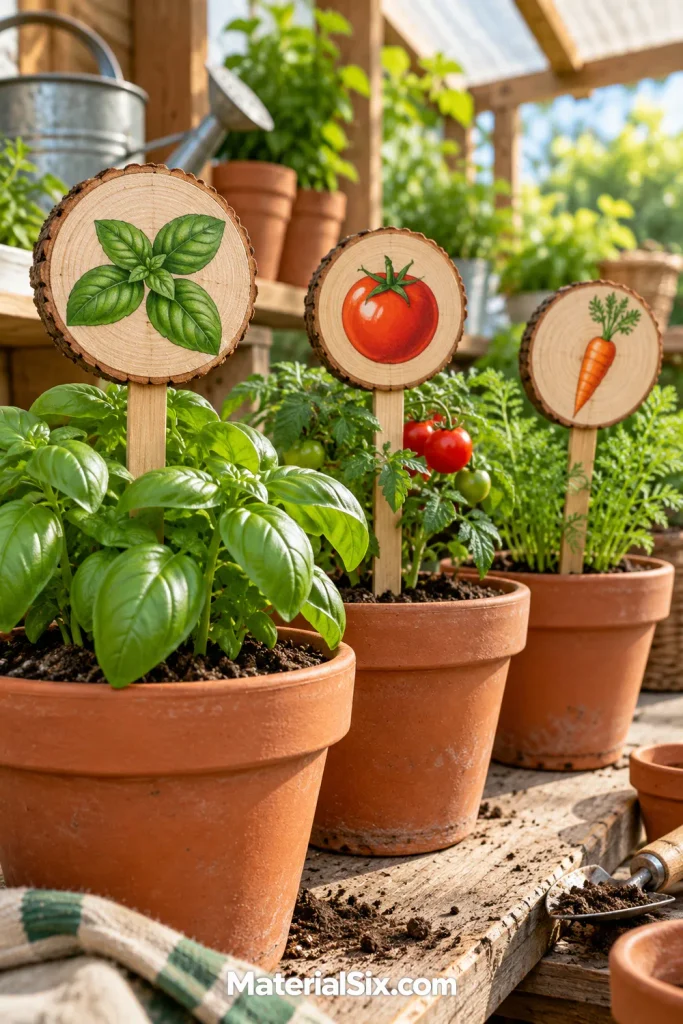
Painted plant symbols make small wood rounds useful on a potting bench. A basil leaf, tomato, or carrot is easy to spot among seedling pots, and the little discs add a handmade detail to a covered growing area. You can also add the plant name on the back if you need a more specific reminder.
Attach each disc securely to a short stake, keeping the wood face above the potting mix. Choose coatings and fasteners labeled for the expected exposure if you plan to use them outdoors. For a simpler decorative version, keep the markers in sheltered pots and replace worn pieces as needed rather than expecting them to last indefinitely.
Before You Start: Match the Slice to the Project
Choose thin, lightweight rounds for hanging ornaments and thicker, flat pieces for freestanding bases. Look for dry craft blanks with firm bark and sound attachment areas. Freshly cut wood needs appropriate drying before finishing; a coat of sealer is not a replacement for that preparation. The USDA Forest Service explains how correct drying and moisture control help limit later dimensional changes in its wood-drying guidance.
For painted and decoupaged pieces, test your full combination of paint, adhesive, and clear coating on a spare slice. Start with a clean, dry surface and follow each product’s label for preparation, ventilation, recoating, and curing. Minwax’s wood-finishing FAQ covers surface preparation, while its clear-finish guidance explains why thin coats matter. These designs are starting points for planning, not complete tool-by-tool tutorials.
Choose a Craft That Fits Your Supplies
Start with the size and condition of your wood slices, then choose a project that fits your tools and the place you want to display it. A small painted set makes a manageable first project, while a wreath, clock, or mirror frame calls for more assembly planning. Save your favorite wood slice crafts and gather the right materials before you begin.