
If you are looking for a budget-friendly yet beautiful way to decorate your home for fall or Thanksgiving, this project is for you. One of the most charming seasonal crafts making the rounds on Pinterest is a 3D paper pumpkin garland.
This paper wall decoration is simple to make but creates a lovely three-dimensional effect. Add a strand of tiny lights, and the garland gives off a warm glow that makes any room feel extra cozy. It is also a fun DIY project to make with children, friends, or other family members.
Looking for more decorating inspiration? Take a look at our complete collection of 35 Creative Thanksgiving Wall Decor Ideas to Fill Your Home with Gratitude for more ways to make your home feel festive and welcoming.
Let’s get started!
✂️ Supplies You’ll Need
Before you begin, gather the following materials:
- Cardstock or thick craft paper in fall colors, such as orange, cream, ivory, brown, and golden yellow
- Scissors or a medium-to-large circle craft punch
- A glue stick or liquid craft glue
- Jute twine or thick string
- Warm-white LED fairy lights, optional but highly recommended
- Clear tape or removable hooks for hanging the garland
🛠️ How to Make a 3D Paper Pumpkin Garland
Step 1: Cut the Paper into Circles

Begin by creating the basic shapes for your pumpkins. Cut the orange and cream cardstock into circles of the same size. You will need approximately six to eight paper circles for each 3D pumpkin.
To save time, stack or fold several sheets of paper before cutting them. If you have a circle craft punch, you can use it to create evenly sized circles more quickly.
Step 2: Fold and Glue the Circles Together
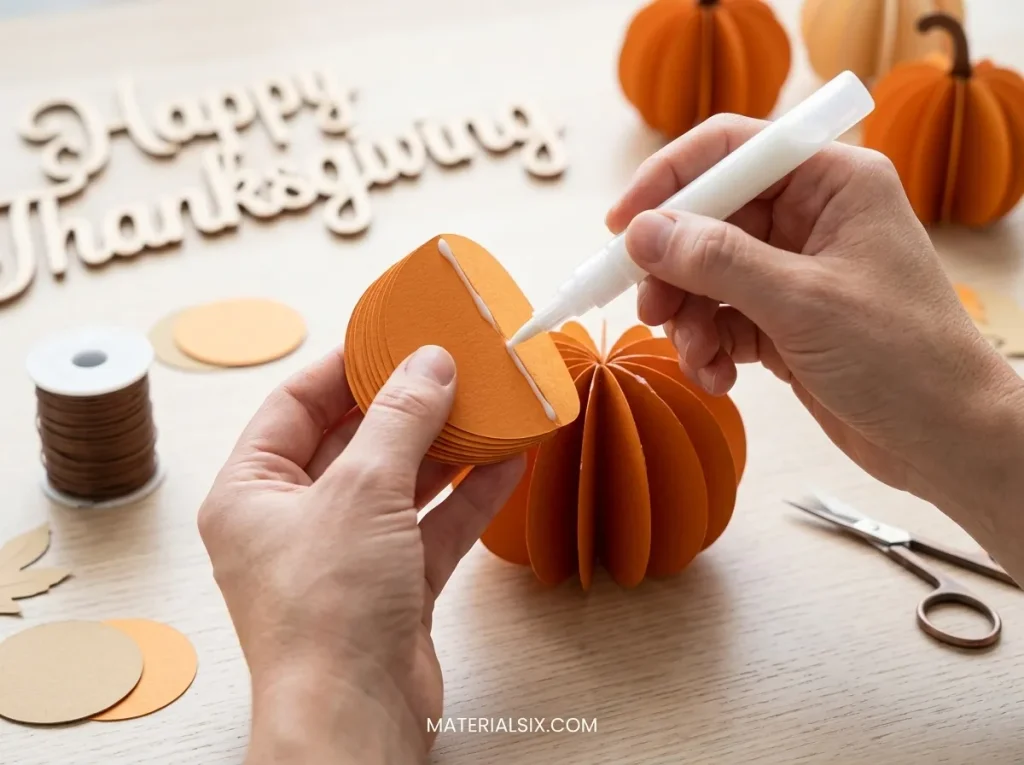
Fold each paper circle in half to create a semicircle. Apply glue to the outside of one folded circle, then press another folded circle against it.
Continue gluing six to eight folded circles together. Once the layers are joined and opened, they will form a rounded 3D pumpkin with a honeycomb-like texture.
Step 3: Add the Stems and Fall Leaves
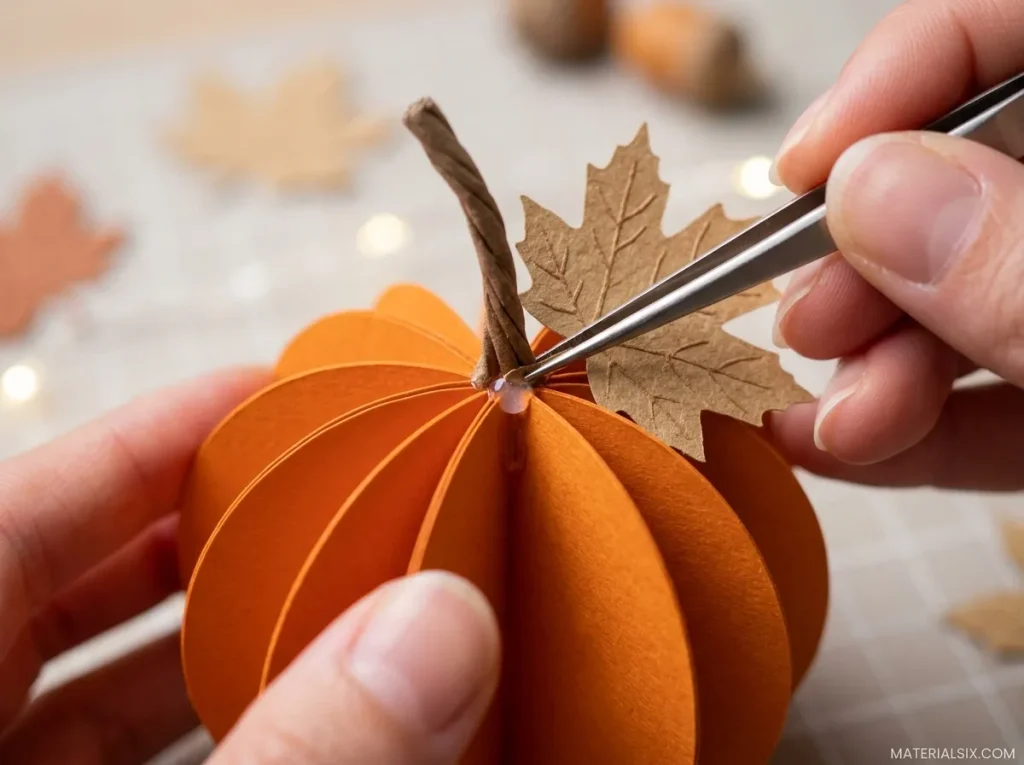
To give each pumpkin more detail, cut small stem shapes from brown paper. Then cut maple leaves or simple vine leaves from yellow or gold paper.
Before gluing the final sides of the pumpkin together, tuck the bottom of the stem and leaves into the top center between the paper folds. Secure them with glue and allow everything to dry.
Step 4: Assemble the Garland and Add a Warm Glow
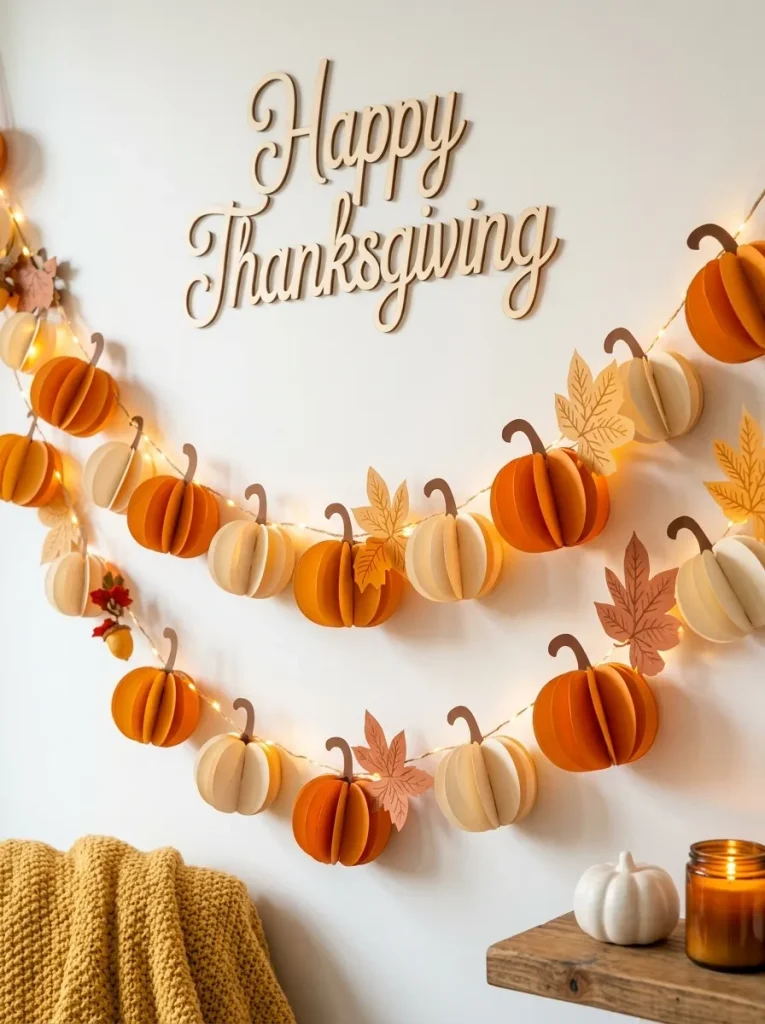
Once all your paper pumpkins are finished, arrange them along a length of jute twine. Alternating orange and cream pumpkins will give the garland a balanced and colorful look.
Thread or secure the twine through the center folds of each pumpkin, leaving as much space between them as you like. Hang the finished garland on a wall, above a fireplace mantel, across a window frame, or along a shelf.
For that cozy Pinterest-inspired look, gently wrap a strand of warm-white fairy lights around the twine.
Your garland is complete! Your space now has a warm and inviting touch of Thanksgiving charm. The combination of rich fall colors, dimensional paper pumpkins, and softly glowing lights can turn an empty wall into a beautiful seasonal focal point.
Easy, right? Remember to photograph your finished garland and share it on social media or Pinterest. Have fun crafting, and Happy Thanksgiving!
1 thought on “Bring Warmth to Your Home with This DIY 3D Paper Pumpkin Garland for Thanksgiving”
Comments are closed.