
Before you flatten those shipping boxes for recycling, picture a tiny haunted house, a sweep of bats, or a set of weathered gravestones. DIY cardboard Halloween decorations can be as simple as painted cutouts or as detailed as layered tabletop scenes. The trick is choosing a project that suits the cardboard you have and the place you want to decorate.
These 17 ideas cover doors, walls, shelves, tables, and temporary porch displays. You’ll find practical material and styling suggestions along the way, whether you prefer friendly ghosts, vintage pumpkin faces, or a darker haunted-house look. Start with one display, then use the scraps for smaller accents.
1. Layered Cardboard Tombstones
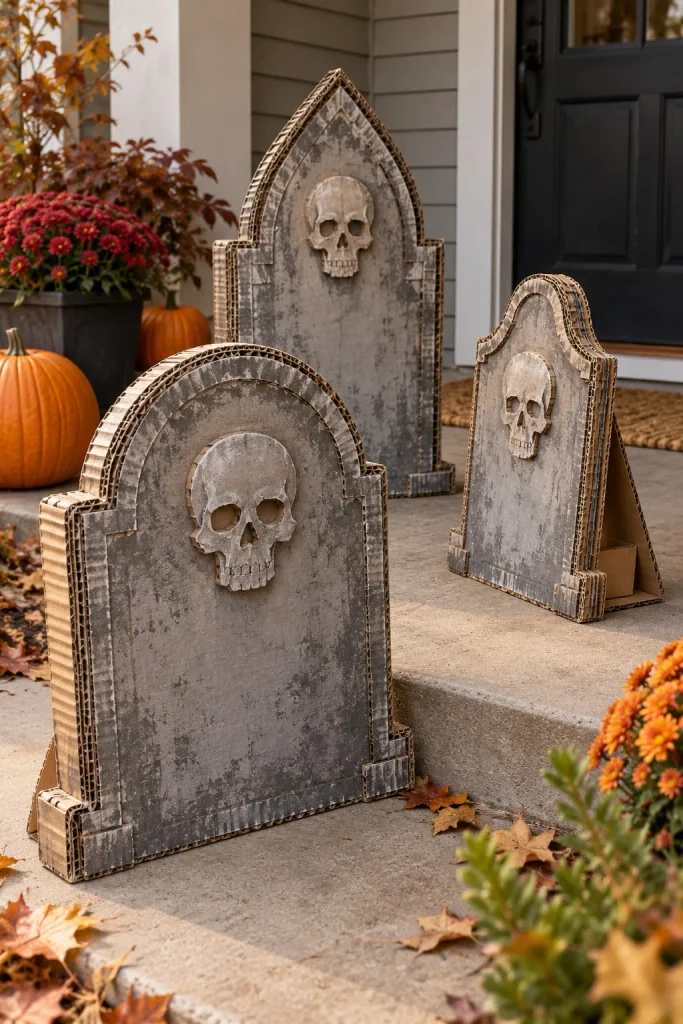
A cluster of gray cardboard gravestones gives a covered porch a little Halloween graveyard atmosphere. Mix a rounded top, a pointed arch, and a scalloped shape so the grouping feels varied. Layer narrower cardboard borders over the fronts, then dab on light and dark gray paint for a mottled stone effect.
Use broad pieces of corrugated cardboard without deep creases for the main panels. Triangular braces at the back help the props stand, but check their balance before displaying them. Keep them beside the entry rather than on steps or walking paths, and bring them inside whenever conditions turn damp or windy.
2. A Mini Cardboard Haunted House
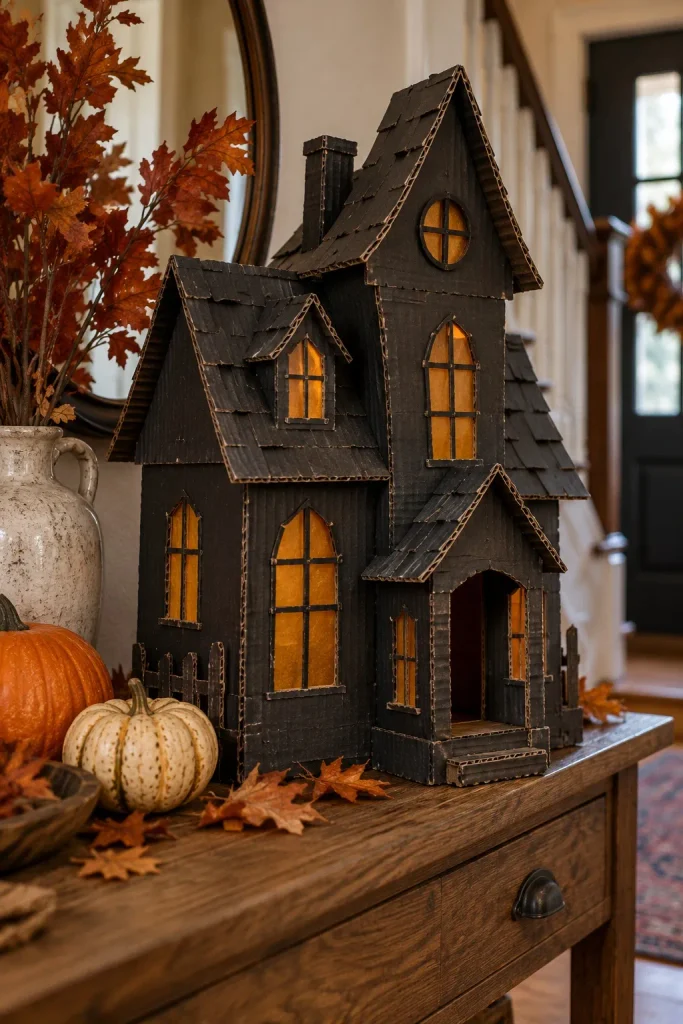
Give a small box a steep roof, uneven window openings, and a narrow tower for a haunted house that belongs on an entry table. Charcoal paint ties mismatched pieces together, while overlapping roof shingles made from scraps add texture. Amber paper behind the windows suggests a warm interior without needing lights.
Plan the window and door openings while the cardboard is still flat. For a simpler version, use one main box and one folded roof rather than several connected wings. Keep a rear opening for access, and arrange the finished house with a few pumpkins so its crooked silhouette remains the focal point.
3. Cutout Jack-o’-Lantern Boxes
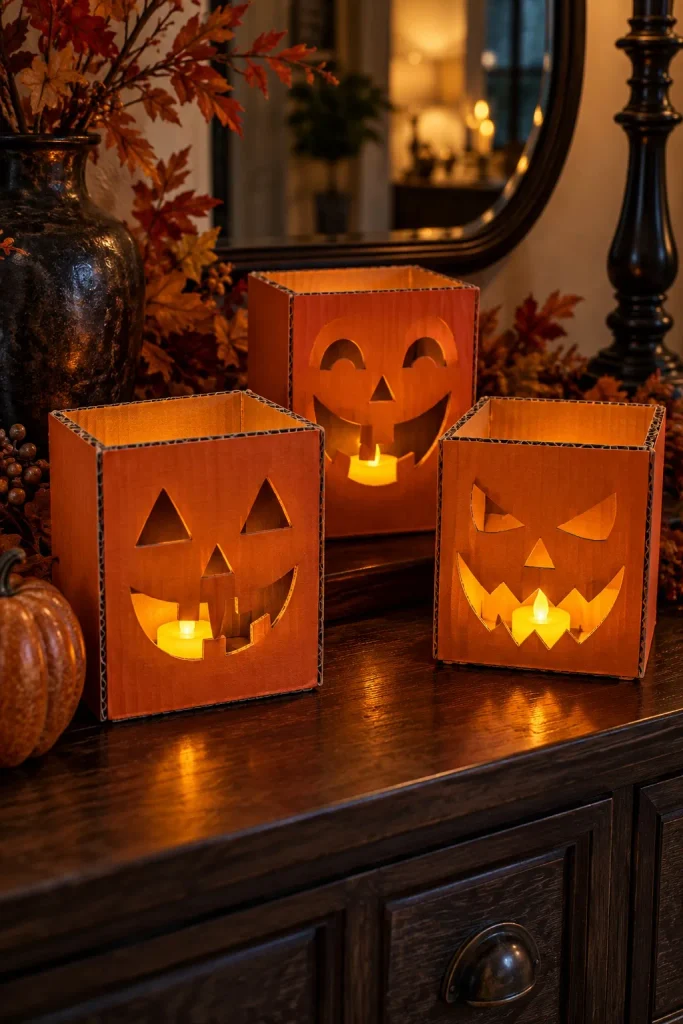
Small square boxes make cheerful jack-o’-lanterns with a different shape from the usual round pumpkin. Paint the outsides orange and give each front a distinct expression: triangular eyes, a wide smile, or angled brows. The open tops keep the box construction visible and make the lights easy to reach.
Choose broad facial openings with enough cardboard left between them to hold the front together. A battery-operated LED tea light provides the glow; never put a real candle inside cardboard. Arrange several boxes at different heights on a sideboard, leaving space around each one so the cutout faces are easy to see.
4. A Sweeping Cardboard Bat Wall
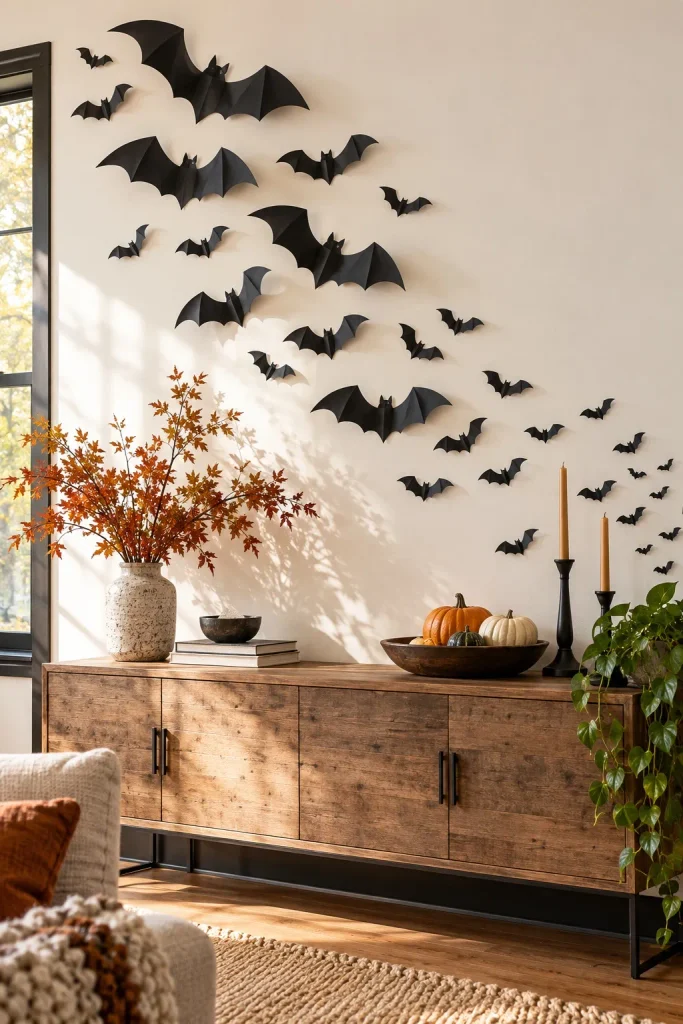
Let a flock of black bats climb diagonally across a blank wall instead of spacing them in straight rows. Three sizes create a sense of movement, especially when the smallest bats trail away from the main cluster. A warm white wall makes the shapes stand out without additional decorations.
Thin cereal-box cardboard is easier to bend than thick shipping-box panels. Lightly score the wing folds without cutting through, then paint both sides with black acrylic paint. Test a wall-compatible removable adhesive in a hidden spot first. Attach the bodies while leaving the wings angled forward to cast small shadows in the daylight.
5. Hanging Cardboard Ghosts
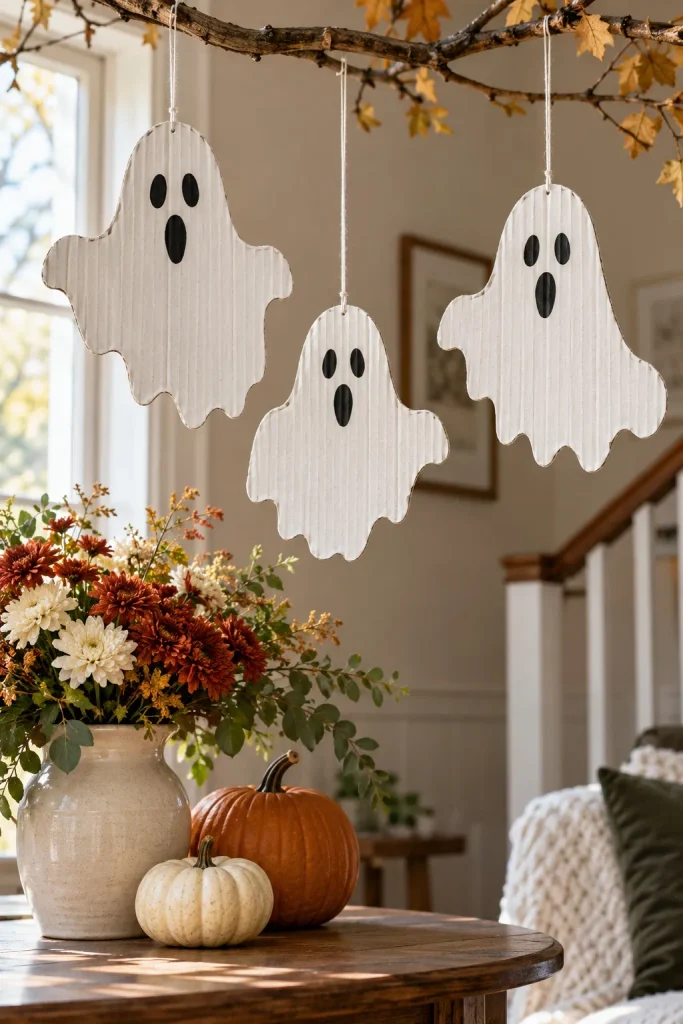
White cardboard ghosts bring a softer, playful look to Halloween decorating. Give each cutout a rounded head, uneven arms, and a wavy bottom edge, then add simple black eyes and a mouth. Hanging them at different heights makes the group feel lively without needing complicated details.
Paint both faces because the ghosts may turn on their strings. Reinforce each hanging hole with a small cardboard patch on the back before threading cotton cord through it. Suspend them from a securely supported branch above a display table, away from walkways and children’s reach. Leave gaps between the shapes so their outlines stay readable.
6. A Jointed Cardboard Skeleton
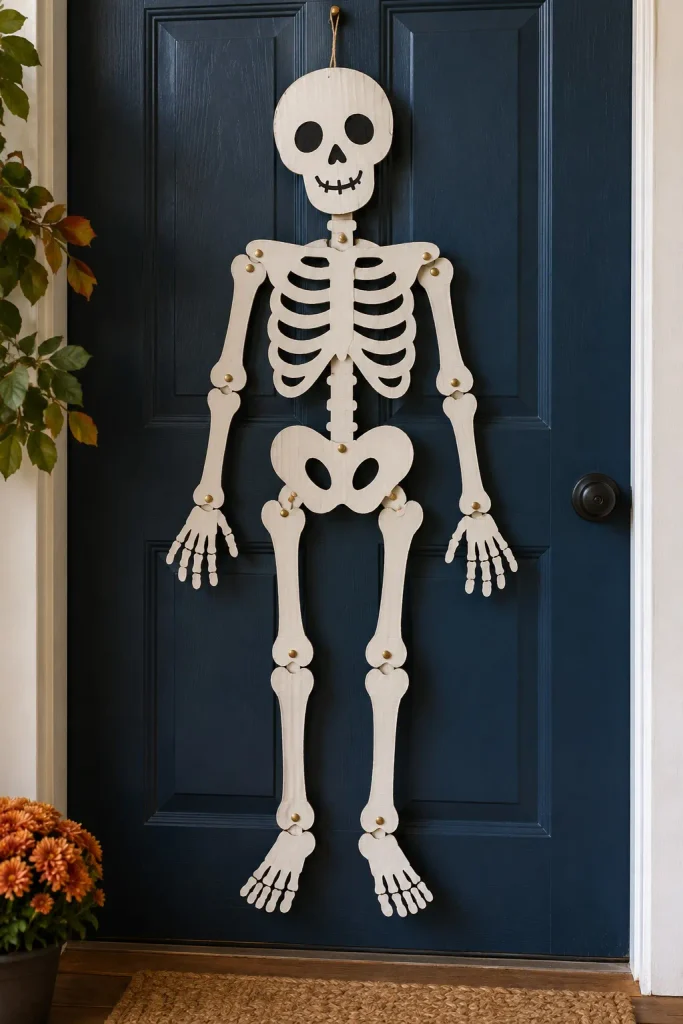
A dangling skeleton adds movement to a door or wall display, and the separate pieces let you change its pose. Use simplified shapes for the skull, rib cage, pelvis, and limbs rather than trying to reproduce every bone. White paint and a dark background keep the silhouette easy to recognize.
Brass paper fasteners can connect the shoulders, elbows, hips, and knees. Leave enough cardboard around each hole to reduce tearing, and avoid tightening the joints so much that they cannot move. For an easier version, paint the rib details instead of cutting them out. Hang it clear of the door handle and hinges.
7. Slot-Together Cardboard Pumpkins
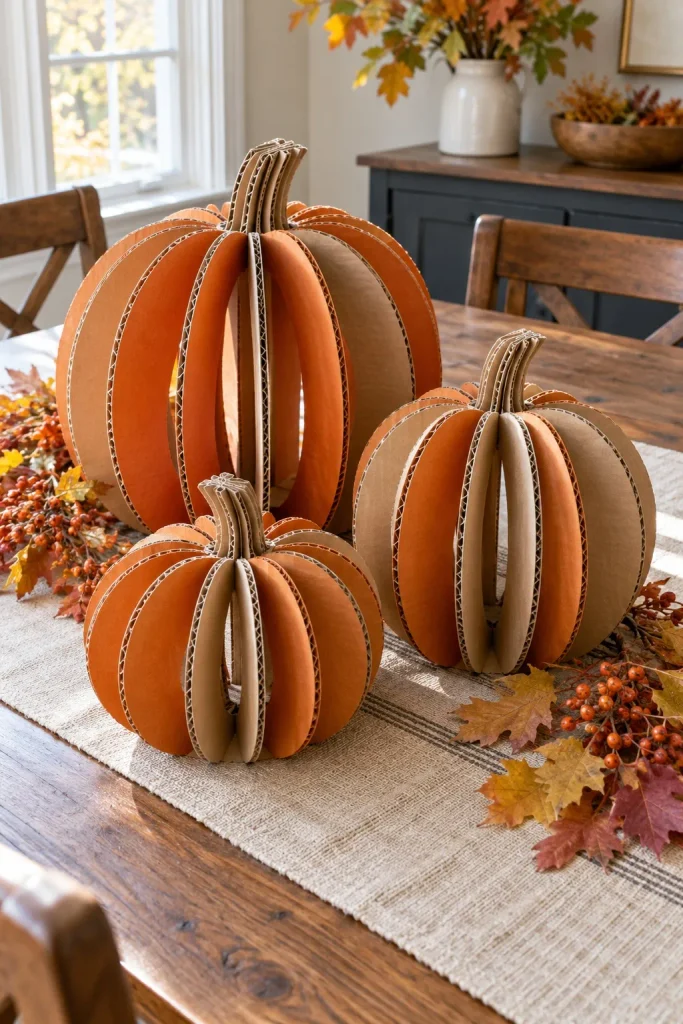
Dimensional pumpkins show off cardboard’s corrugated edges in a way that flat cutouts cannot. Curved vertical panels create rounded forms, with open spaces between the ribs. Mix orange-painted surfaces with natural kraft cardboard for a warm centerpiece that works alongside your Halloween decorations.
Start with a small two-panel slotted prototype before attempting a fuller ribbed version. Match slot widths to your cardboard’s thickness and test the fit before painting; oversized gaps make the pieces wobble. Keep the bottoms flat so the pumpkins sit evenly. Group a tall pumpkin with shorter, wider shapes, then add simple cardboard stems instead of heavy ornaments.
8. A Giant Spider and Cardboard Web
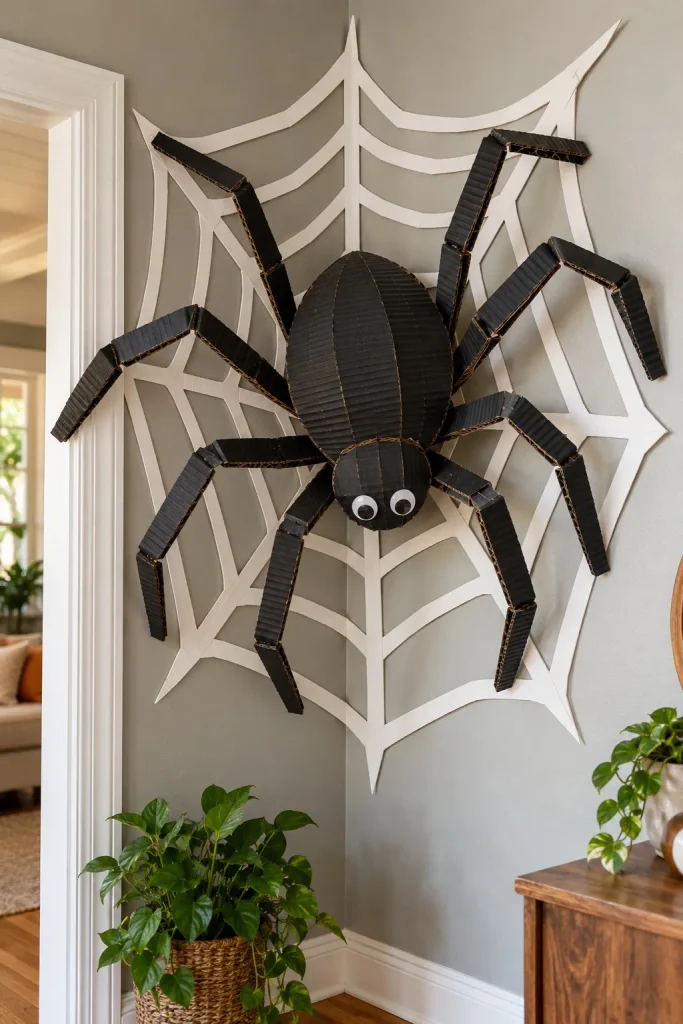
An oversized spider turns an unused wall corner into a Halloween feature. A rounded black body, smaller head, and eight bent cardboard legs create a bold shape, while a white web behind it provides contrast. Large painted eyes can make the display playful rather than frightening.
Keep the legs broad enough to hold their bends, and reinforce the attachment points behind the body. The web can be assembled from cardboard strips instead of cut from one complicated sheet. Mount it on an indoor wall away from door openings, supporting the body and web separately so the legs do not carry the weight.
9. A Monster Face for the Door
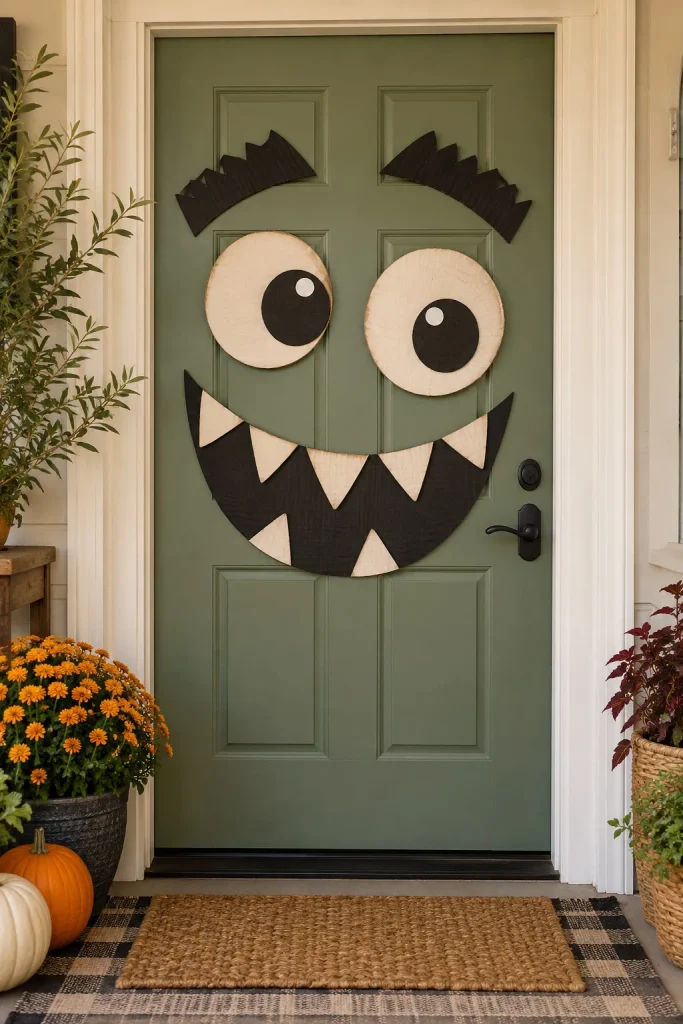
Oversized eyes and a toothy grin can give a plain door a goofy monster personality. Use the existing door color as the face, then add separate cardboard eyebrows, eyes, and a wide mouth. Off-center pupils and mismatched teeth make the expression more fun without adding many pieces.
Lay the features on the floor first to judge their proportions. Thin cardboard keeps the decorations lighter, while large, simple shapes are easier to cut than tiny details. Use attachments suited to the door finish, and keep the handle, lock, edges, and hinges clear. An interior door avoids the moisture that can damage a front-door display.
10. Faux Boarded-Up Window Panels
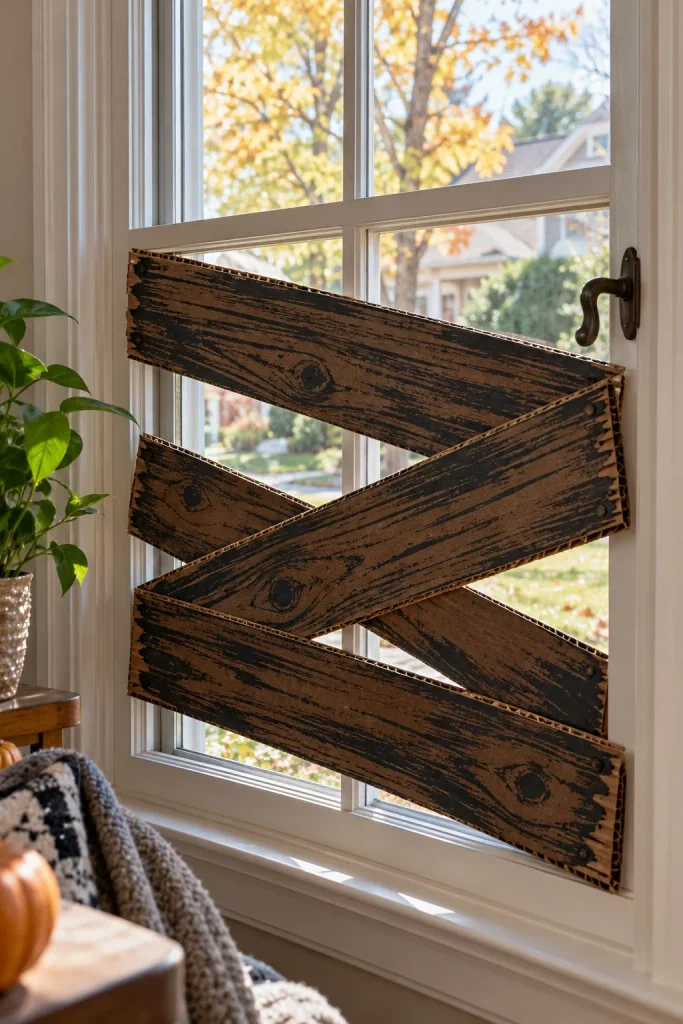
Cardboard strips painted to resemble old boards create a haunted-house window effect without actual lumber. Vary the widths, angle a few pieces, and add dark, broken brushstrokes for wood grain. Exposed corrugated edges can stay visible; the handmade look is part of the charm.
Build the arrangement as a lightweight removable panel and test it against the window before attaching anything. Choose a display window that is not needed for emergency escape, and leave all opening hardware accessible. You can also place the panel inside an empty decorative frame against a wall. That gives the same abandoned-house mood without covering a working window.
11. A Gothic Cardboard Mirror Frame
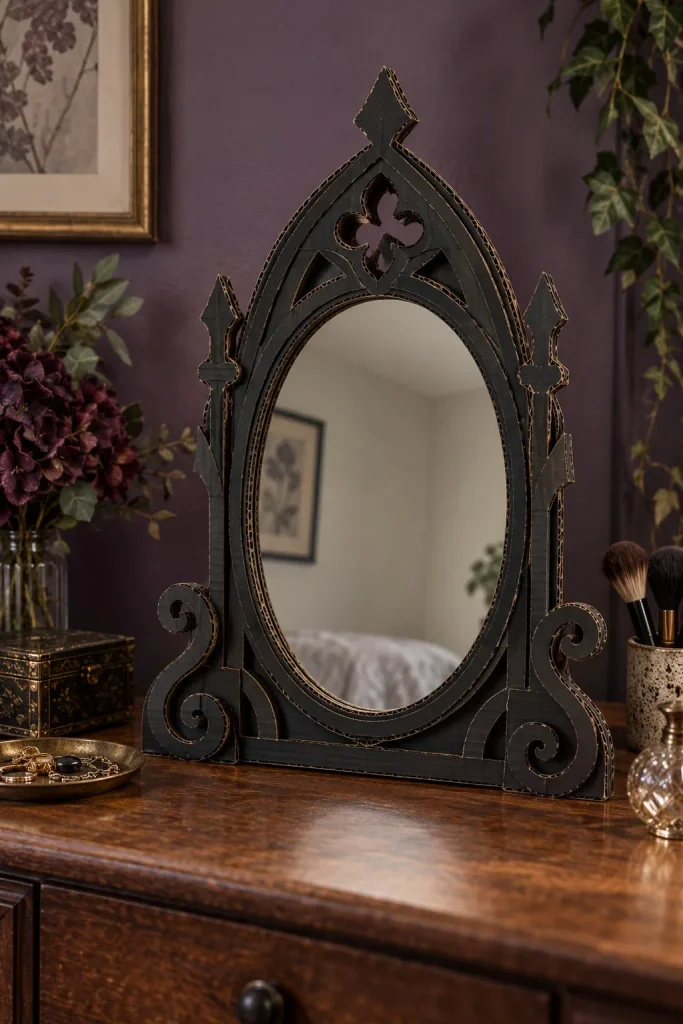
A pointed arch and layered scroll shapes give a small mirror a gothic Halloween look. Matte black paint unifies the layers, while visible corrugated edges add texture. Set the finished arrangement on a vanity or dresser with deep purple accents for a room display that feels more understated than pumpkins and ghosts.
Treat the cardboard as decorative trim around an already secure mirror, never as the structure holding the glass. Make a paper pattern first to keep the opening aligned. Broad curves and a few repeated shapes are more manageable than elaborate filigree, especially when you are cutting sturdy corrugated cardboard by hand.
12. A Cardboard Witch Silhouette
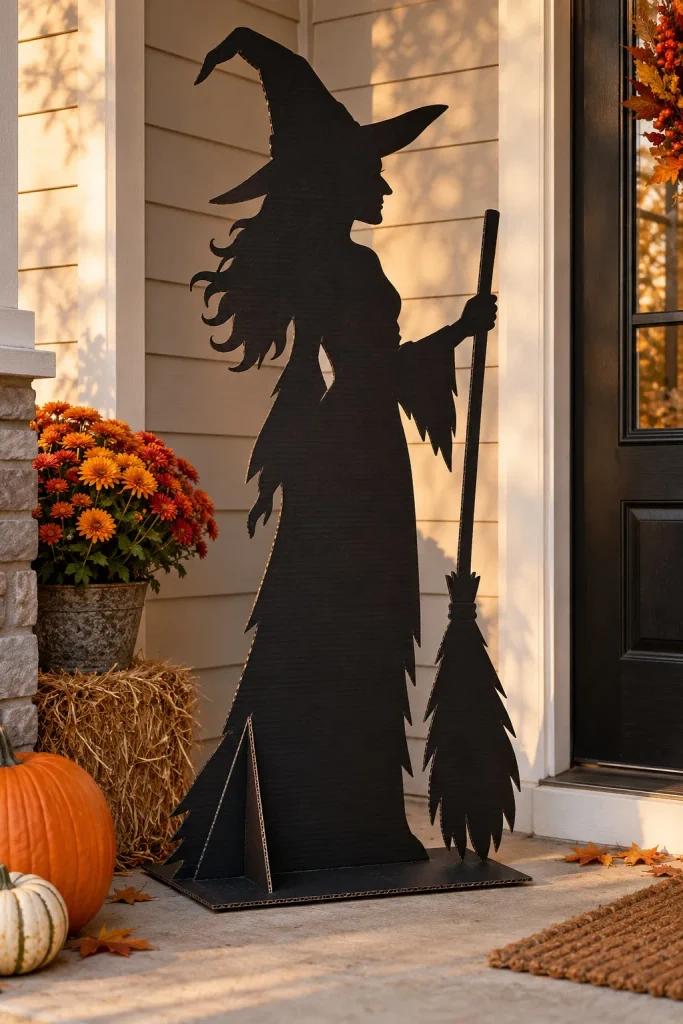
A witch silhouette gives large cardboard boxes a starring role. A pointed hat, long skirt, and broom communicate the character even with very little surface detail. Black paint keeps the outline bold against pale siding or an indoor wall, while a broad skirt provides room for hidden reinforcement.
Sketch the whole shape before cutting, keeping the broom handle and hat tip wider than delicate line drawings suggest. Add backing strips across any joined panels and test the rear brace on a level surface. Use it indoors or for a supervised dry-weather porch display, positioned well away from the route trick-or-treaters will take.
13. Black Cats with Fold-Out Stands
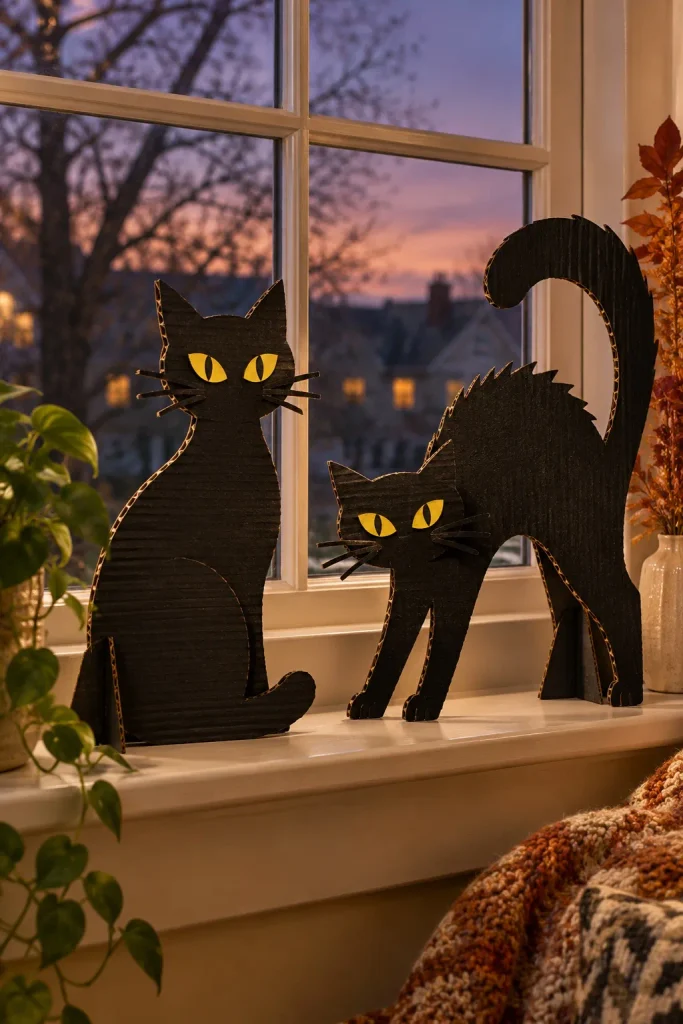
Two black cat cutouts can fill a windowsill without hiding the whole view. Pair a seated cat with an arched-back pose, then add yellow paper eyes for contrast. Broad tails and simple pointed ears keep the shapes recognizable while avoiding too many fragile pieces.
A folded cardboard support behind each cat lets it stand on a shelf or sill. Check the sill’s depth before choosing the size, and shorten any tail that makes the cutout unbalanced. Paint both sides if the display will be visible through the window. Keep the cats away from condensation and leave space for blinds or curtains to move.
14. A Vintage-Style Halloween Garland
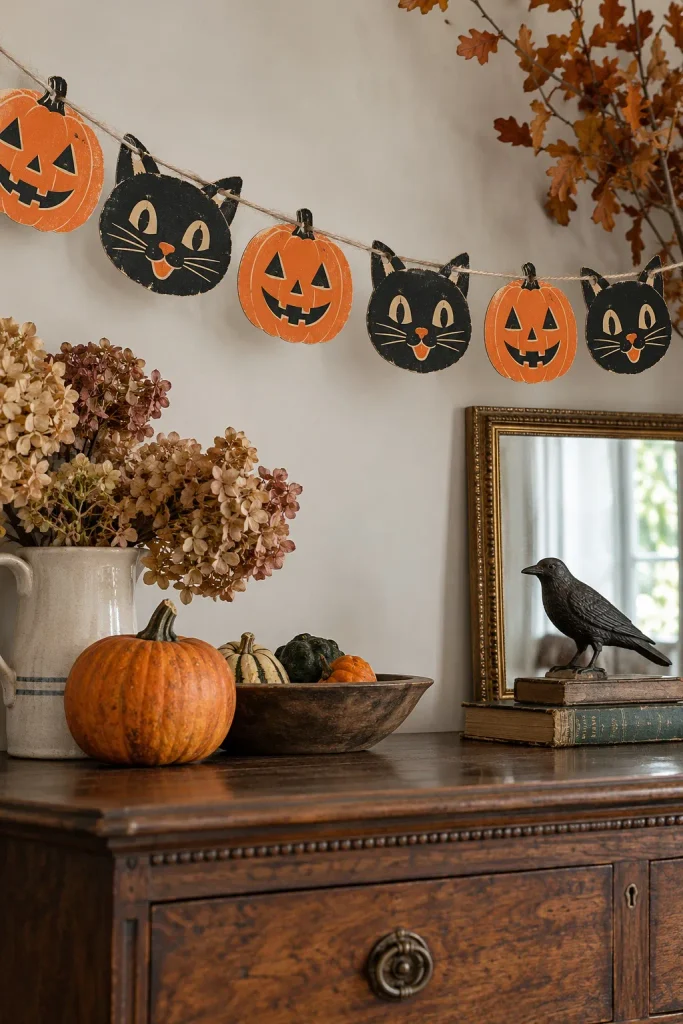
Pumpkin and black cat faces strung on twine bring a vintage Halloween mood to a sideboard or wall. Use a limited palette of orange, black, and cream, with broad smiles and simple eyes. Slightly irregular outlines make the pieces feel handmade without requiring detailed painting.
Trace a reusable face template onto thin cardboard so the garland has a consistent scale. Two holes near the top of each piece help it face forward instead of spinning. Space the cutouts before tying them in place, and leave extra twine at both ends for hanging. Keep the strand above a display surface rather than across a doorway.
15. Faux Spell Books from Cereal Boxes
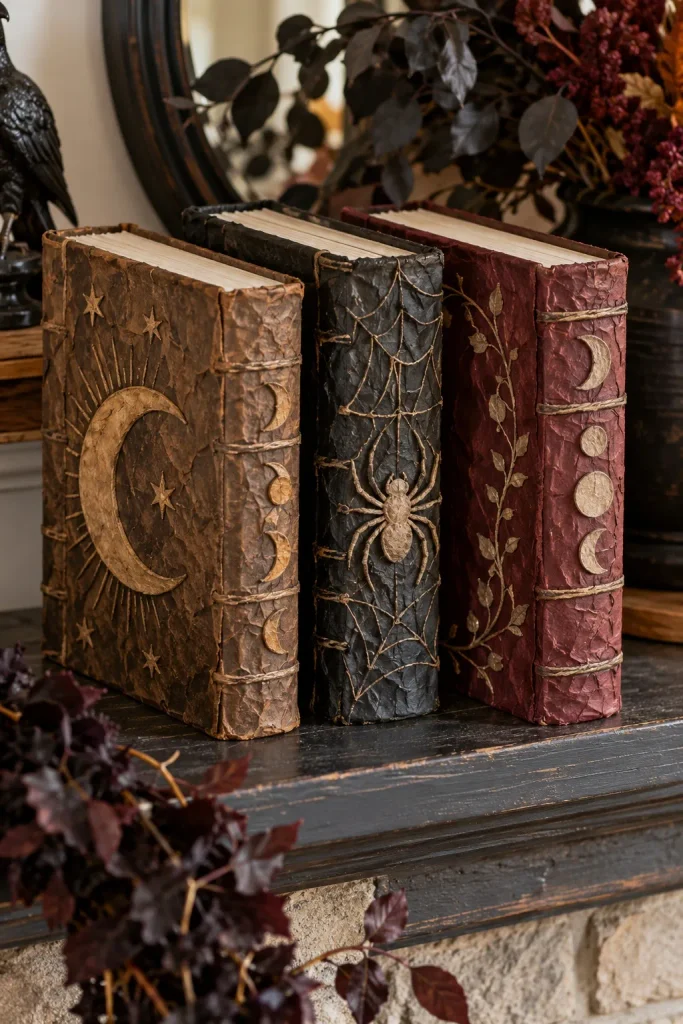
Empty cereal boxes can become chunky decorative books for a Halloween shelf. Cover the printed surfaces, add raised cardboard moons or spiders, and use lightly wrinkled tissue paper for a worn-cover texture. Brown, burgundy, and black paint make the boxes look like a coordinated collection.
Close the flaps and add a little scrap cardboard inside if the boxes collapse when handled. Narrow cardboard panels extending past the box edges suggest book covers, while cream-painted sides suggest pages. Let glued paper dry fully before painting. These are lightweight display props, so lean them against a stable bookend rather than using them to support other decorations.
16. A Twisting Cardboard Halloween Tree
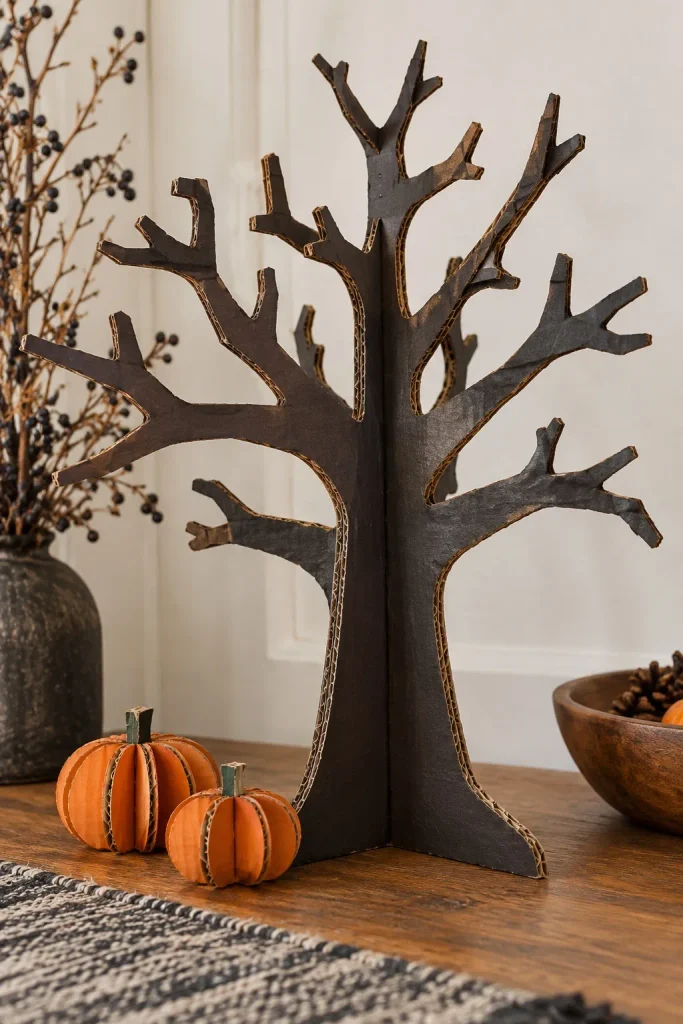
A bare-branched tree creates a taller centerpiece for a shelf or table without needing a real branch. Two slotted cardboard silhouettes set at right angles give it depth from several viewpoints. Charcoal-brown paint and uneven branch shapes suggest an eerie woodland scene, especially against a light wall.
Keep the trunk wide and the branches short enough that they do not droop under their own weight. Test the slot connection with scrap cardboard before cutting the final pieces. The tree needs a broad, level base, and heavy hanging ornaments can upset its balance. Small cardboard pumpkins placed underneath add color without loading the branches.
17. A Layered Moon-and-Ghost Shadow Box
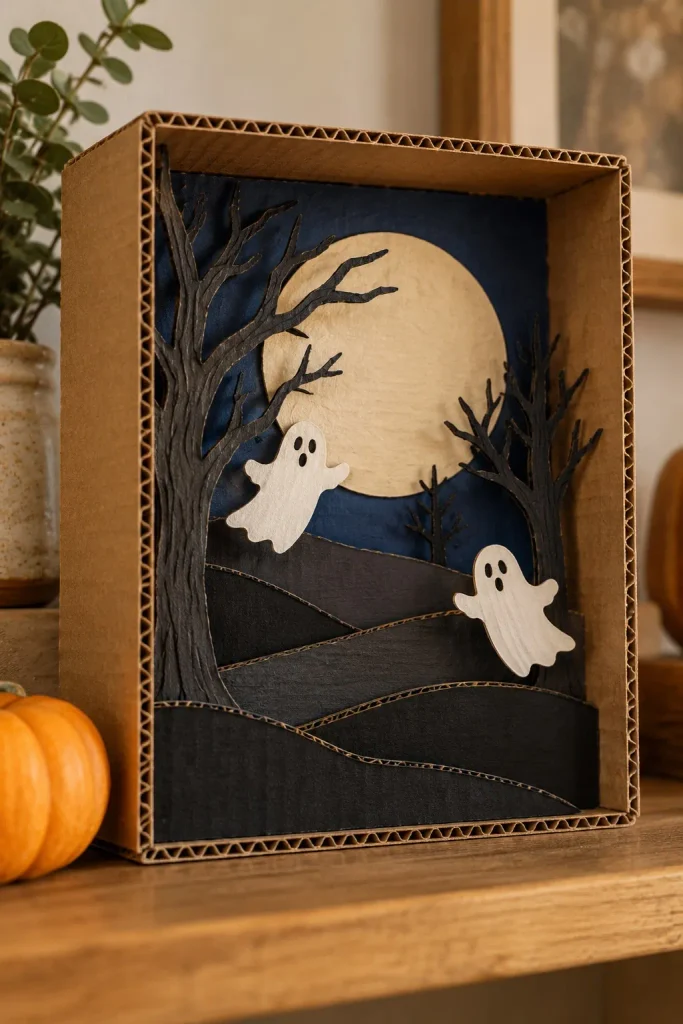
A shallow cardboard box becomes a miniature nighttime scene with a cream moon, dark hills, bare trees, and two white ghosts. Spacing the layers apart creates real shadows, so the scene has depth even without added lighting. It is a good choice for a shelf where visitors can see the details up close.
Plan the background first, then arrange the foreground pieces before gluing. Folded cardboard tabs or small spacer blocks can hold the layers apart, hidden behind the hills and tree trunks. Keep the ghost shapes simple and bright against the darker scenery, and display the box upright on a stable, dry surface.
Before You Start: Choose the Right Cardboard
Use clean, dry packaging and remove staples before working. Thin cereal-box cardboard suits smaller cutouts, garland faces, and curved details. Corrugated shipping boxes suit standing props and layered structures. Save broad, uncreased panels for the biggest shapes and reserve small scraps for braces, borders, and spacer tabs.
Make a paper pattern or scrap prototype before committing your largest panel. Apply paint in light coats, allowing each coat to dry according to the product directions. Adults should handle craft-knife cutting on a suitable cutting mat; children can help plan faces and paint prepared pieces with age-appropriate materials.
Can Cardboard Halloween Decorations Go Outside?
Treat them as temporary dry-weather decorations, even when painted. A covered porch may still get windblown rain, dew, or dampness from the ground. Bring cardboard props inside overnight and whenever the weather changes. For a display that must stay in the yard throughout October, choose a material intended for outdoor use instead.
Lighting and Placement That Keep the Fun Practical
Use battery-operated lights for glowing decorations, and keep cardboard away from flames, heaters, and other heat sources. Follow the light manufacturer’s directions and keep switches and battery compartments accessible. Do not block exits, walking paths, or doors and windows needed for escape. These precautions follow the National Fire Protection Association’s Halloween safety guidance.
Save Your Favorites and Start with One Display
Choose the project that matches your cardboard supply and the spot you want to decorate. A bat wall or ghost mobile makes a straightforward starting point, while a haunted house or shadow box leaves room for more detail. Save your favorite ideas, keep useful scraps, and build a Halloween display one piece at a time.