
A stack of construction paper can go a long way when you want something hands-on for Thanksgiving. You might need a quiet afternoon project, a shared family activity, or a few handmade details for the table. These Thanksgiving paper crafts cover folded shapes, textured collages, woven paper, and gratitude displays, so you can choose a project that suits your supplies and the people joining in.
Some ideas invite younger children to tear, arrange, and glue, while others call for more careful folding or adult-prepared cuts. Use the examples as inspiration, adjust the details to your group, and let the handmade edges show.
1. Accordion-Fan Paper Turkey
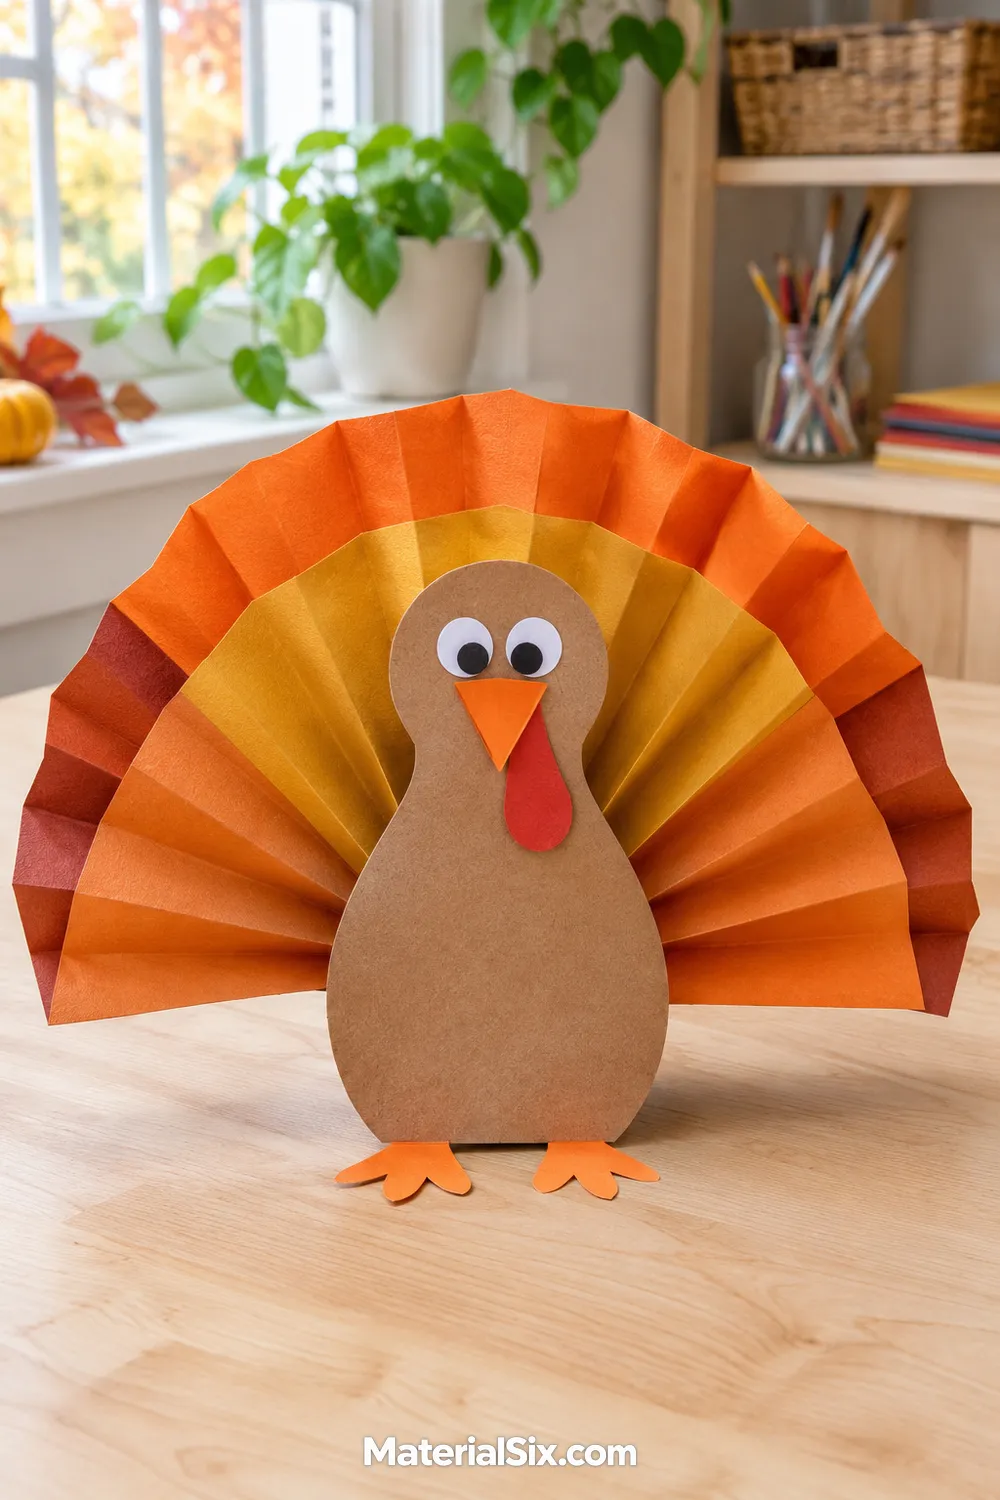
A folded paper fan gives this turkey a tail that stands out from the page. Choose orange, rust, and golden yellow paper, then pair the fan with a simple brown cardstock body. A flat base or folded tab helps the finished bird sit on a shelf or dining table.
Keep the body fairly small so the folds remain the main feature. You can prepare the fan folds ahead of time for younger children and let them arrange the face. Make one larger turkey as a centerpiece or several smaller birds for a windowsill display. Set finished pieces aside until the glue holds.
2. Handprint Harvest Wreath
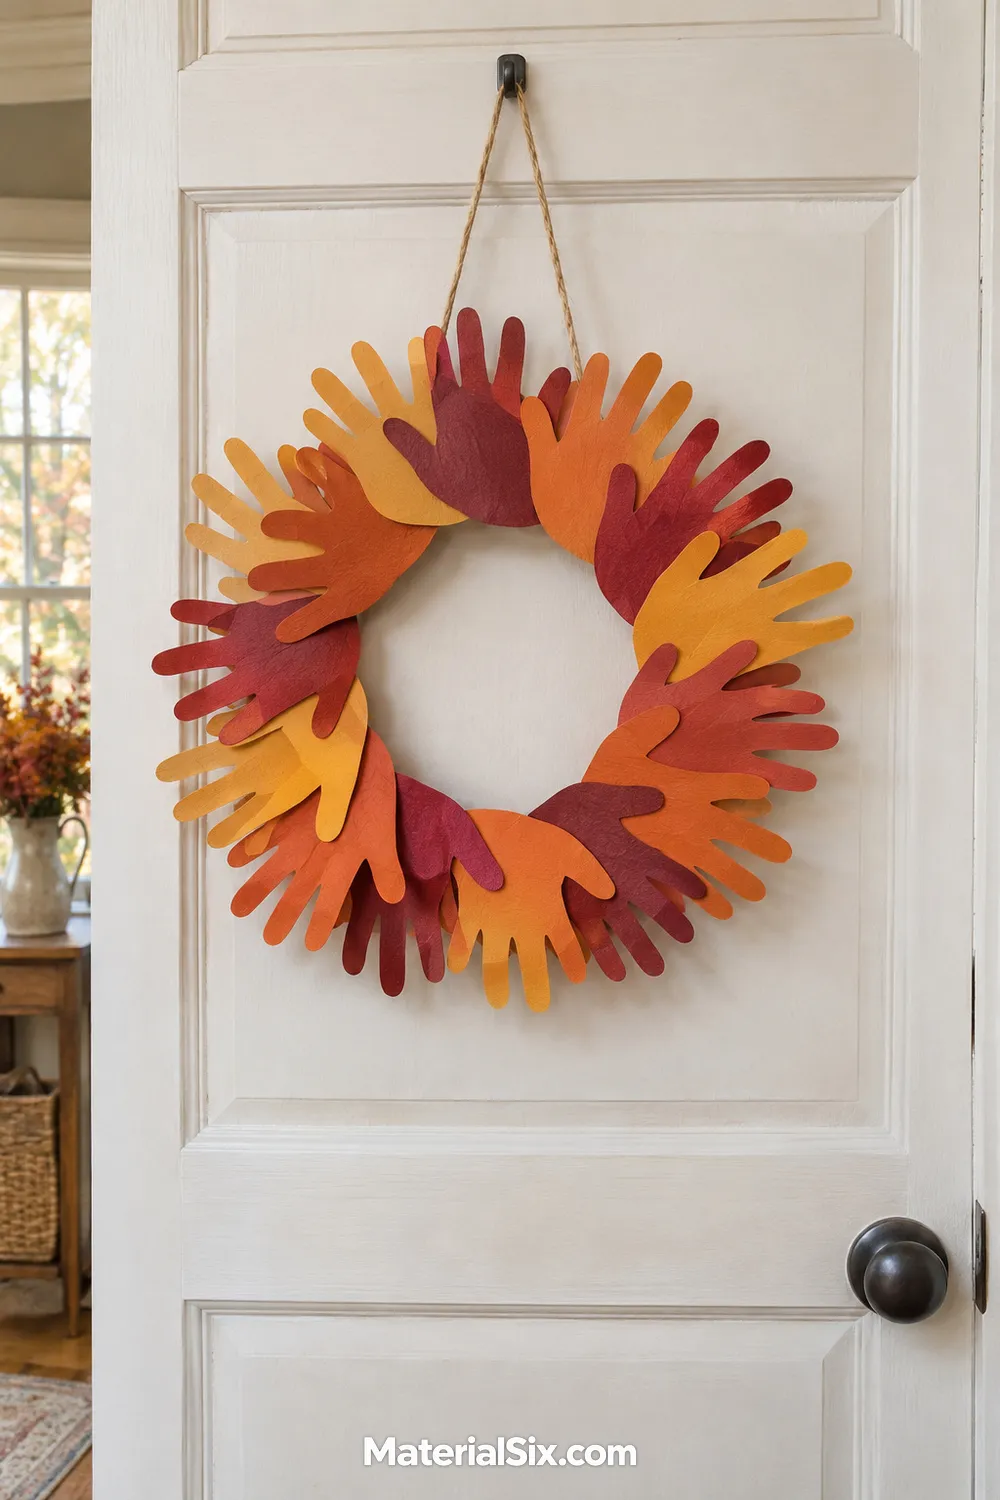
Paper handprints make a wreath feel personal without needing a complicated pattern. Trace hands onto construction paper in several autumn colors, cut out the shapes, and overlap them around a sturdy paper ring. Turning the fingertips outward gives the wreath a leafy edge.
Use a ring wide enough to support the glued pieces while leaving an open center. Mix larger and smaller handprints if family members want to contribute. A short ribbon loop makes the wreath easy to hang on an interior door. For a group project, put names on the back so the front keeps its simple harvest look.
3. Thankful Paper Chain
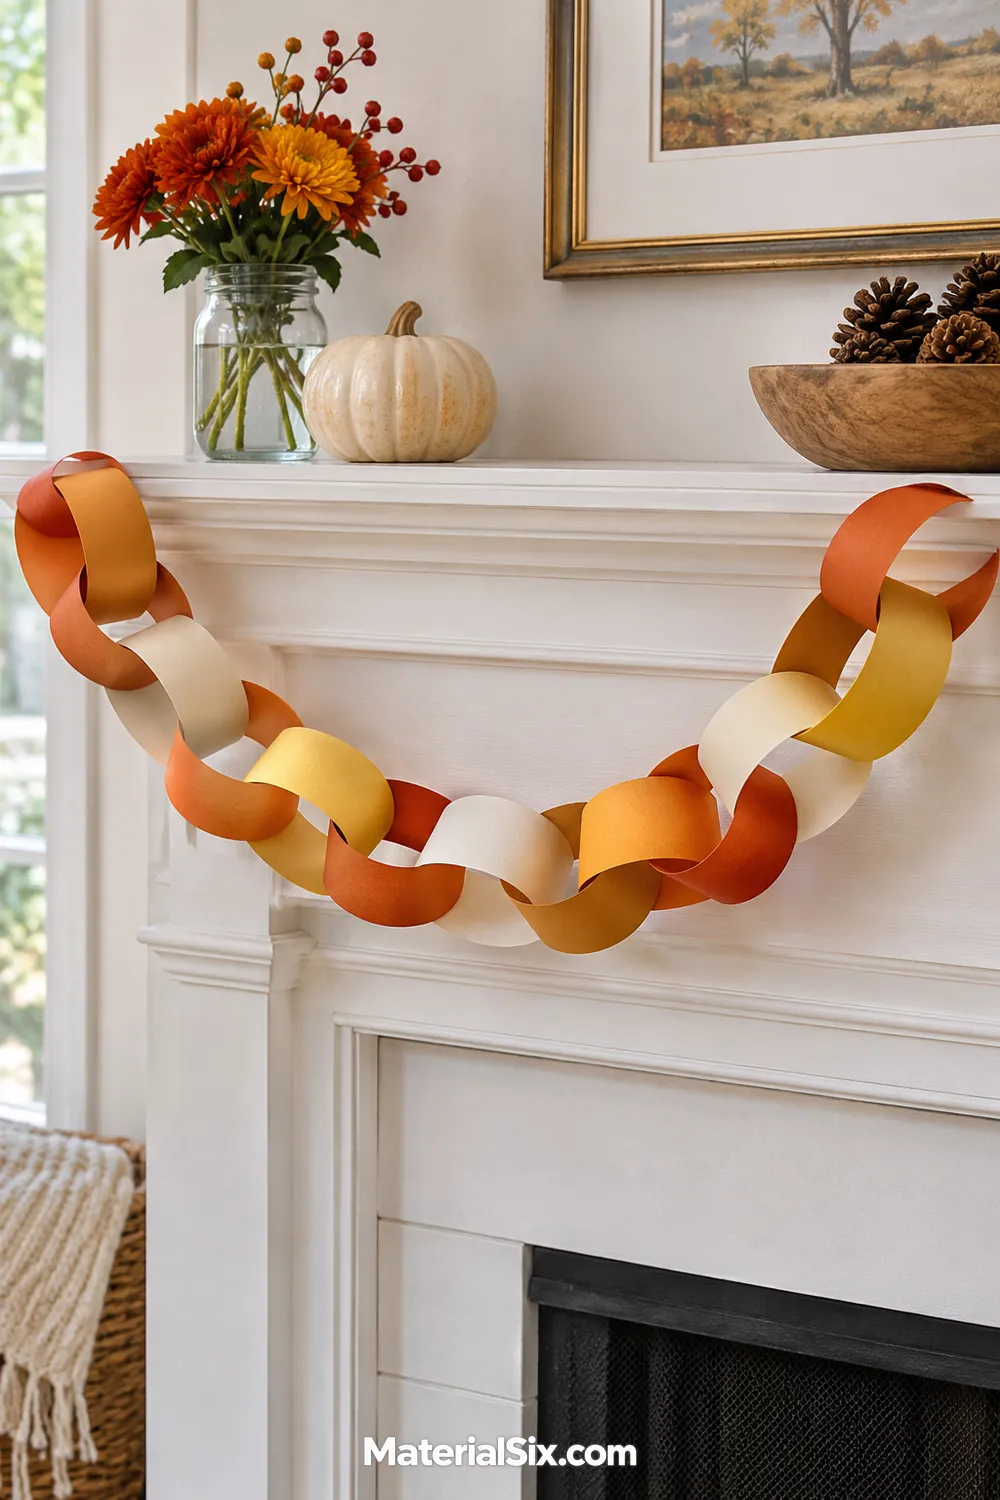
A paper chain turns gratitude into something you can build a little at a time. Cut broad strips from autumn-colored paper and invite everyone to add a thought before linking the loops. Hang the growing chain along a mantel or across a dining room wall.
Leave enough blank space on each strip for a short message, and keep the loops loose enough to see their shape. Younger children can dictate their thoughts to an adult or add small drawings instead. Choose a few coordinating colors to make separate contributions feel connected. Store the finished chain loosely to avoid crushing the loops.
4. Looped Paper Pumpkins
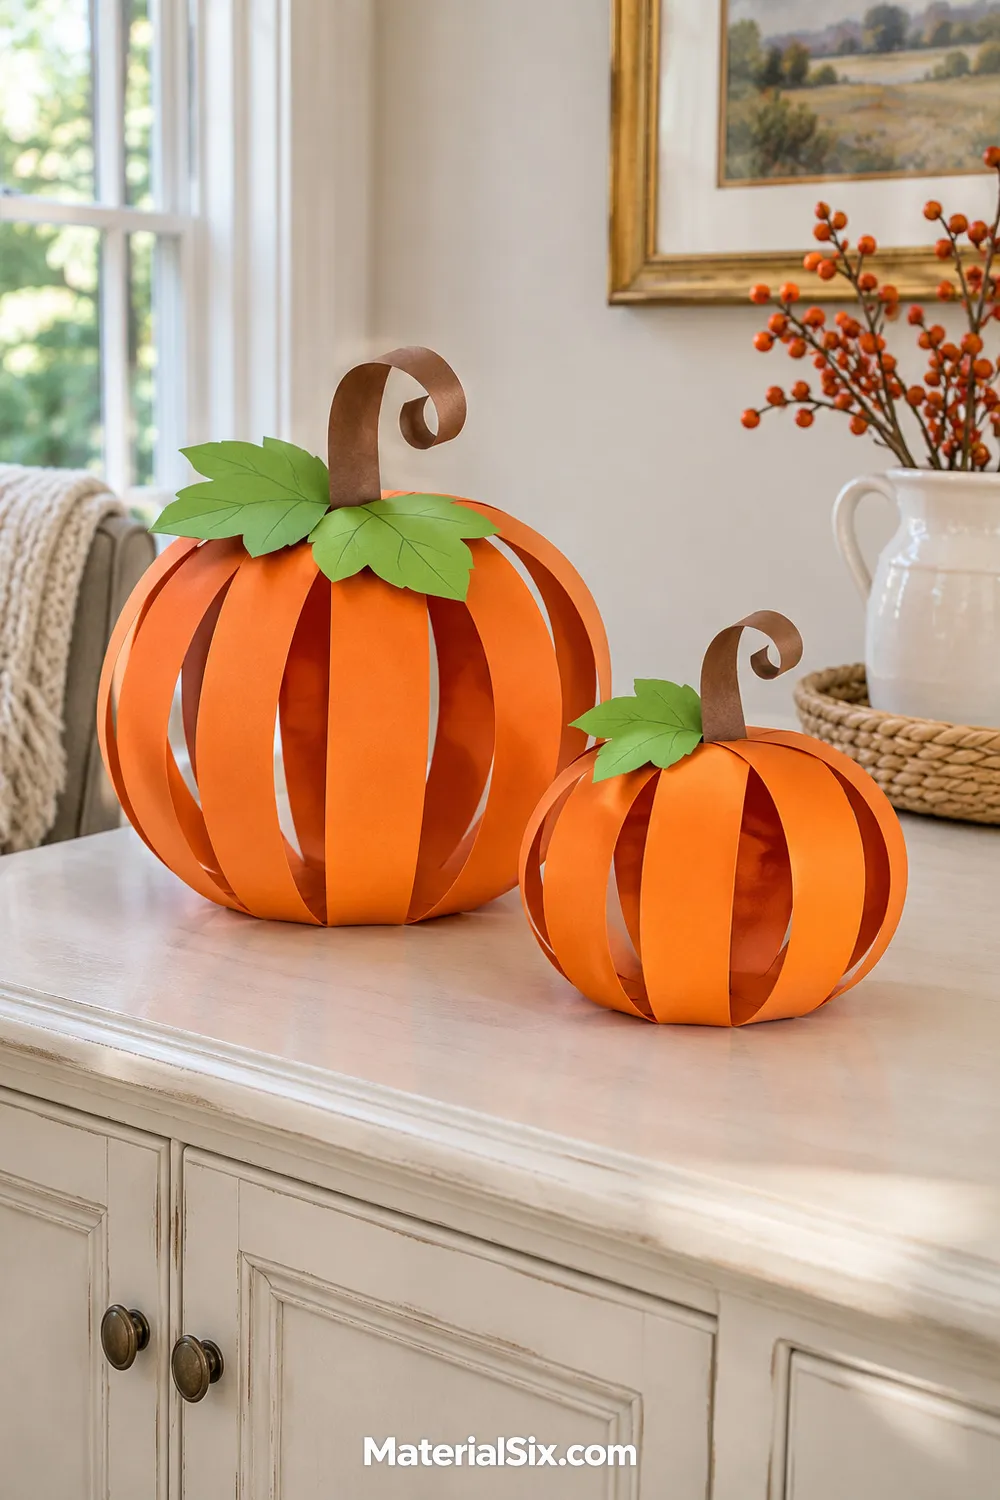
Curved strips of paper create a rounded pumpkin with open spaces between its ribs. Use orange cardstock for a firmer shape, with a small green leaf and a curled paper stem at the top. The airy construction makes these pumpkins different from a flat cutout.
Try a short, wide pumpkin beside a taller one to give your display variety. Keep the strips similar in width so the curve looks balanced, and use an adult-prepared fastening method if the design needs holes. These pieces work well on a sideboard or classroom shelf. Lift them from underneath so the paper ribs keep their shape.
5. Tissue-Paper Leaf Suncatchers
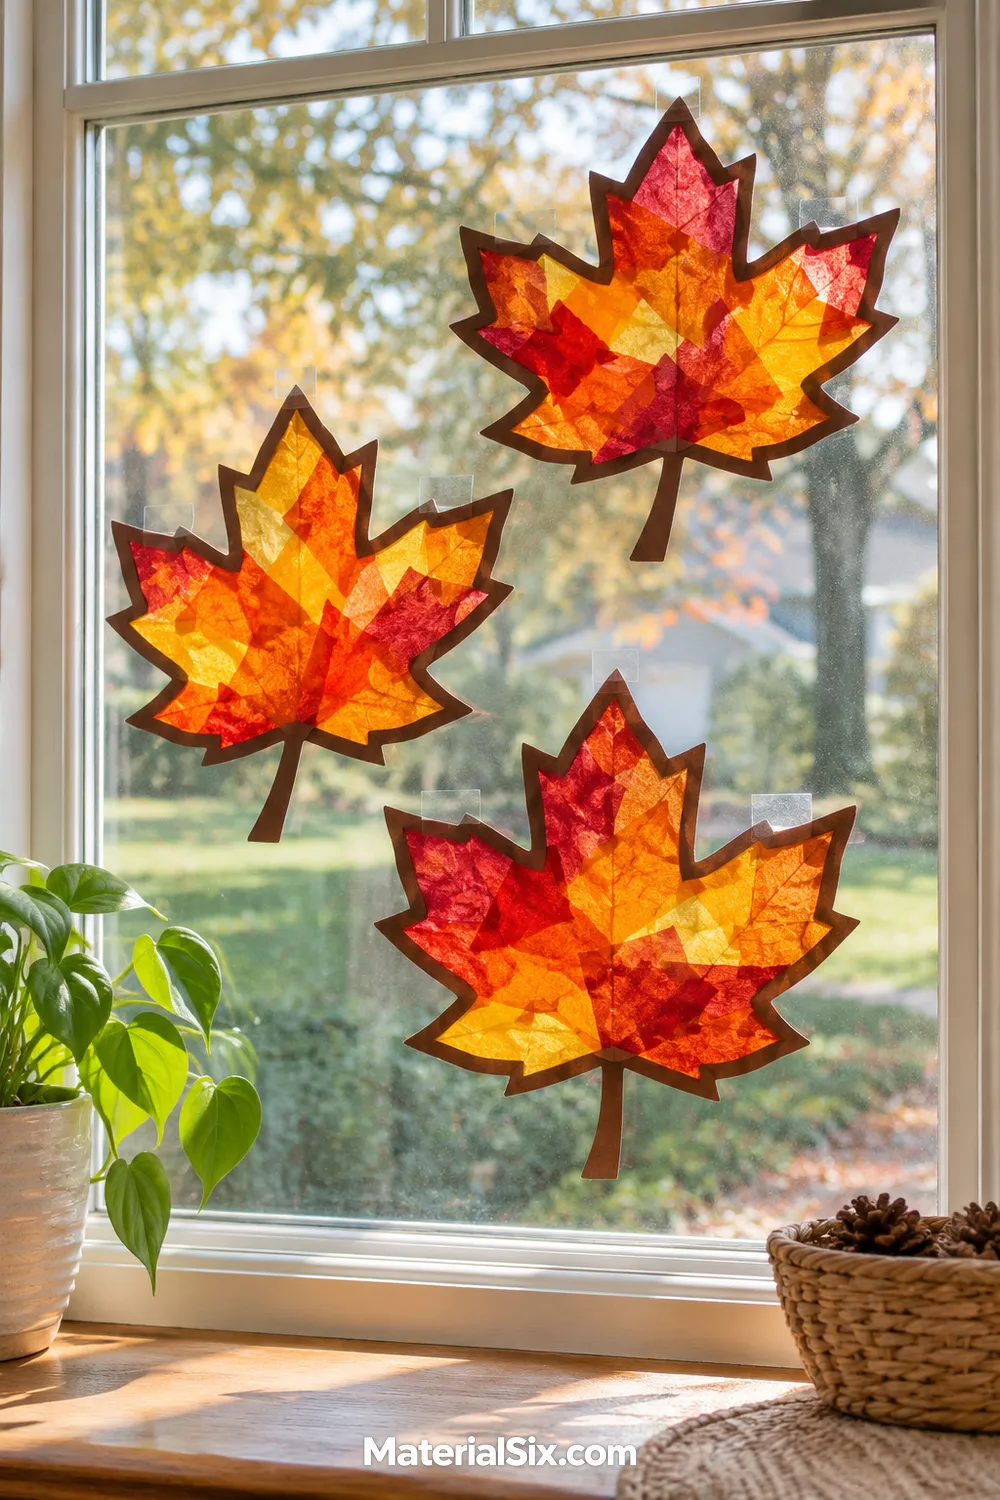
A dark paper leaf outline gives translucent tissue pieces a clear shape. Fill the center with overlapping scraps in yellow, orange, and red, using a transparent backing that holds the pieces in place. Daylight makes the layered colors easier to see.
Choose a broad leaf silhouette rather than one with many tiny points. Larger openings leave more room for little hands to arrange tissue paper. Hang the finished leaves against an indoor window, where the outlines stay visible against the light. Check your backing material before choosing glue, and keep adhesive on the craft rather than applying it directly to the glass.
6. Torn-Paper Harvest Corn
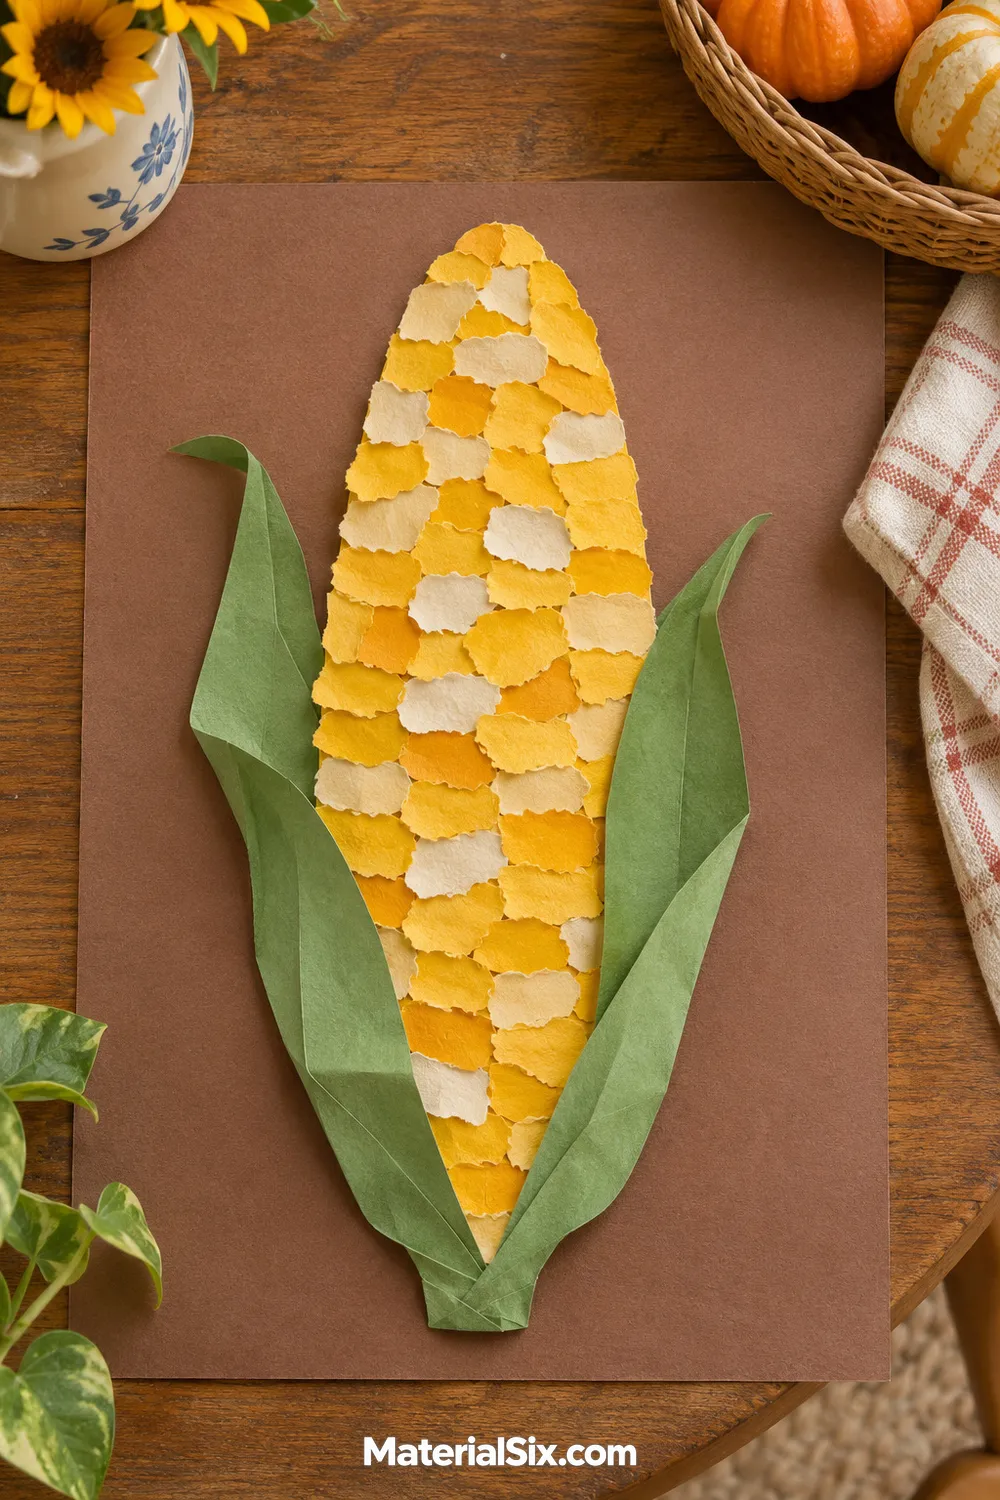
Small torn paper pieces give a corn cob a textured surface without requiring careful cutting. Start with a long oval base and fill it with yellow, cream, and a few muted brown scraps. Add folded green paper husks around the bottom and sides.
Leave the torn edges visible instead of trying to make every piece match. A slightly darker background helps the pale kernels stand out, especially if you plan to hang the finished craft on a wall. Prepare a shallow tray for the scraps to keep the workspace manageable. This is a useful choice when children would rather tear and arrange paper than follow detailed outlines.
7. Paper-Plate Pumpkin Pie Slice
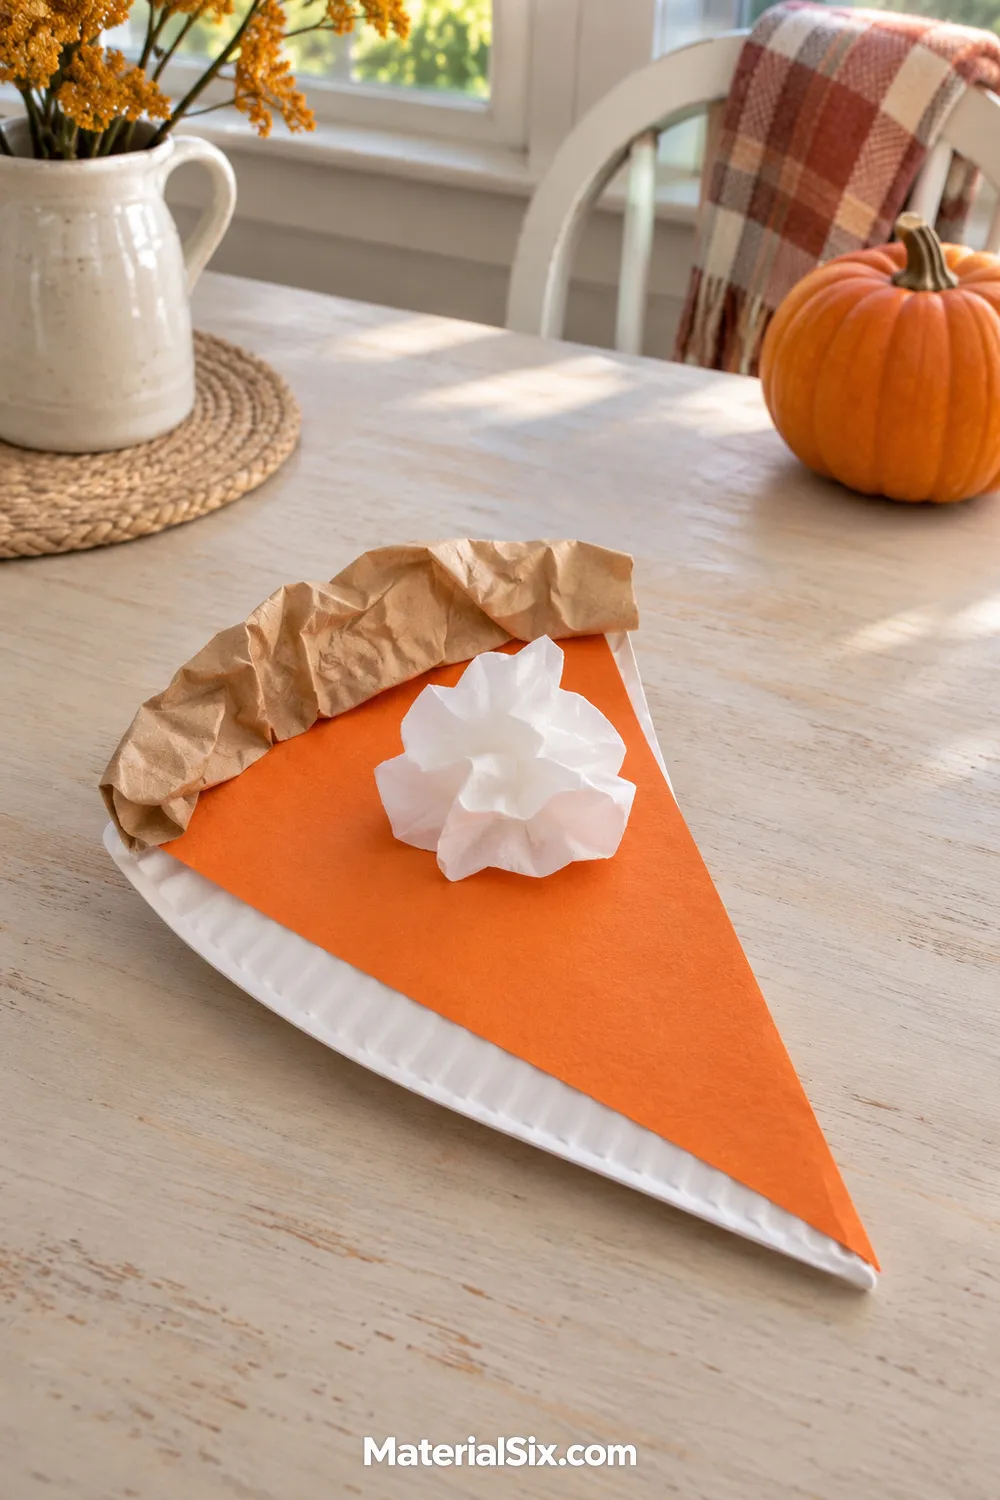
Turn a wedge of paper plate into pumpkin pie with orange paper filling and a crinkled kraft-paper crust. A small puff of white tissue paper finishes the slice. The curved plate edge gives you a ready-made outer crust line.
Make the filling slightly smaller than the plate wedge so a border remains visible. Scrunching the crust paper adds a useful texture contrast against the smooth center. Display several slices in a loose circle, or use a single piece as playful kitchen decor. Have an adult handle any firm plate cutting, then let children choose and arrange the paper details before gluing them down.
8. Standing Cone Turkey
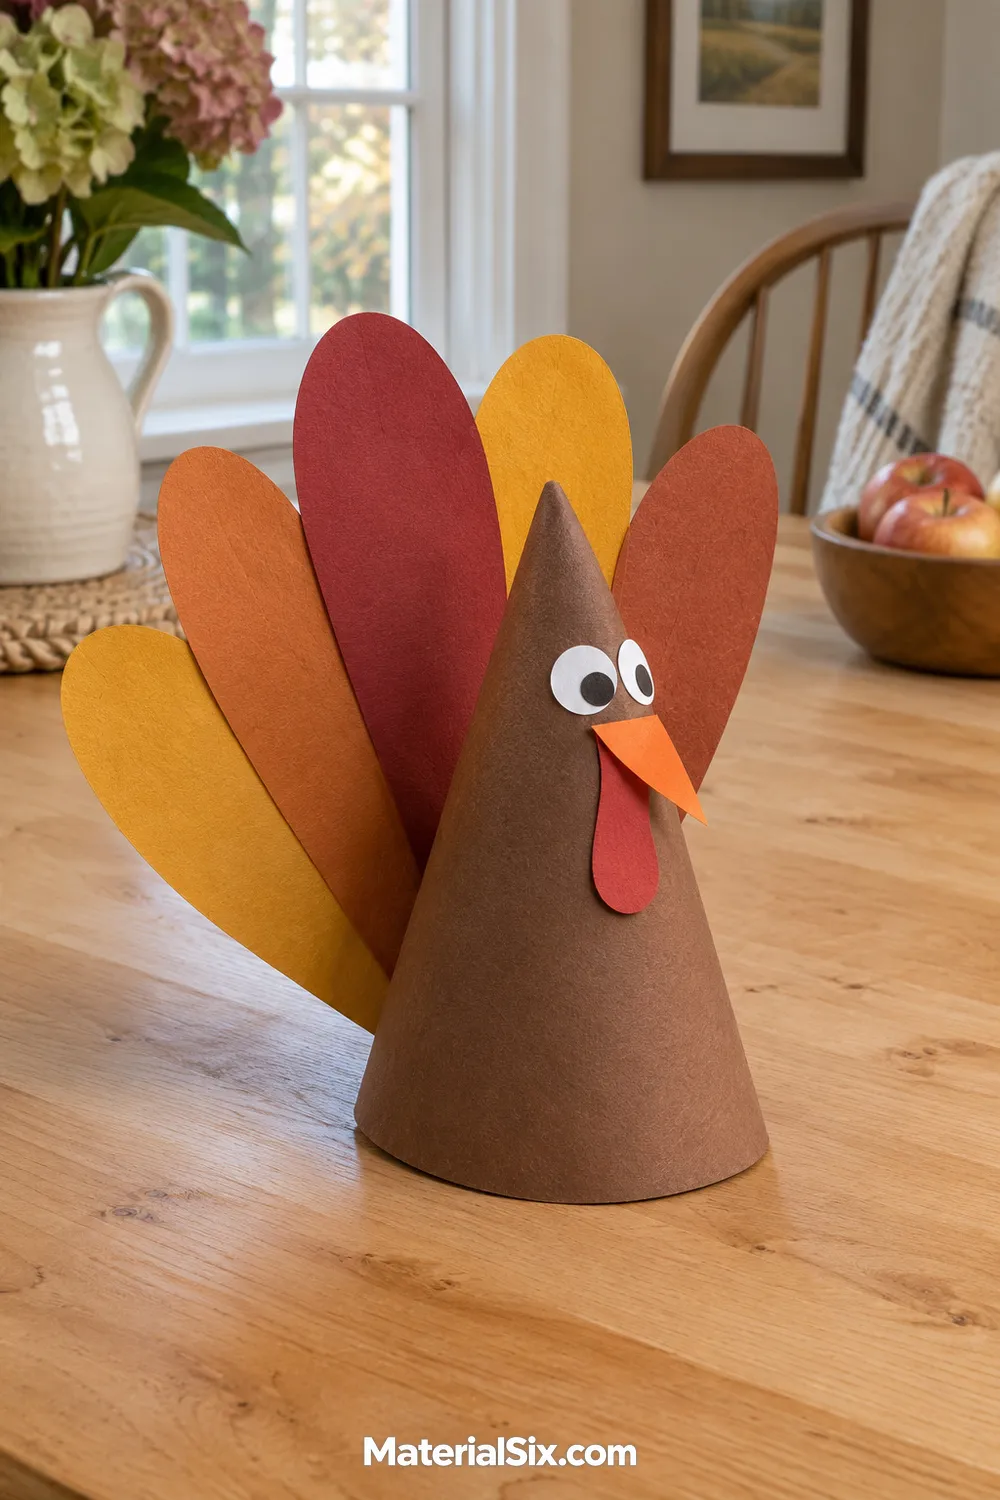
A rolled cardstock cone creates a turkey that can stand on its own. Attach a small paper face near the point and arrange broad, flat feathers behind the body. Unlike a fan turkey, this version gets its shape from the rounded cone.
Use sturdy paper for the body and lighter construction paper for the feathers. A wide cone base is easier to balance than a narrow one. If you want a row of birds, vary the feather colors while keeping the bodies the same size. Check that the feather assembly does not pull the turkey backward before the glue dries. A tabletop display keeps the three-dimensional shape visible.
9. Accordion-Leaf Garland
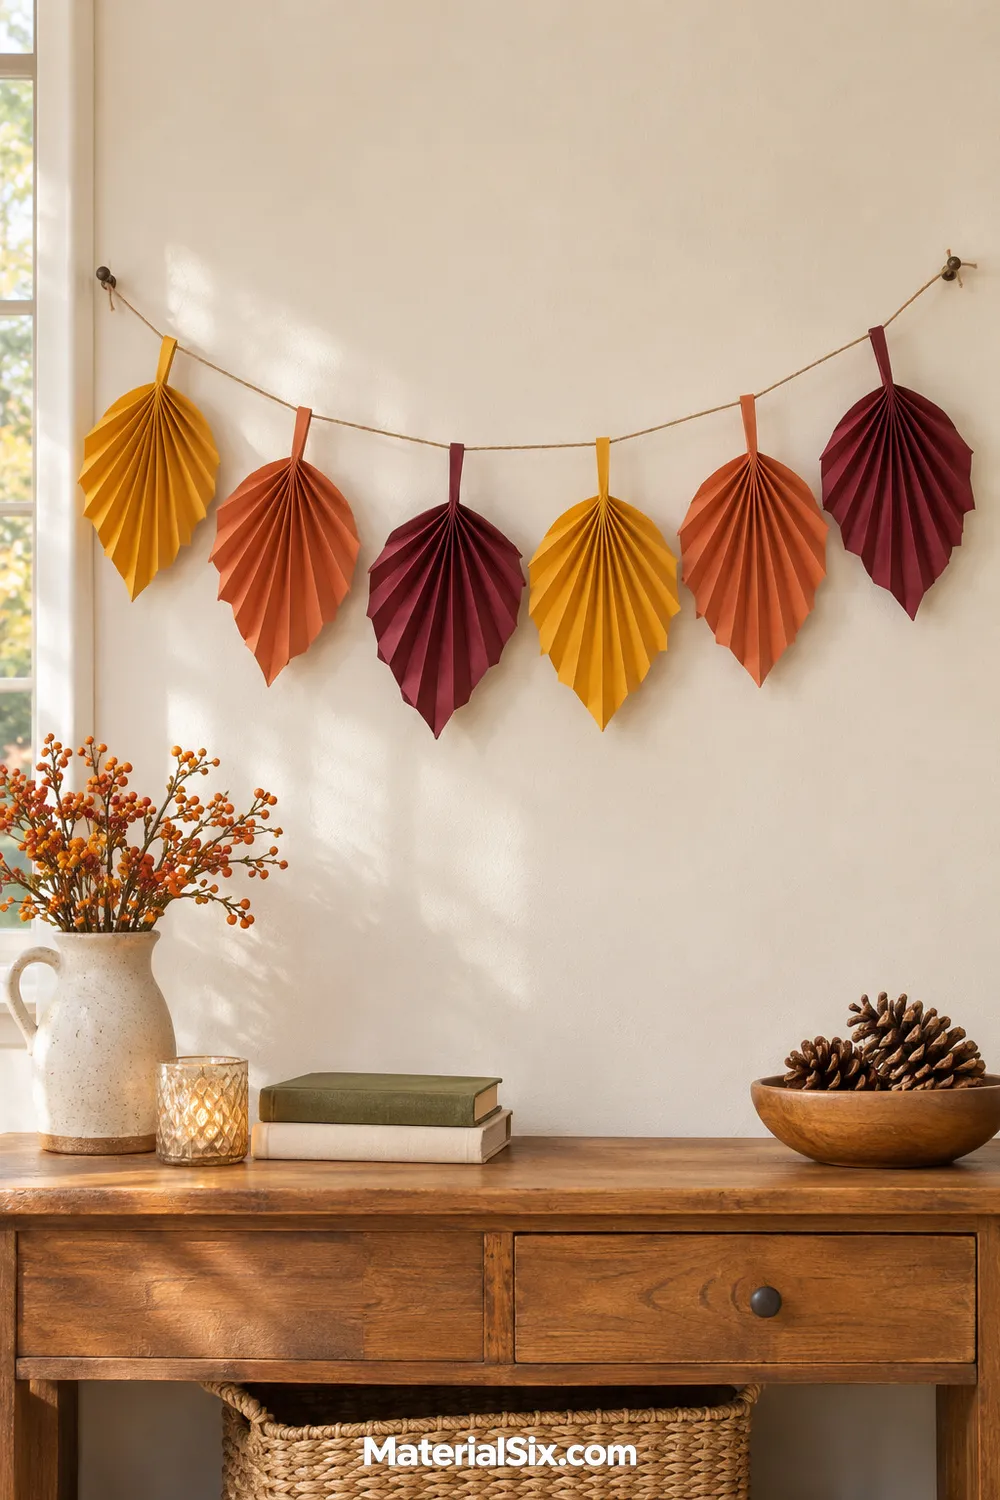
Folded leaves bring texture to a paper garland without adding much weight. Choose simple leaf shapes in two or three colors, then add accordion folds that open into a ribbed surface. Space the leaves along twine so each silhouette stays recognizable.
Let the leaves face slightly different directions for a relaxed arrangement. A mantel, shelf edge, or wall above a serving table gives the garland room to drape. Attach the twine near the stem end rather than across the middle of each leaf. Keep the span short enough to support its own weight, and use an indoor spot where the paper stays dry.
10. Woven Paper Placemat
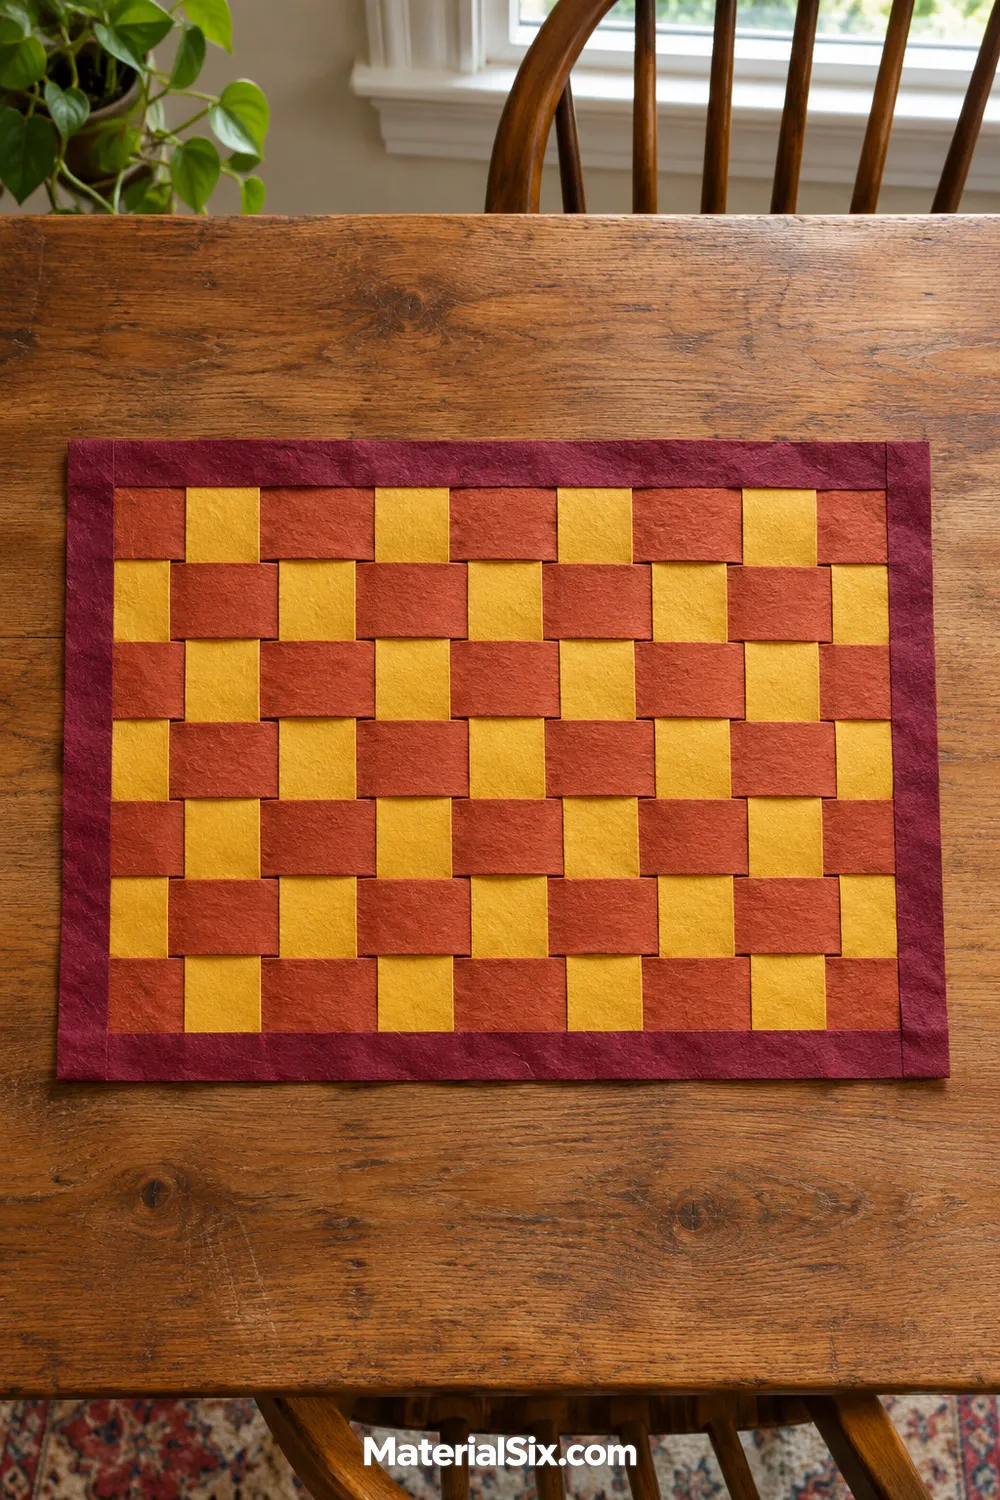
Paper weaving adds an activity to your table preparations and creates a flat piece you can display afterward. Alternate wide strips of rust and golden paper through a simple slotted base. A contrasting border helps the woven center look finished.
Start with broad strips rather than narrow ones so the over-and-under pattern is easier to follow. An adult can prepare the slits while children choose the color order. Treat the finished piece as decorative table paper, since ordinary construction paper will not protect a surface from moisture or heat. Keep it away from wet dishes, and consider displaying it beneath a dry centerpiece instead of a place setting.
11. Gratitude Paper Tree
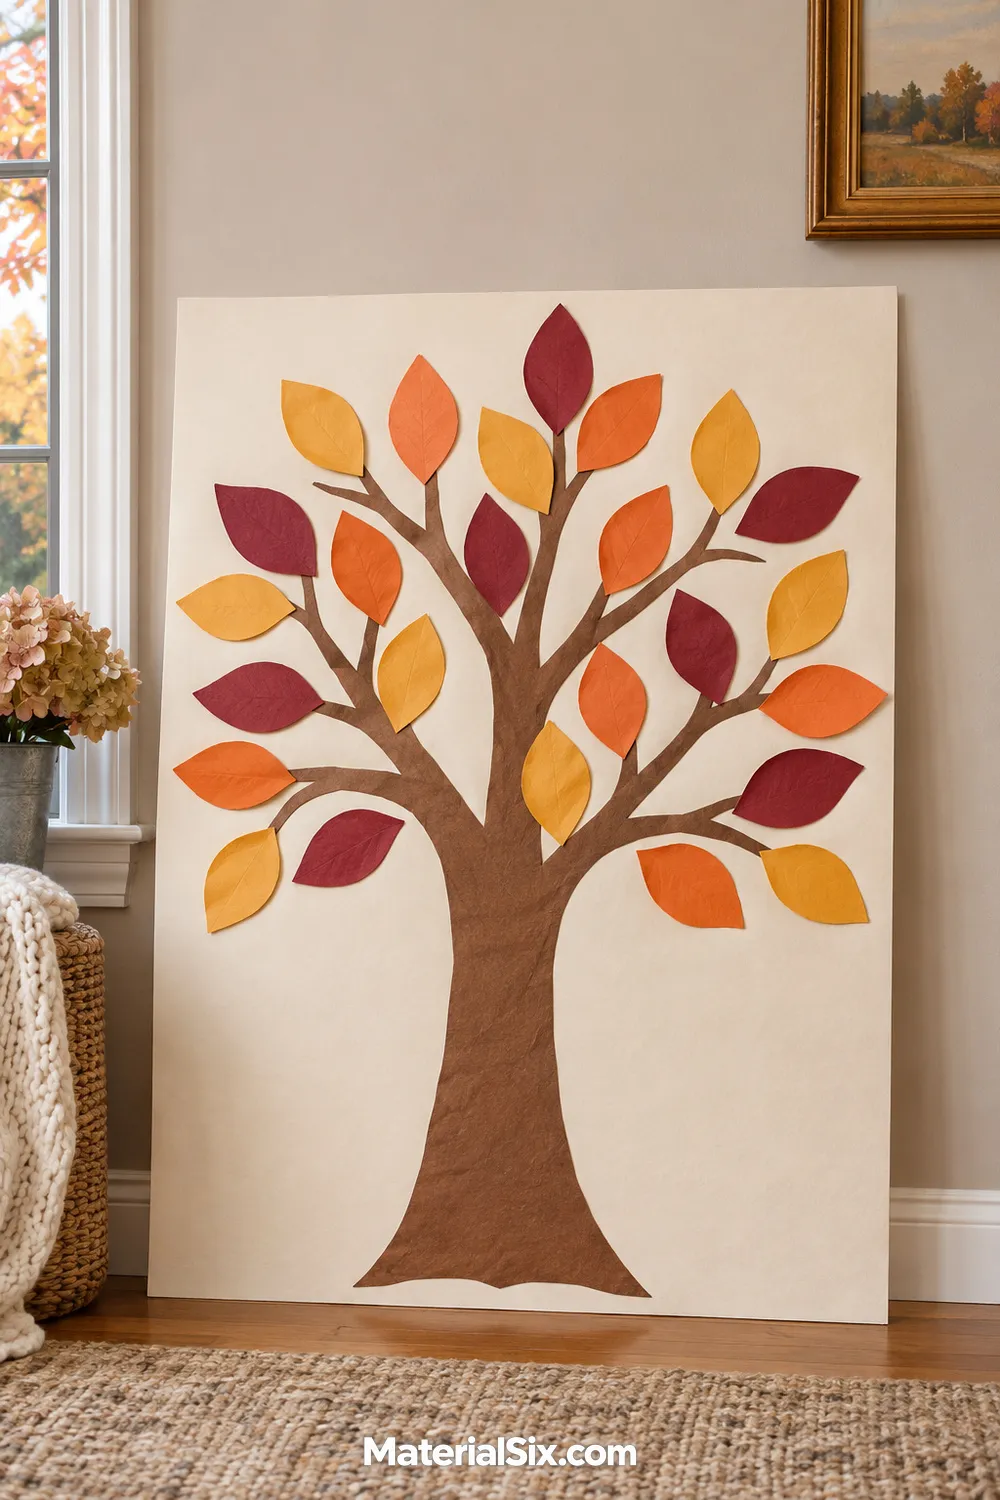
A paper tree gives everyone a place to add something they appreciate. Cut a sturdy trunk and branching shape from brown cardstock, then attach separate paper leaves as your family contributes. Mount the trunk on a larger sheet so the whole display stays together.
Keep the branches fairly broad so leaves have room to overlap without hiding the structure. You can add a few leaves each evening or fill the tree during a holiday gathering. Short notes belong on the leaves, but drawings work too. Place the finished tree where everyone can reach it, then save it flat as a record of the season.
12. Folded Paper Harvest Basket
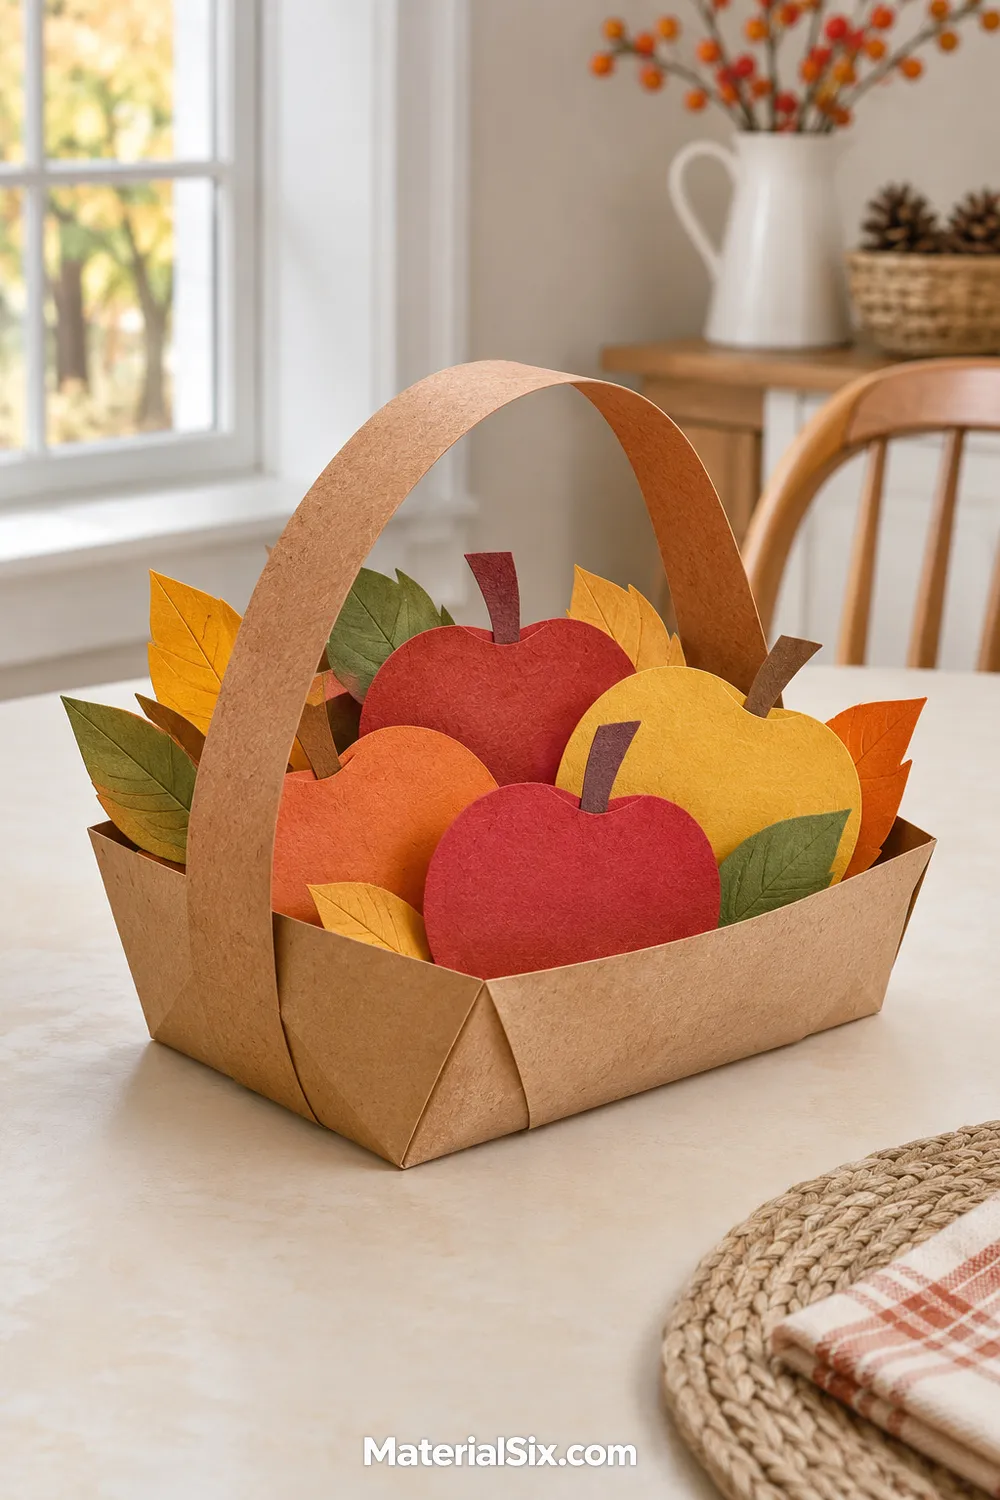
A small paper basket turns simple folding into a three-dimensional harvest display. Use cardstock for the folded base, add a broad handle, and tuck in lightweight paper leaves or flat paper fruit shapes. The open top gives you room to arrange the contents.
Choose a basket with a low, wide shape so it sits steadily on the table. Reinforce the handle attachment with another small paper patch if needed. Keep the contents decorative rather than using the basket to carry anything heavy. A few large shapes read more clearly than a crowded pile of tiny pieces, especially when the basket sits on a shelf.
13. Layered Paper Sunflower
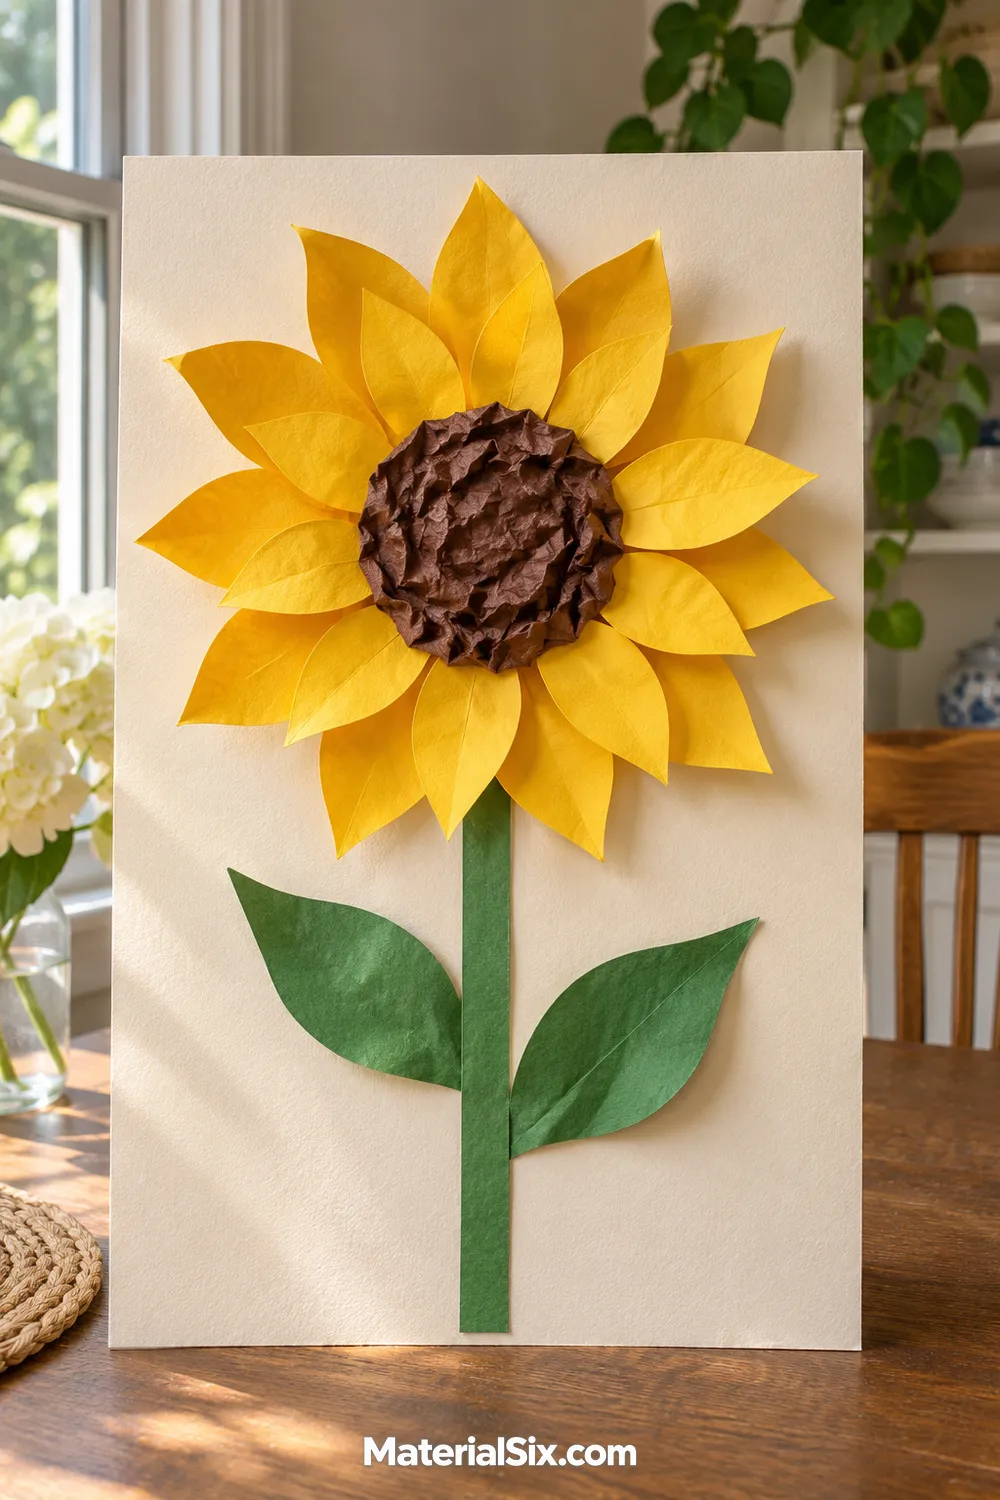
A sunflower offers a harvest theme that does not depend on turkey shapes. Layer yellow paper petals around a brown center, then add a green stem and leaves on a backing sheet. Slightly lifting the petal tips gives the flower more depth.
Use two petal sizes to keep the layers distinct, and offset the upper row so the lower petals still show. Small crumpled paper pieces can add texture to the center without needing loose seeds. Make one large flower as wall art or group several smaller versions above a craft table. Leave the stem simple so the flower head stays the main feature.
14. Paper Leaf Napkin Rings
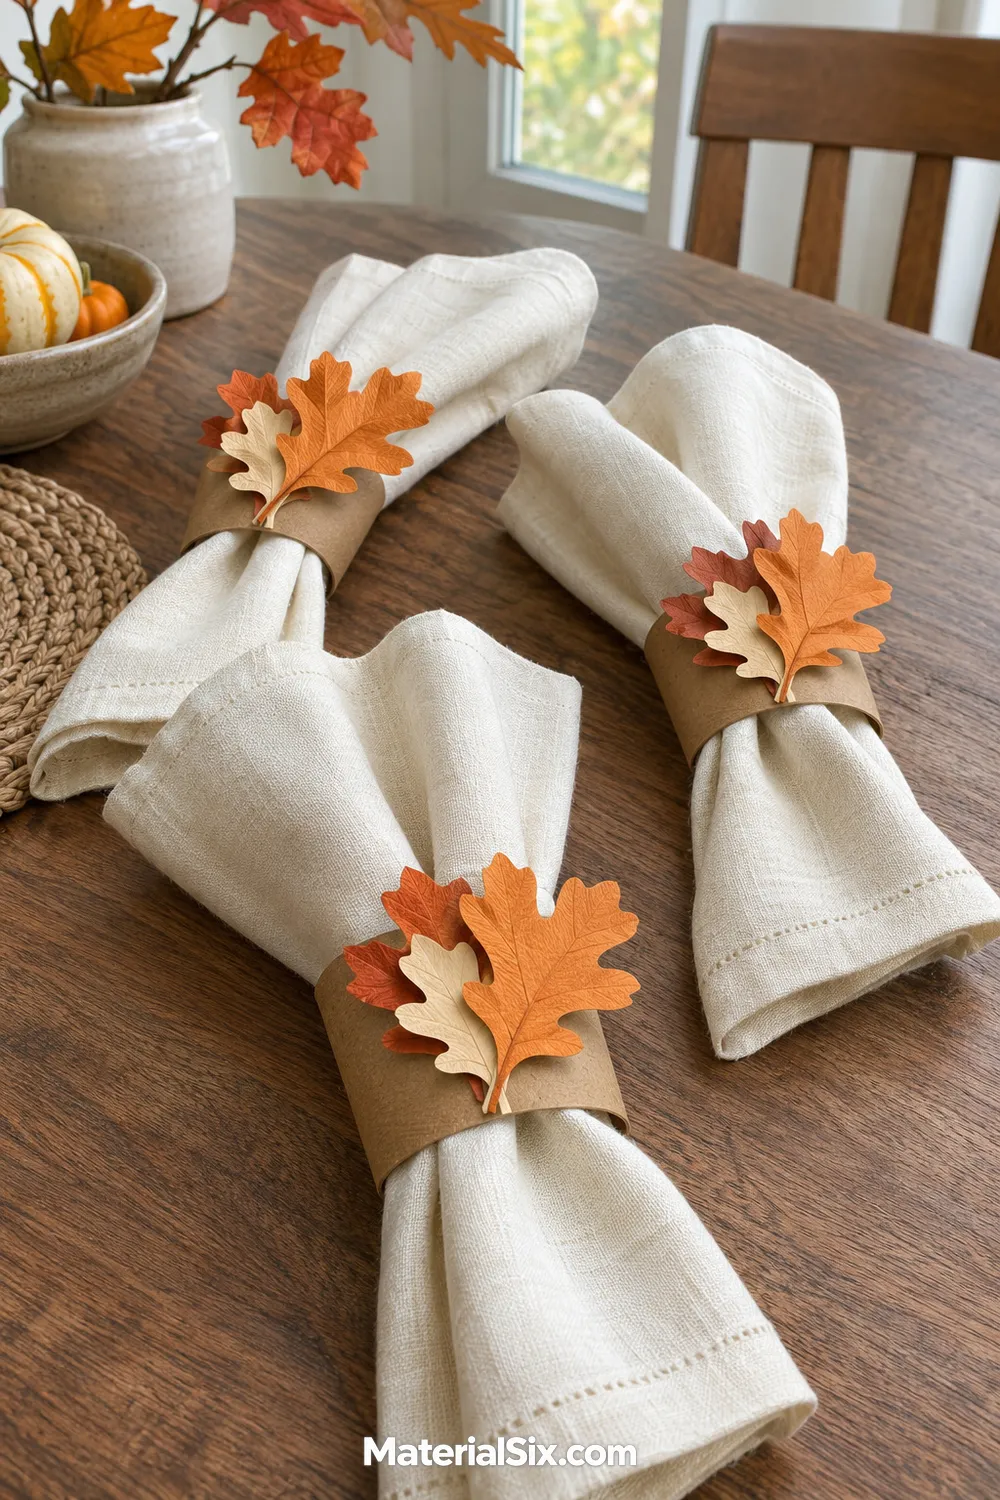
A simple paper band becomes table decor when you top it with a layered leaf. Use cardstock for the ring and a lighter paper for the leaf so the decoration stays easy to shape. Warm browns, muted orange, and cream work with many Thanksgiving table settings.
Wrap the band around a folded napkin before fastening it so you can judge the size. Leave it loose enough to slide off without tearing. A pair of overlapping leaves adds dimension without making the ring bulky. Assemble the bands before setting the table, and store extras flat until needed. Keep these paper decorations clear of candle flames and damp glassware.
15. Pop-Up Turkey Greeting Card
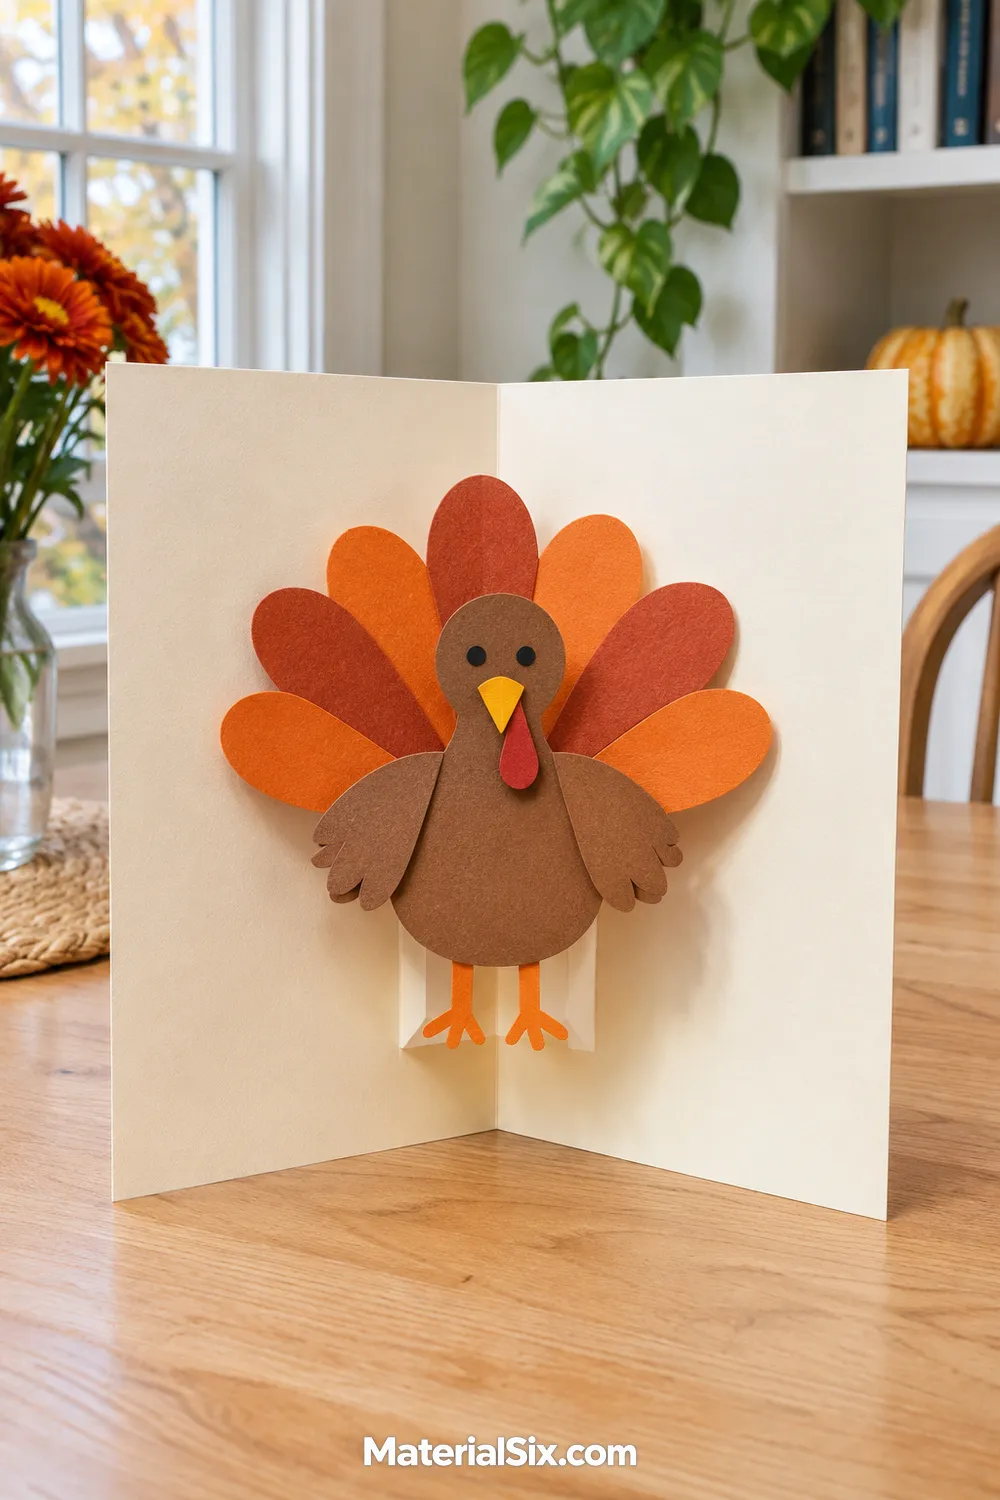
A pop-up card adds a surprise inside a familiar folded sheet. Use a simple folded support to bring a paper turkey forward when the card opens. Keep the surrounding decoration fairly flat so the raised shape has space to move.
Test the card gently before adding extra feathers or face details. Thick stacks of paper can stop it from closing, so choose just a few layers. The front can stay plain while a personal note goes inside. This is a good project to prepare with an adult if the support needs precise cuts. Display the finished card partly open so the dimensional turkey remains visible.
16. Paper Pocket Place Cards
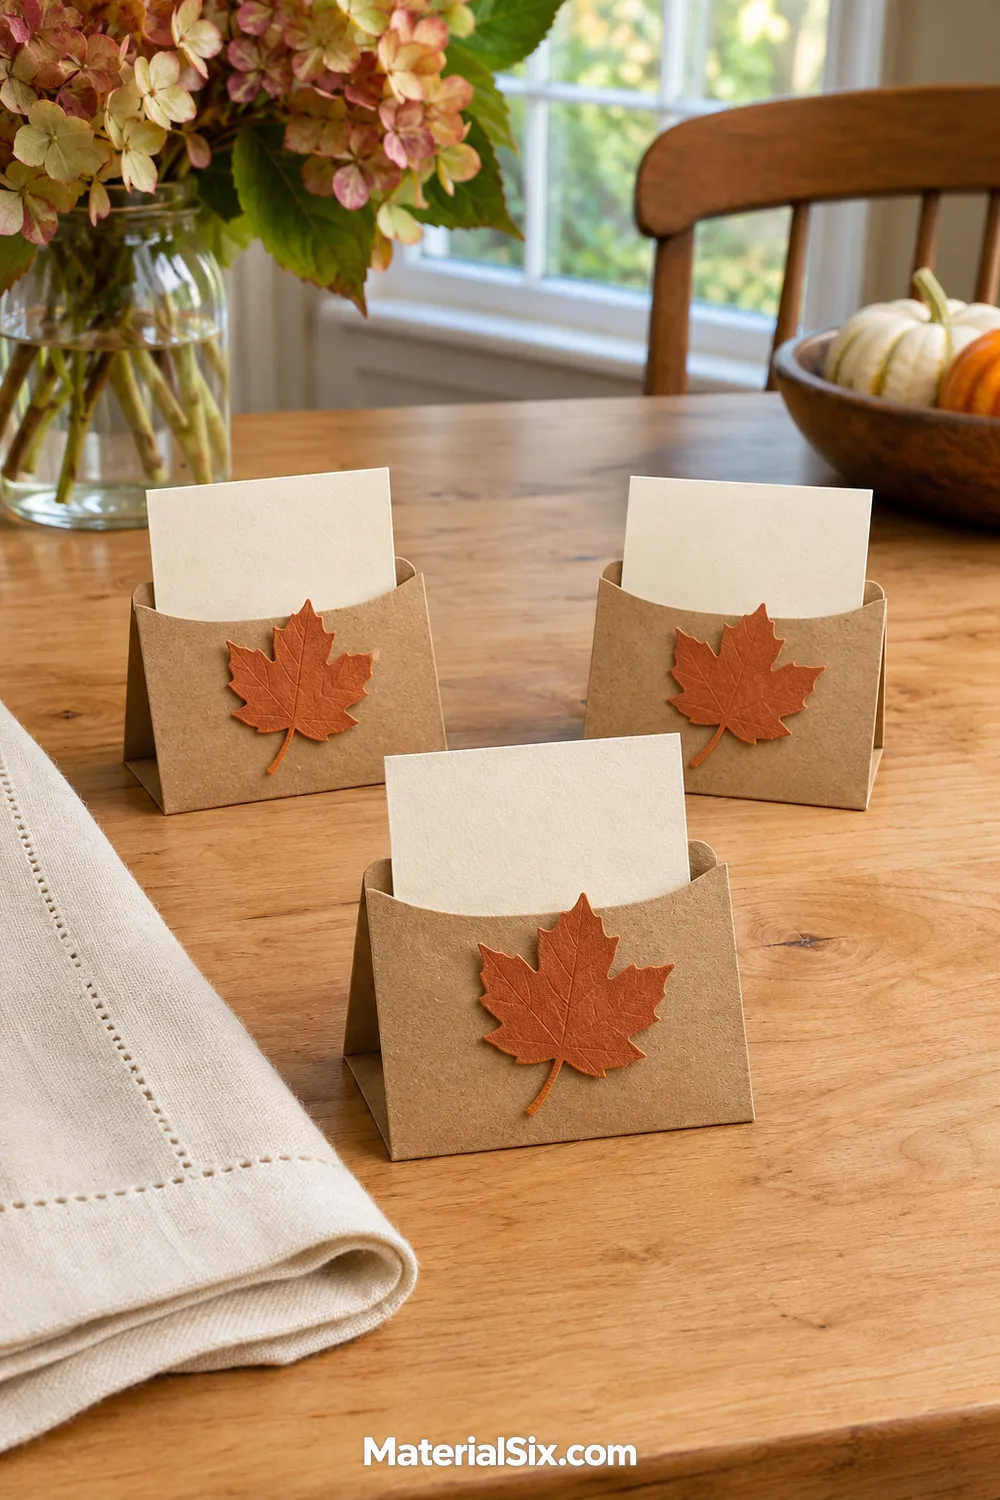
Fold a small paper pocket to hold a removable name card at each place setting. Add a single autumn leaf to the front so it feels seasonal without hiding the opening. The pocket gives this project a useful purpose beyond decoration.
Choose cardstock for the insert and a more flexible paper for the folded holder. Check the fit before gluing the sides, leaving a little space so the card slides out easily. Write guest names after the glue has dried. For a family activity, let each person choose a leaf color. Arrange the pockets upright against folded napkins or lay them flat beside the plates.
17. Patchwork Paper Gratitude Quilt
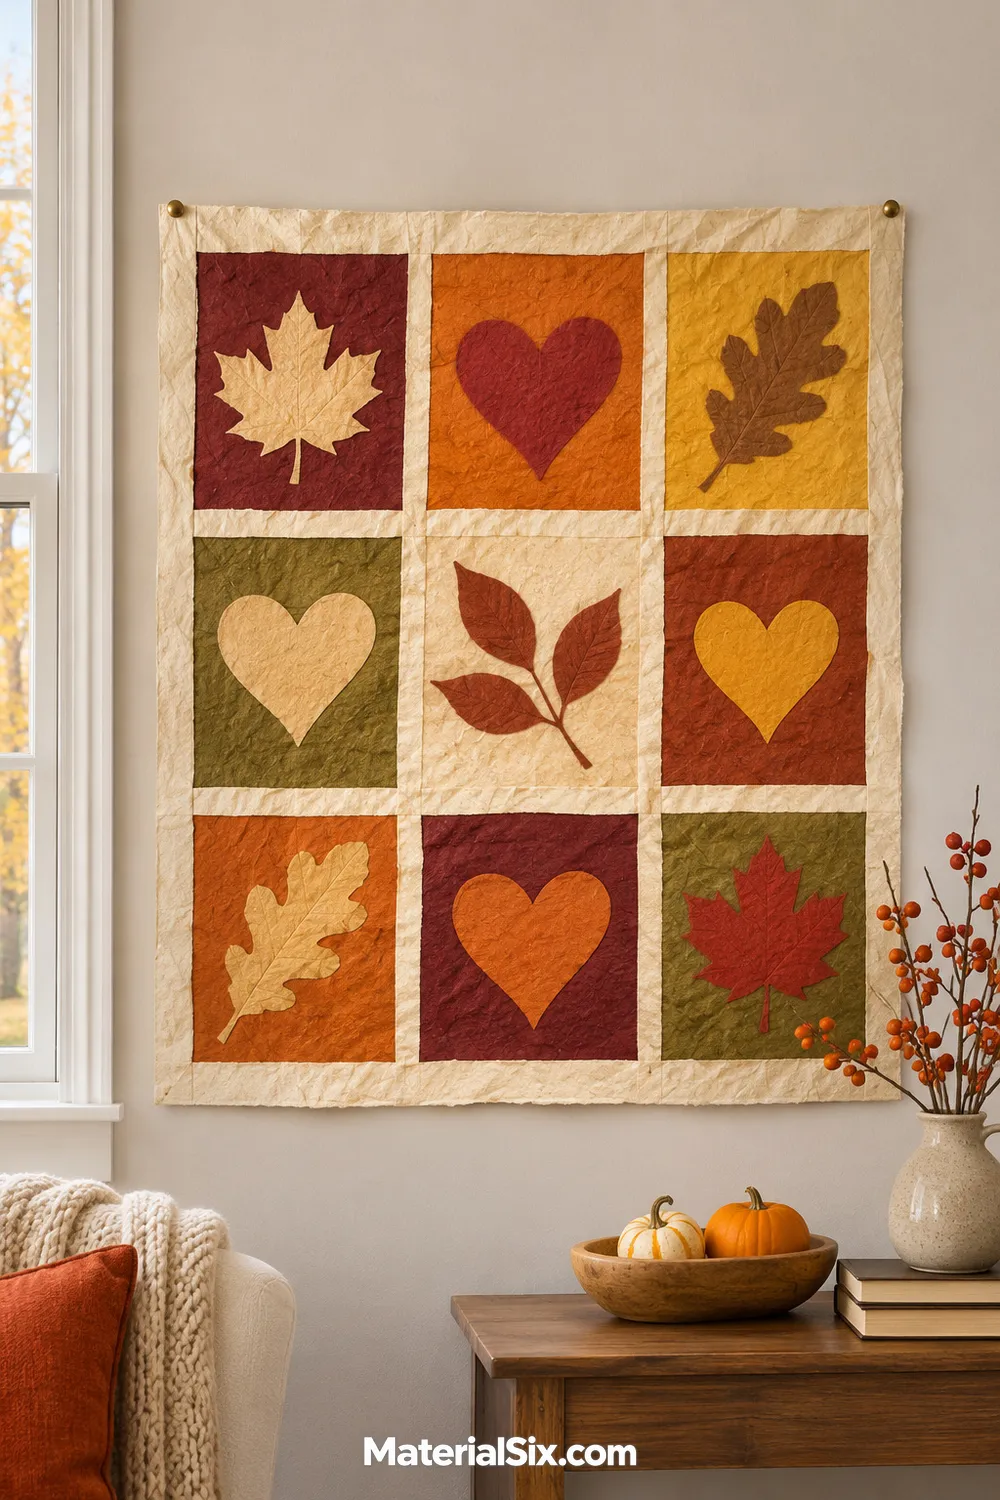
A paper quilt brings separate contributions into one shared display. Give everyone a square of paper to decorate with a leaf, a small drawing, or a gratitude message, then arrange the squares into a patchwork grid. A larger backing sheet keeps the pieces aligned.
Choose one square size and a small color palette before you begin. That leaves plenty of room for individual choices while keeping the finished display cohesive. Add paper strips between the squares if you want a clear quilt-block effect. This project works well for a family gathering or classroom wall, and the flat format is easy to photograph before storing.
Choose a Craft That Fits Your Day
Start with the technique your group will enjoy most, whether that means tearing paper, folding leaves, or sharing a thankful thought. Set out a small selection of colors and prepare any tricky cuts before you begin. Save your favorite Thanksgiving paper crafts for another afternoon, and keep a few finished pieces together for a handmade holiday display.