
Grinning pumpkins, paper cats, and softly glowing lanterns can give Halloween decorating a charm that oversized props sometimes miss. The trick is choosing a few pieces that look good together, then giving them room to stand out.
These vintage Halloween decorations range from simple paper accents to displays built around old-looking finishes, fabric, and collected objects. You can use reproduction decorations, make a few pieces yourself, or work genuine vintage finds into the mix.
Whether you prefer playful faces or a quieter, slightly spooky mood, these ideas offer practical starting points for your mantel, table, windows, and entryway.
1. Group Paper Mache Jack-o’-Lanterns on a Sideboard
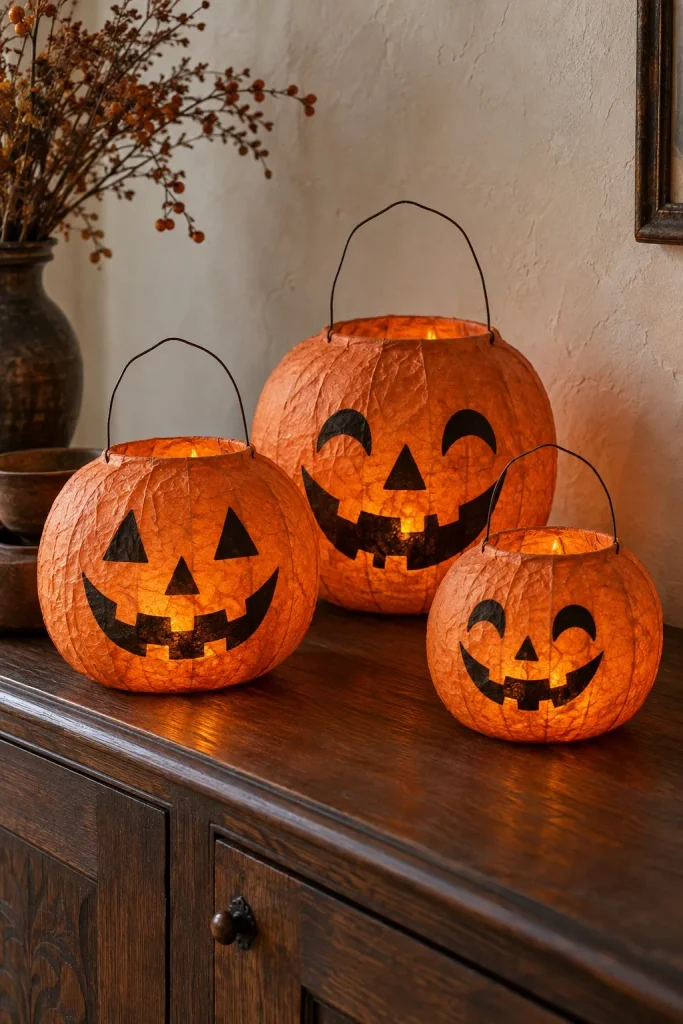
Let expressive pumpkin faces do most of the decorating. Set three paper mache pumpkins on a wood sideboard, choosing different heights and grins so the group feels collected rather than matched. A cream wall behind them keeps their orange color and dark features easy to see.
Look for reproduction pieces with visible paper texture, painted features, and wire handles if you like an old-fashioned finish. Keep the tallest pumpkin toward the back, with the smaller two slightly forward. Leave the remaining surface mostly clear. These lightweight decorations work best indoors, away from splashes, and any added illumination should be battery-operated rather than an open flame.
2. Hang a Black Cat Garland Across a Mantel
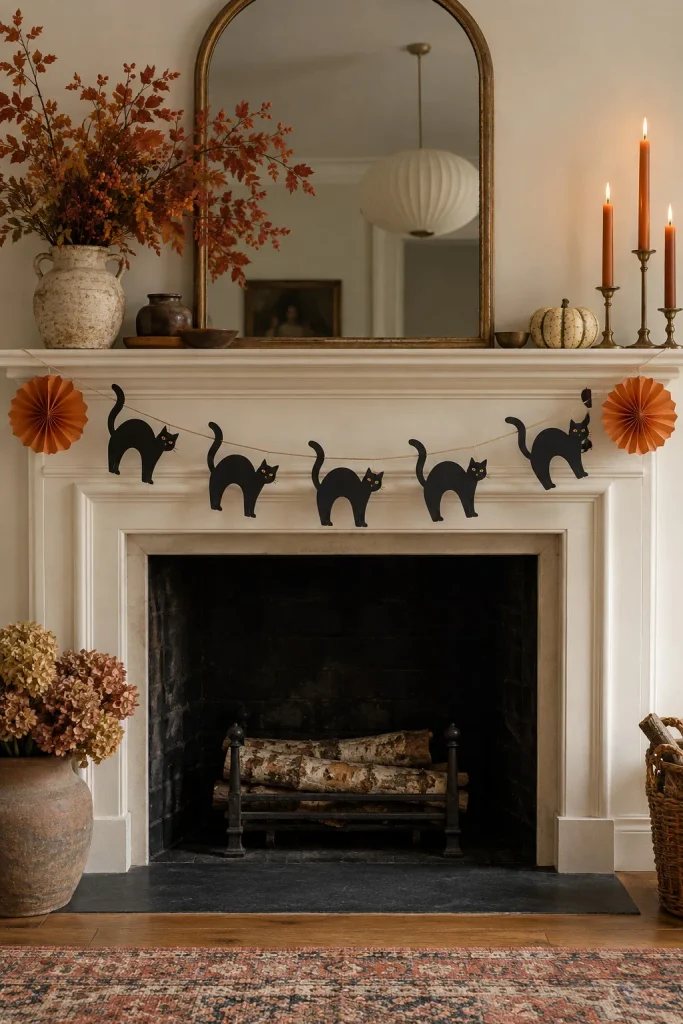
A row of arched black cats brings a playful edge to Halloween mantel decor without covering the entire fireplace. Cut your own original silhouettes from sturdy cardstock, or choose a ready-made vintage-style Halloween garland. Small yellow eyes give each cat personality while keeping the design simple.
String the shapes along cotton cord with enough space for each tail and back to remain recognizable. A shallow swoop reads more clearly than a deeply sagging line. Add one orange paper fan near each end if the mantel needs more color. Reserve this paper arrangement for a fireplace that will stay unused while the decorations are up.
3. Build a Small Gallery of Halloween Art
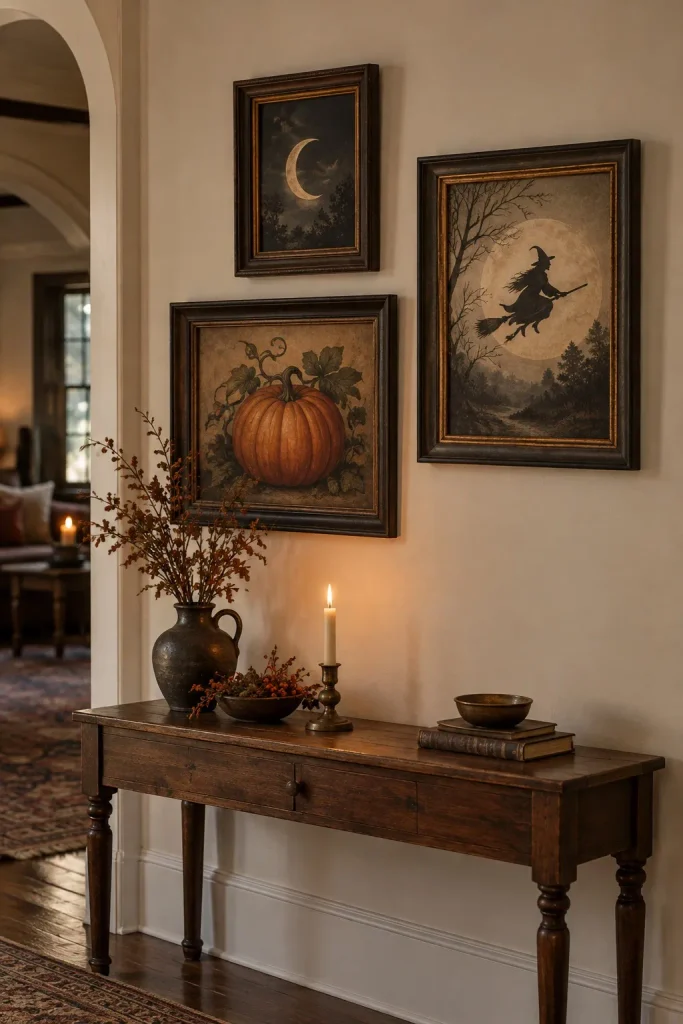
Vintage Halloween wall decor can feel like part of the room when you frame it thoughtfully. Combine three original or properly licensed images, such as a crescent moon, a pumpkin face, and a witch silhouette. Dark wood frames connect the pictures even when their sizes differ.
Arrange the frames on the floor first, leaving similar gaps between them before hanging. A larger central picture helps the smaller pieces feel intentional. Choose cream backgrounds and a limited orange-and-black palette to keep the grouping cohesive. Reproduction prints are useful here because you can size them to existing frames without trimming or altering an older piece of artwork.
4. Make Honeycomb Pumpkins the Table Centerpiece
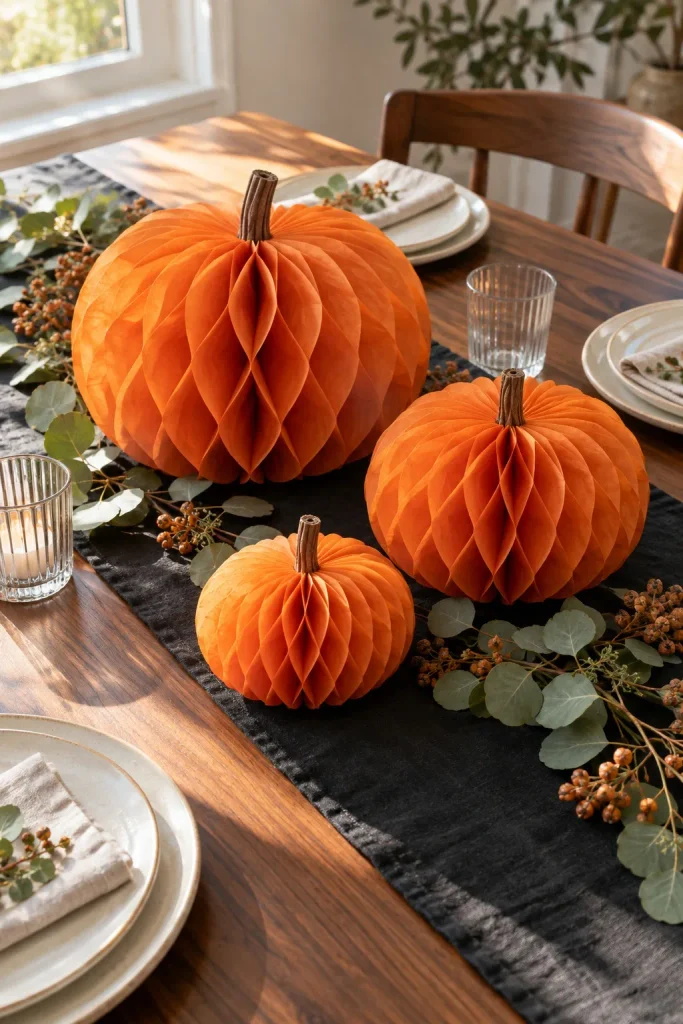
Folded tissue pumpkins bring a different texture to Halloween displays, especially when the light catches their open paper cells. Gather several sizes along a black table runner, leaving enough space between them to appreciate their rounded shapes. Cream dishes and a bare wood tabletop balance the stronger colors.
Keep the tallest pumpkin near the center, then step down toward the ends so the arrangement feels relaxed. For a table used during meals, check the view from a seated position and move any piece that blocks conversation. Choose decorations that fold flat if storage matters, and keep serving bowls or drinks from brushing against the delicate paper.
5. Cluster Antique-Style Lanterns by the Entry
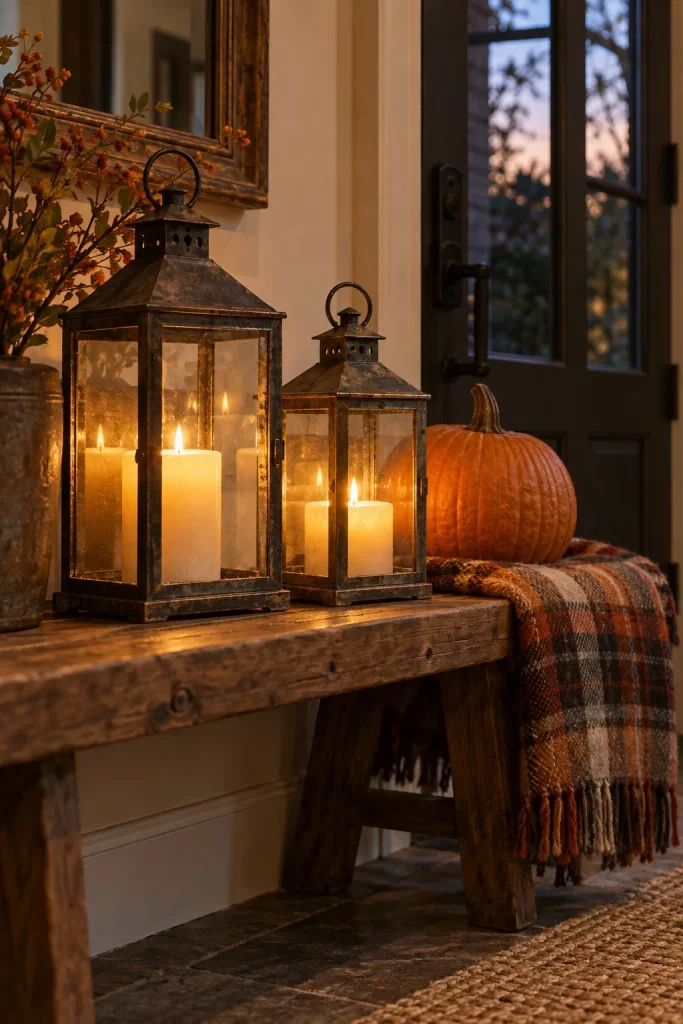
A pair of weathered-looking lanterns gives the entryway a softer Halloween glow. Set them on a sturdy bench beside one pumpkin and a folded plaid blanket. The mix of metal, glass, and fabric adds interest without needing lots of small accessories.
Use lanterns of different heights, but keep their finishes related, such as dark iron and muted bronze. Battery-operated pillar candles let you suggest candlelight without lighting a wick. If you already own antique lanterns, use them as decorative vessels rather than assuming their old fuel or electrical components are ready to operate. Position the display away from the seat or walkway your household uses most.
6. Fill a Window with Spooky Paper Silhouettes
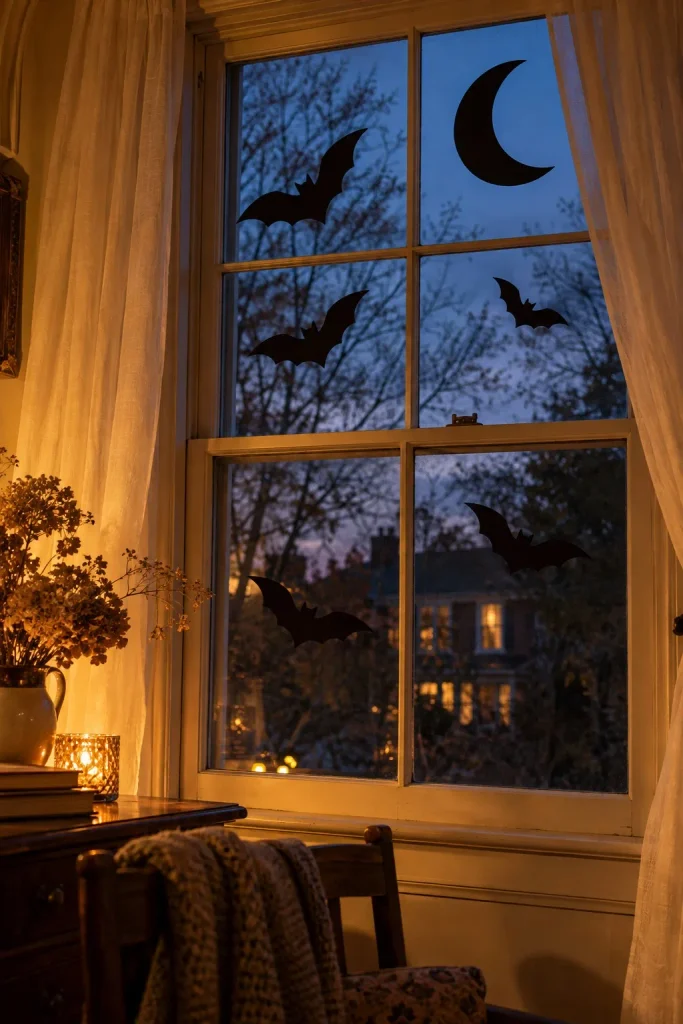
Black paper bats and a crescent moon create a graphic display that works with the window itself. Arrange the bats so they appear to travel upward across the panes, leaving stretches of empty glass between them. That open space makes the shapes easier to recognize from across the room.
Use a few larger silhouettes instead of covering every pane with tiny cutouts. Test a removable attachment method on an inconspicuous spot and keep paper off painted trim when possible. Pull sheer curtains to the sides to frame the arrangement. This is an approachable vintage Halloween craft for a room where shelf and tabletop space are already occupied.
7. Line Up Retro Treat Buckets on a Shelf
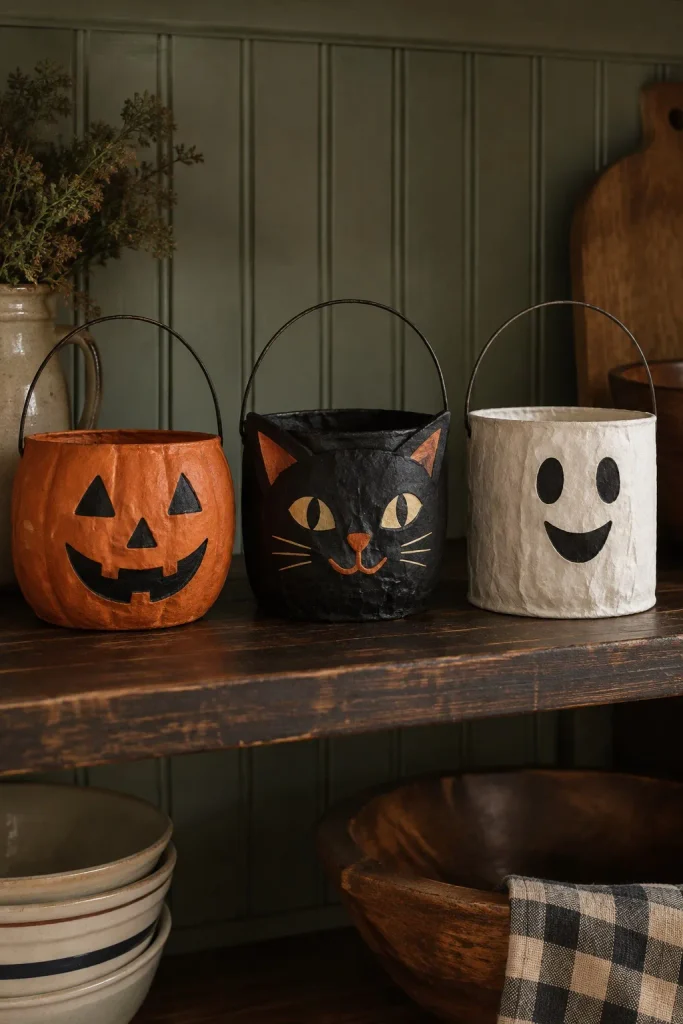
Pumpkin, cat, and ghost treat buckets make cheerful decorations even when they are not holding candy. Give three reproduction buckets a dedicated shelf, allowing their handles to stand upright and their faces to point forward. A painted beadboard background adds texture without competing with the designs.
Vary the characters while keeping the buckets close in scale. That balance creates a small collection rather than a jumble of unrelated objects. Leave room above the wire handles so they do not look squeezed into place. If you want treats nearby, put wrapped candy in a separate food-safe bowl instead of assuming a decorative or older bucket is suitable for serving.
8. Arrange Primitive Fabric Pumpkins in a Crock
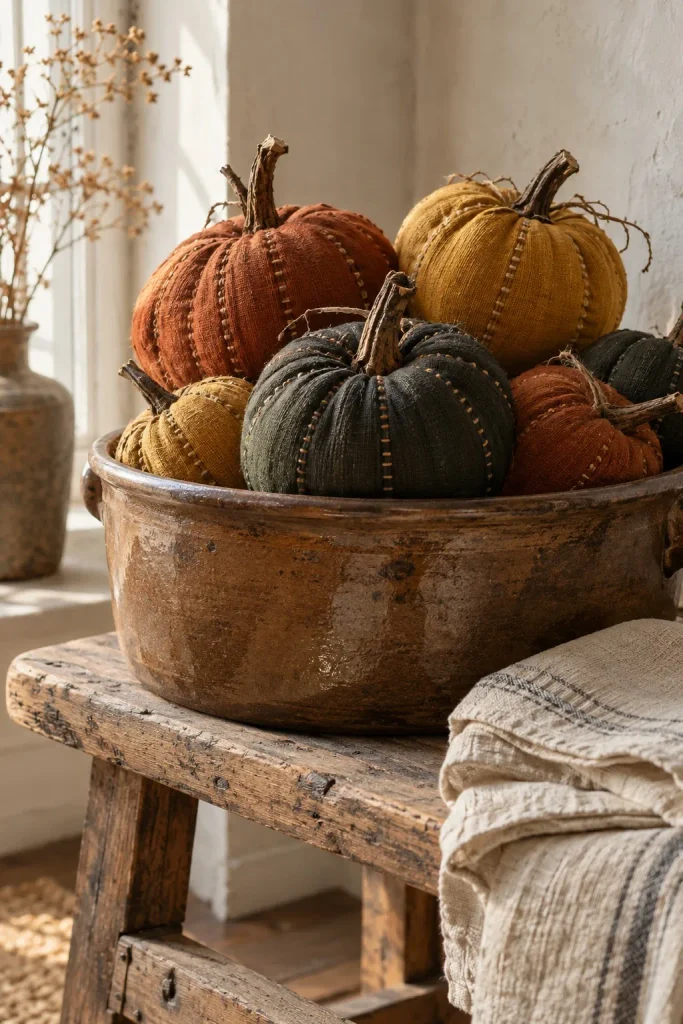
For a quieter take on primitive Halloween, trade bright plastic for cloth pumpkins in rust, mustard, and charcoal. Visible stitching, slightly uneven shapes, and twig-like stems give the arrangement a handmade character. A broad stoneware crock provides a solid contrast to the soft fabric.
Place the largest pumpkin low in the container and nestle smaller ones around it, keeping their stems visible. A folded neutral linen beneath the crock softens a rough bench or console. Choose lightweight filler inside the vessel if the pumpkins sink too far down. This approach blends easily with fall decorating, so you can leave the display out after the more playful Halloween pieces come down.
9. Turn a Shutter into a Halloween Backdrop
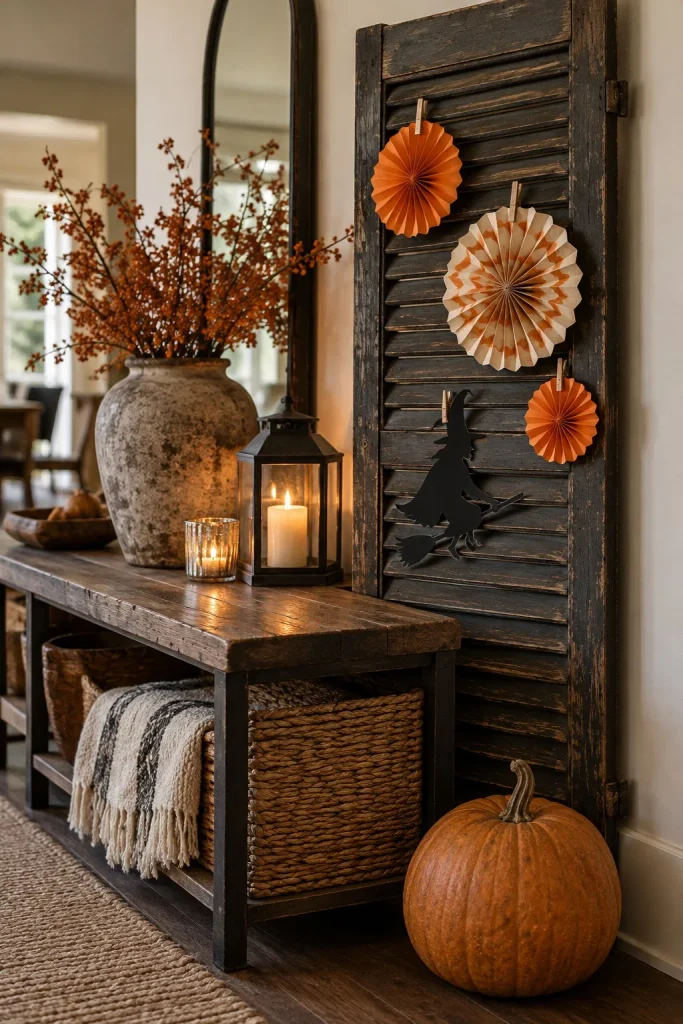
A decorative shutter gives a console display height without requiring a whole wall of decorations. Clip a few orange-and-cream paper rosettes to its slats, then add one black witch silhouette as the focal point. A single pumpkin at the base connects the tall backdrop to the furniture below.
Use a stable, securely mounted shutter or a lightweight reproduction panel rather than leaving a heavy piece loosely propped. Newly finished wood with an intentionally weathered look can provide the same effect. Keep most of the slats exposed so the backdrop remains visible. Removable clips make this Halloween shutter DIY easy to rearrange and simplify taking the paper pieces down afterward.
10. Create a Paper Bat Branch Arrangement
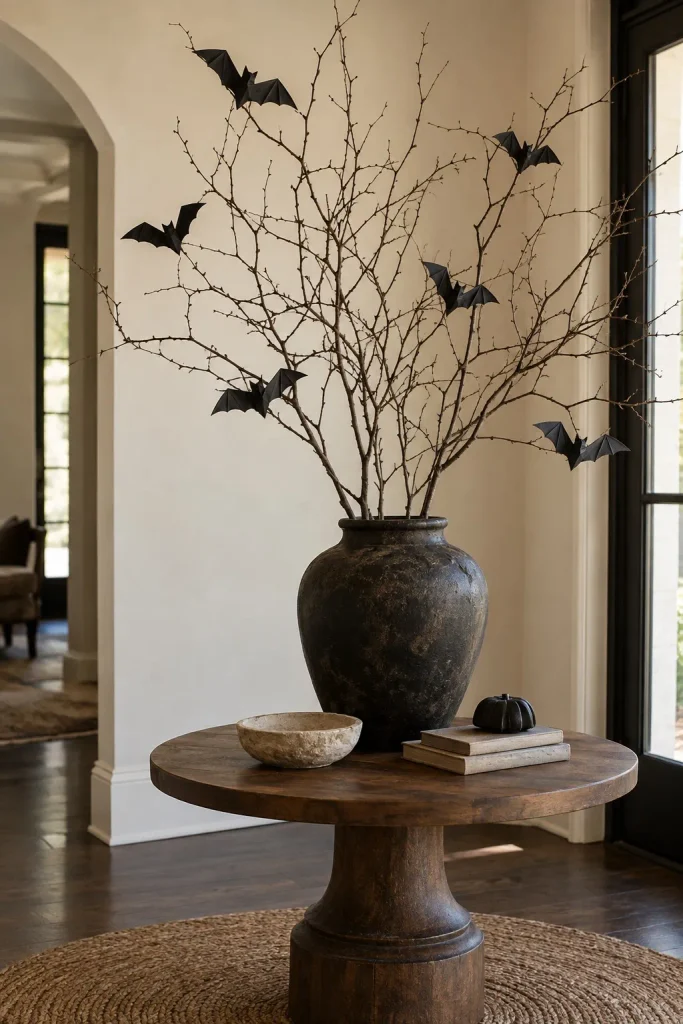
Bare branches offer a sculptural way to display paper bats when you want something taller than a pumpkin grouping. Place a few branching stems in a heavy vase, then attach small folded bats at different heights. Slightly bent wings help the flat shapes stand out from the twigs.
Start with fewer bats than you think you need and check the arrangement from the doorway. Each silhouette should have a little clear wall behind it. Keep the widest branches within the table’s footprint so they do not snag sleeves in a busy entry. A plain dark vessel and pale wall make this homemade Halloween decoration feel striking without extra embellishments.
11. Gather Tiny Decorations in a Shadow Box
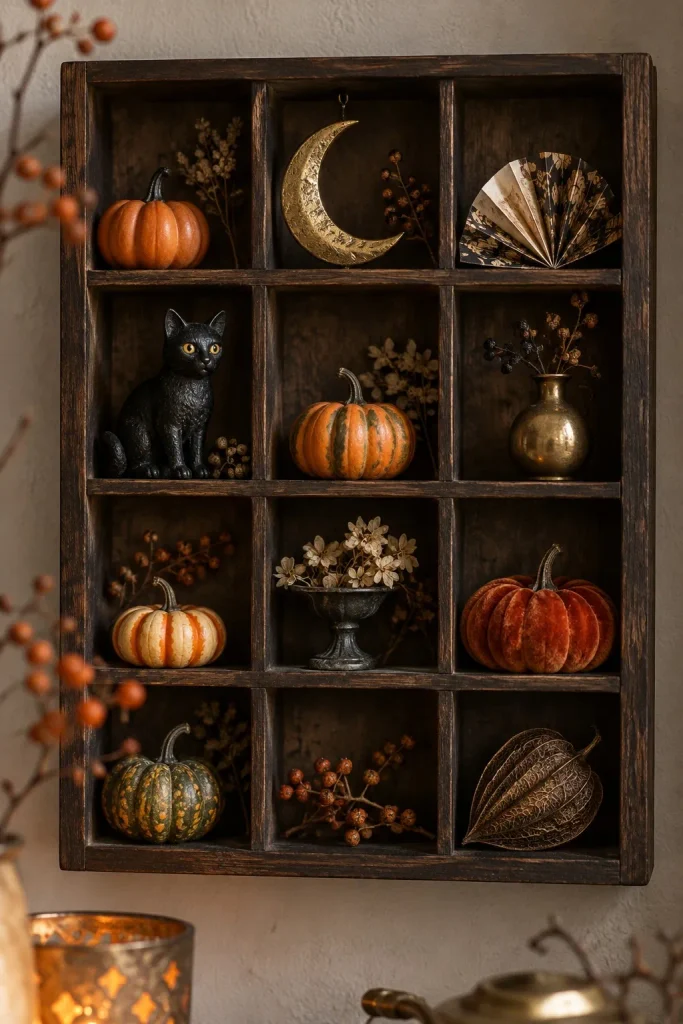
Small Halloween charms and miniature ornaments are easier to appreciate when they have defined places. Use a shallow compartment box to display a tiny pumpkin, a cat figurine, a crescent moon, and a folded paper fan. The dividers give each object its own little stage.
Repeat a few colors across the compartments, but leave at least one space empty to keep the display from feeling crowded. Set heavier pieces in lower sections and secure the box appropriately before filling it. Use reproduction objects for anything you plan to glue in place. For older collectibles, choose a display method that supports them without attaching adhesive directly to their surfaces.
12. Set a Retro Halloween Supper Table
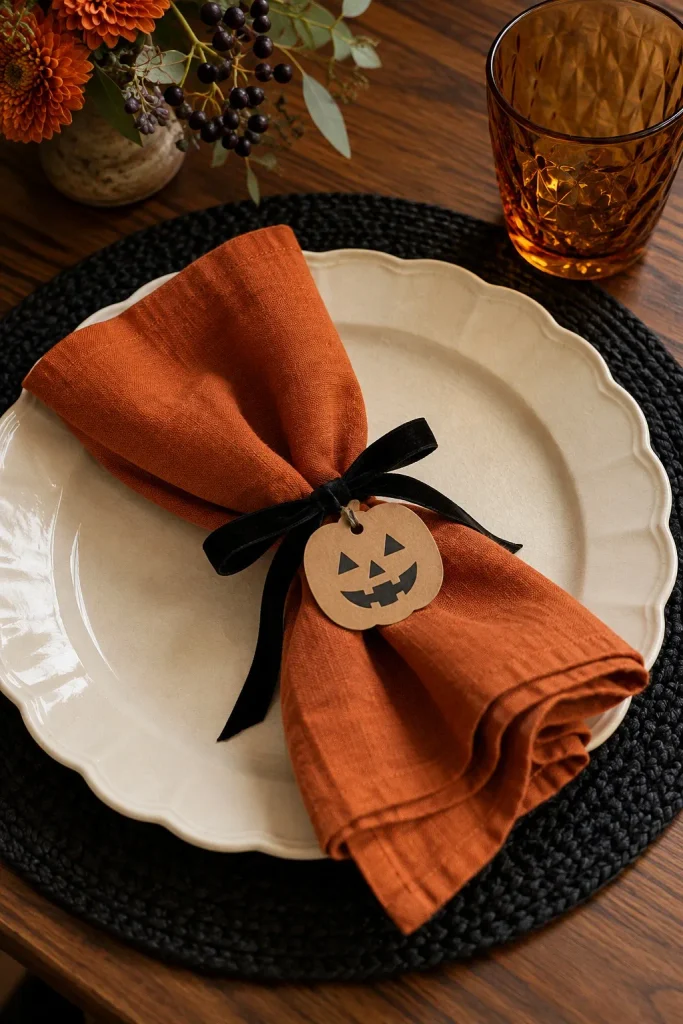
You do not need themed dinnerware to build a nostalgic Halloween table. Start with cream plates, black placemats, and burnt-orange napkins, then add amber drinking glasses for warmth. A small pumpkin-face paper tag tied to each napkin supplies the seasonal detail.
Keep the tag outside the eating surface and use plain ribbon rather than a bulky ornament that guests have to move around. A simple face drawn on orange cardstock fits the retro Halloween designs without adding a written place card. If the table is narrow, let these individual settings carry the theme and skip a large centerpiece. The dishes and linens can return to everyday use after dinner.
13. Style a Mantel with Flameless Tapers
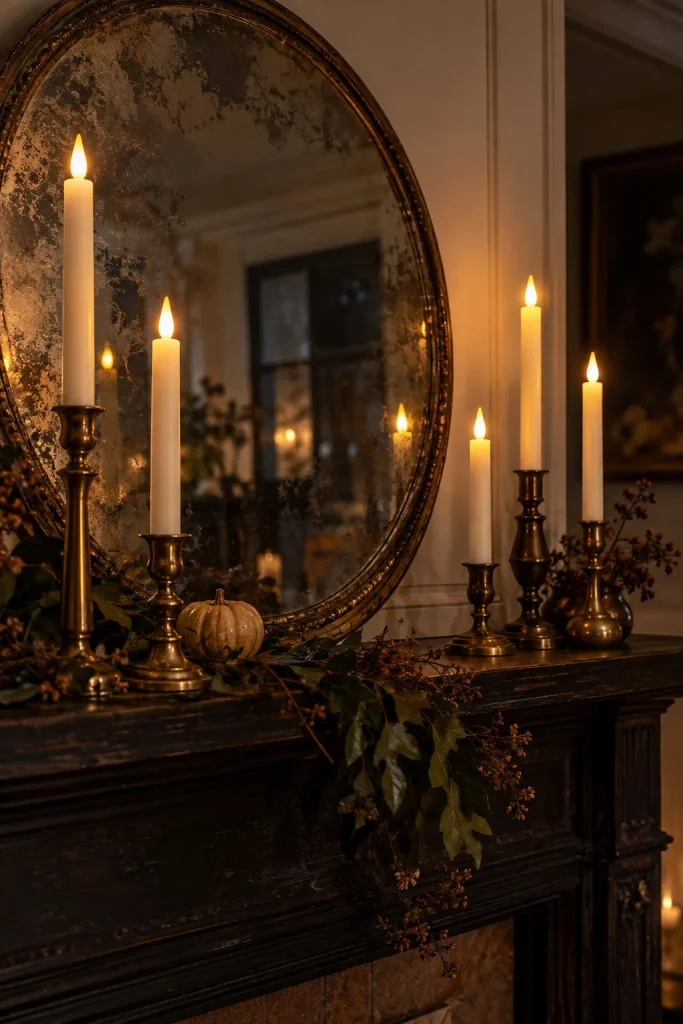
Ivory flameless tapers in aged-looking brass holders create a restrained, slightly spooky mantel. Arrange the holders in uneven heights to one side of a round mirror, then add a small pumpkin at the opposite end. The mirror gives the grouping depth while the mostly neutral palette keeps it calm.
Check that each battery taper fits its holder securely and stands straight. Stagger the bases so every candle is visible rather than lining them up like fence posts. Keep the rest of the mantel simple, especially if the mirror has a decorative frame. This approach suits a room where you want Halloween atmosphere without strong character faces or lots of orange.
14. Make a Paper Medallion Wreath
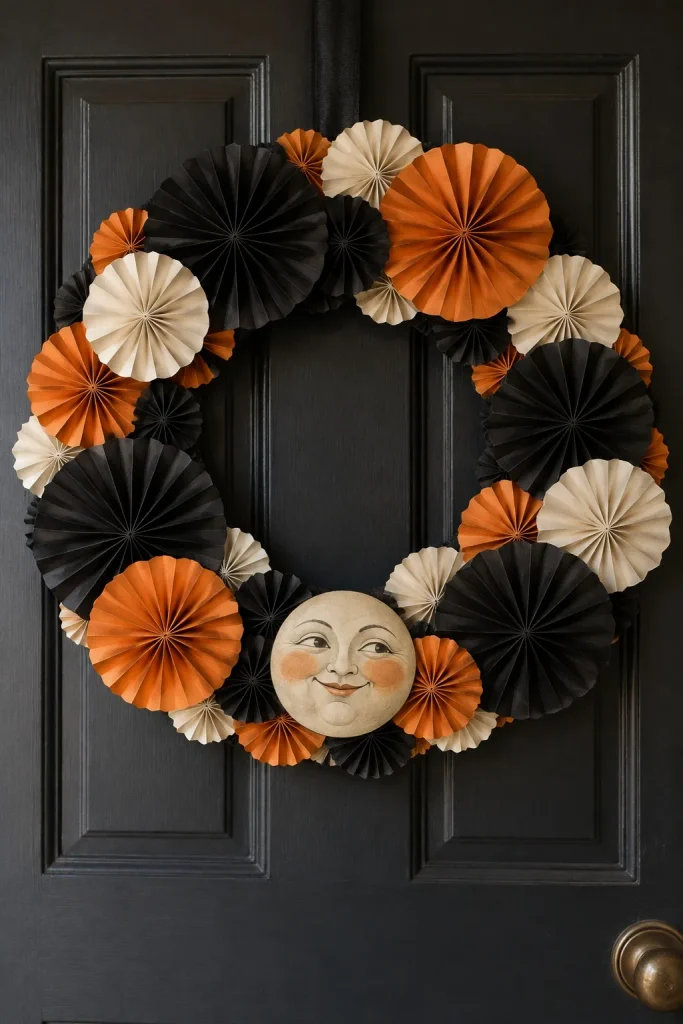
Folded paper medallions can bring the look of old-fashioned party decorations to an interior door. Combine black, cream, and burnt-orange rosettes around a wreath base, varying their sizes while leaving the center open. One smiling moon motif gives the arrangement a clear focal point.
Lay out the entire design before attaching anything, checking that the larger fans are balanced around the circle. Use an original drawing or an image you have permission to reproduce for the moon. A dark door makes the lighter folds easier to see. Keep this vintage Halloween DIY indoors, where damp air and an opening exterior door are less likely to damage the paper.
15. Try a Midcentury Halloween Console Display
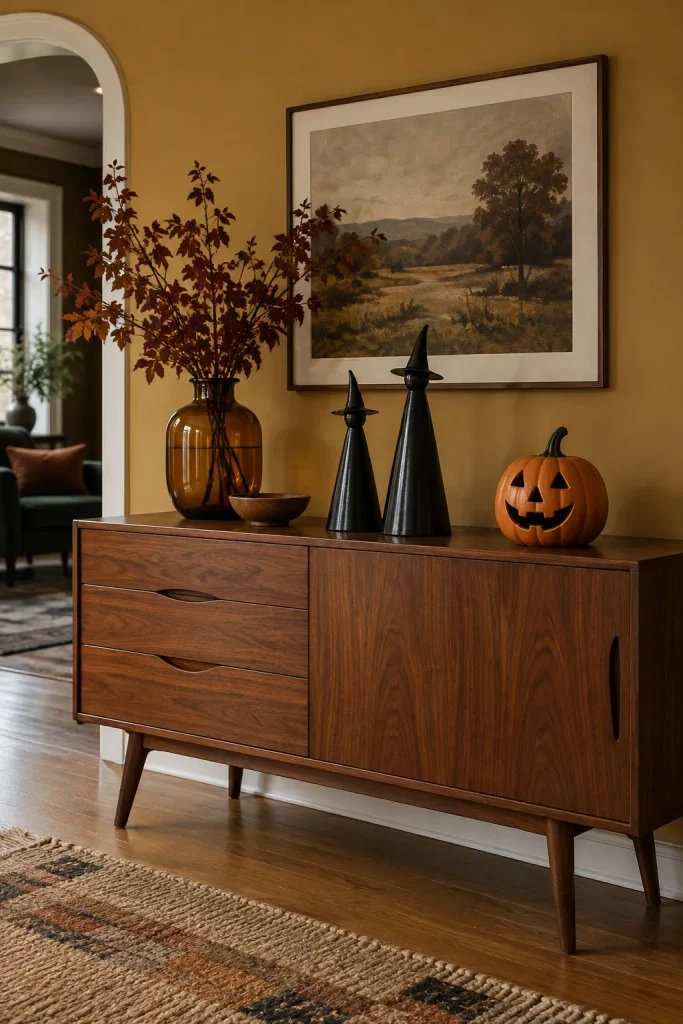
A clean-lined console offers a different direction from rustic wood and crowded shelves. Pair a rounded orange jack-o’-lantern with two slim black witch figures, then bring in one amber vase. The contrast between simple geometric forms gives the arrangement a midcentury-inspired feel.
Leave a generous stretch of the console uncovered so its wood grain and tapered legs stay part of the scene. Choose just one expressive pumpkin face, allowing the other pieces to remain understated. A muted mustard wall or warm neutral backdrop supports the palette. This is a styling interpretation rather than a period recreation, so you can build it with contemporary pieces that share the same shapes and colors.
16. Give a Covered Porch an Old-Time Halloween Look
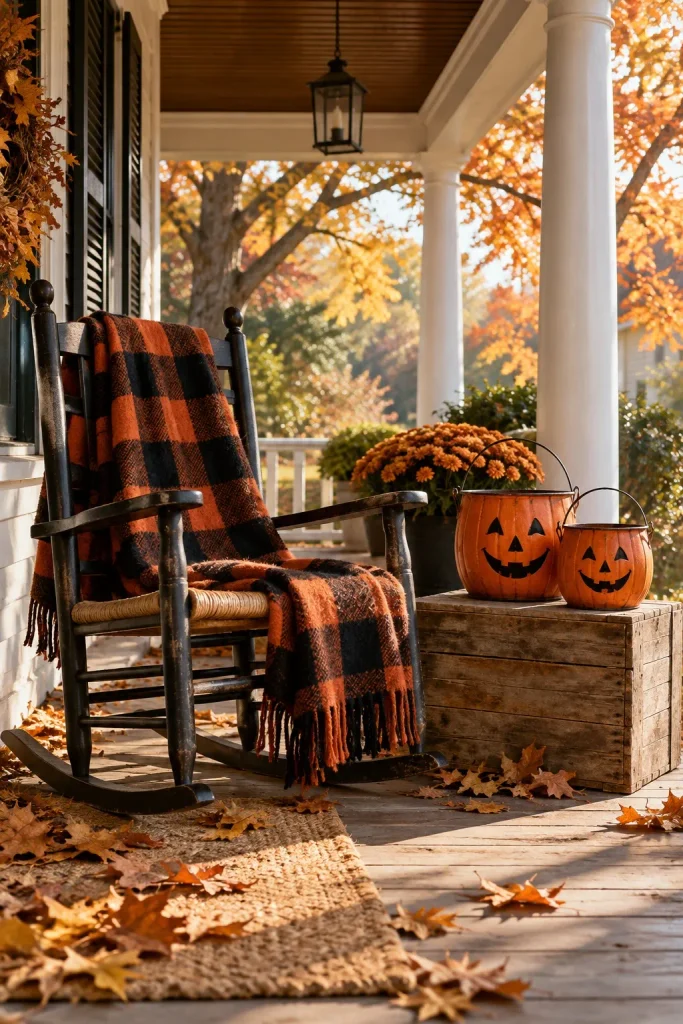
Carry the nostalgic mood outdoors with a wood chair, a plaid throw, and pumpkin-face pails set on a sturdy crate. The familiar household pieces make the porch feel welcoming, while the grinning faces clearly signal Halloween. Keep the arrangement tucked well beneath the porch roof.
Use outdoor-suitable reproduction decorations for anything that will remain outside, and bring paper pieces and indoor textiles in when weather threatens. A covered location still gets wind and moisture. Leave the door swing, steps, and walking route clear, and avoid stacking loose crates. Repeating the same orange-and-black palette used indoors helps the porch feel connected to the rest of your Halloween house decor.
17. Reserve a Cabinet for Halloween Collectibles
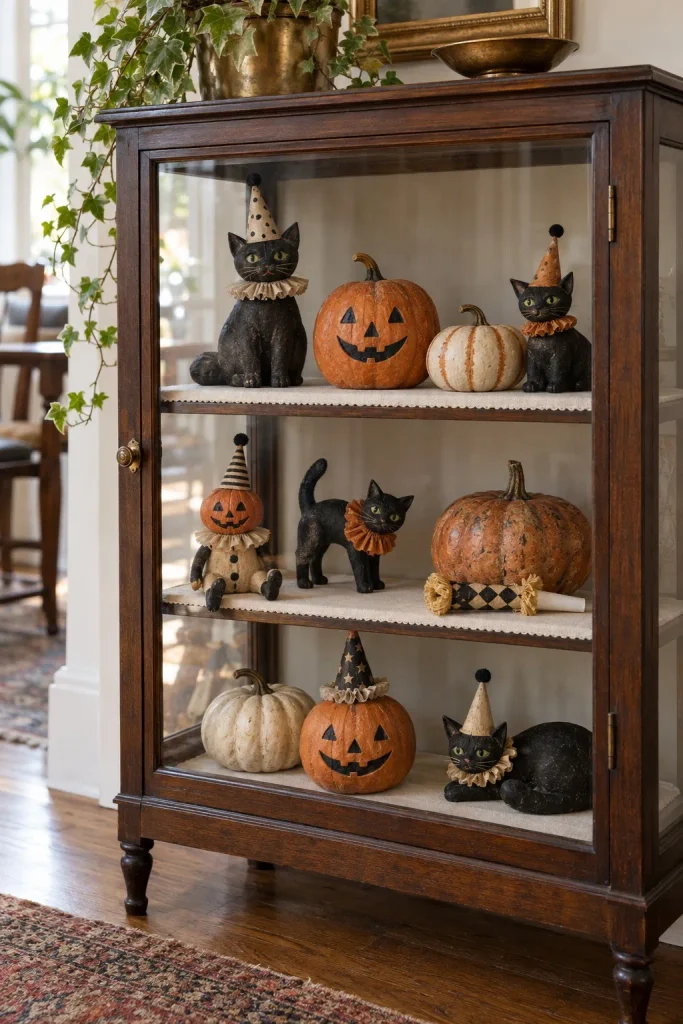
A glass-front cabinet gives a larger assortment of Halloween items a shared home. Spread pumpkin figures, black cats, paper party hats, and noisemakers across several shelves instead of gathering everything into one dense cluster. Pale shelf liners can help dark shapes stand out against a wood interior.
Group objects by scale or color, leaving open space around the most expressive pieces. Keep heavier decorations lower and give delicate paper objects enough room to sit without bending. Display reproductions alongside older finds if you enjoy both, but avoid presenting new pieces as antiques. A cabinet also makes it easy to enjoy the collection without moving individual objects every time you use a table.
How to Keep the Mix Cohesive
Choose one visual thread before adding more decorations: expressive faces, faded fabric, or simple black silhouettes. Repeat two or three colors across nearby displays, then let the materials vary. You can combine paper, metal, and wood without making every surface equally busy.
Vintage-inspired describes a look, not an object’s age. If age or authenticity matters to you, ask the seller about provenance and any repairs rather than judging by distressing alone. For decorating, reproductions let you enjoy the style while reserving genuine older pieces for gentler display.
Bring Your Favorite Ideas Together
Start with one spot you see every day, such as the entry table or mantel, and choose a decoration that makes you smile. Add a second idea only if it supports the first. A few expressive pieces and thoughtful spacing can carry the nostalgic mood throughout a room. Save your favorite vintage Halloween decorations so you have a clear starting point when it is time to decorate.