Who does not want to get relaxed on the outdoor patio with the surrounding greeneries and cool breeze? Therefore, to serve the ease of your home, you should consider incorporating a freestanding patio cover.
A covered freestanding patio will not only offer comfort and additional space, but it gives you the liberty to modify the design as you wish too.
Moreover, for some ideas and a guide to build this freestanding patio, you can read the following information.
Step-by-Step to Build a Freestanding Patio Cover
Although building a freestanding covered patio is not that difficult, the entire process is not that effortless as well.
At least you need to have intermediate woodworking skills to build this patio cover yourself. If you are a beginner at carpentry, doing the project with experienced professionals will be a better choice.
Meanwhile, the general steps to build a freestanding covered patio are as follows.
1. Prepare the required materials
Before starting your project, you need to prepare some materials including pressure-treated boards in the following sizes: 4×4, 2×4, 2×6, and 2×10.
Besides, you will need a hammer, shovel, circular saw, socket set, jigsaw, wheelbarrow, a post hole digger, spade, screwdriver, and power drill.
Do not forget to have some gravel, quick-dry cement, lag bolts, level, and galvanized screws.
2. Determine the location
Find a location where you want to build the freestanding covered patio and determine the size of the used area.
Then, mark the area where you wish the cover to stand by using a rope or some stakes. Do it precisely for a better result.
To make it simpler, you can consider using boards or spray paint to mark the area. After that, you can start digging out holes for the posts.
Further, the depth of each hole must be 24 inches while the width is 9 inches.
3. Get the wooden posts ready
Since this project uses wooden posts, you should take time to remove the moisture since this material is prone to deterioration.
Thus, for preventive measures, you can incorporate crushed stones or gravel into each hole that you have dug out in the previous step.
The depth of the layer should be 3 inches and you need to tamp it down afterward. Then, pour the same amount of gravel into the holes before you tamp them down again.
4. Install the posts
Once you have filled each hole with gravel, start to place the 4×4 posts into it. Utilize the 2×4 pressure-treated boards as support to keep them in place.
After that, you should confirm that the level of every post is accurate before adding some cement to attach it.
Create a mix of quick-dry cement as instructed by the label directions. Then, pour the mixture around each post.
After that, wait for about a day to let the cement totally dry.
5. Form and assemble the beams
Use the 2×10 boards for the beams. Likewise, the length of each beam should be able to cover the distance from post to post.
For visual interest, you may also like to draw decorative patterns for an accent on the beams. Since this is a tricky job, you should do it carefully when cutting them.
Once you got the beam, drill holes through it and the core posts to allow you to assemble them. After that, use 3-inch lag bolts to connect these two.
Make sure you get the precise level of each beam before continuing to the next step.
6. Structure the Roof
Now that you have installed the beams, it is time to structure the roof. Firstly, take and cut your 2×6 boards as needed.
You should not cut the boards at the identical length as the patio since they need to overhang a little bit over your outdoor space.
Hence, you need to cut the boards longer than the patio. After that, arrange them to cross the joint beams and form a perpendicular pattern.
Besides, the boards must be situated evenly across the top of your patio. Do not forget to install galvanized deck screws to keep them in place.
7. Double check and furnish your freestanding patio

Now that the structure of your freestanding covered patio is ready, you can start to cover it with the material of your liking.
For instance, you can opt for metal panels, translucent fiberglass, lattice wood, canvas shade sails, boards, and netting, or wood and shingles.
Then, you can also furnish your freestanding patio with furniture pieces and decoration to make it feel homier.
Further, remember that the structure made through this guide is the most straightforward one. Other varieties are available to meet your outdoor space’s needs.
Whatever your choice will be, make sure to double-check the level of your freestanding patio before installing the roof.
10+ Best Inspirations to Build a Freestanding Patio Cover in Your Yard
Since it is not attached to the main house or other constructions, a freestanding patio tends to come with its own cover.
It does not depend on the existing house’s roof and typically comes with four posts that support the cover.
For this reason, a freestanding patio can vary in height and size. Subsequently, you can even build it with a different style from the existing building.
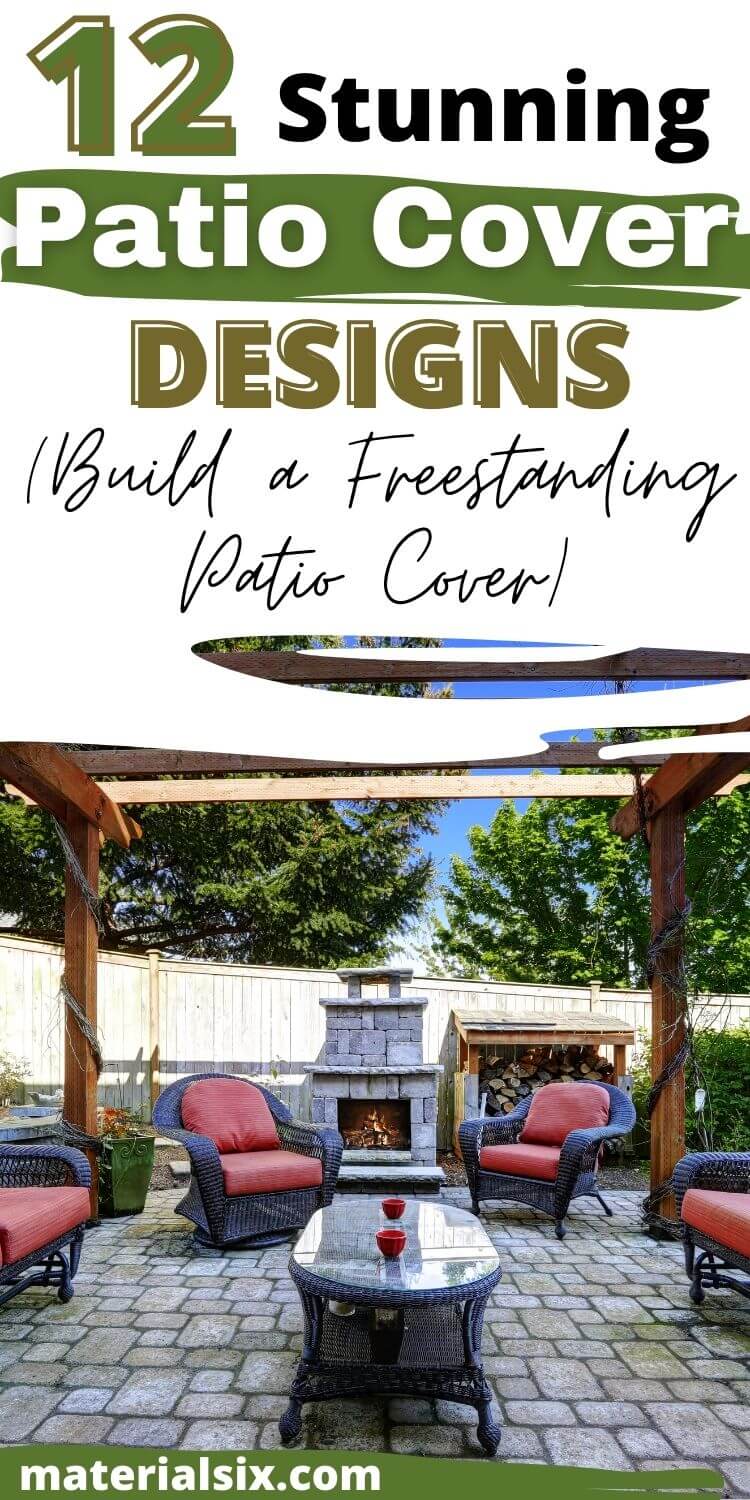
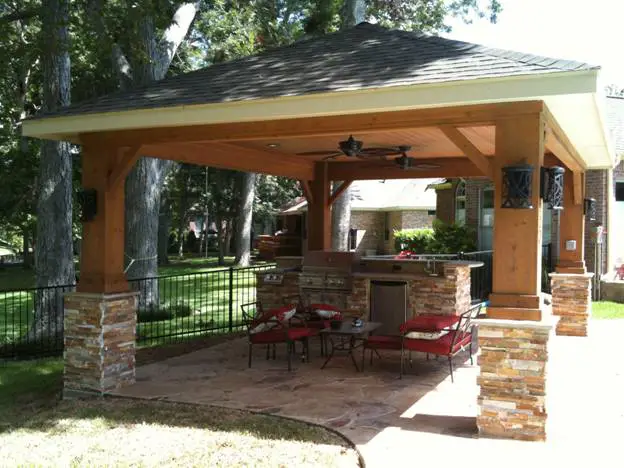
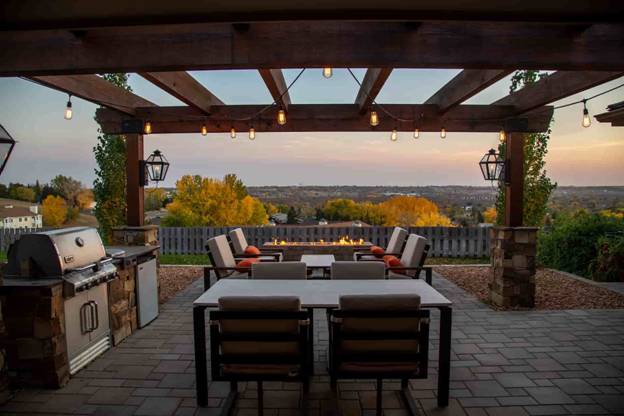
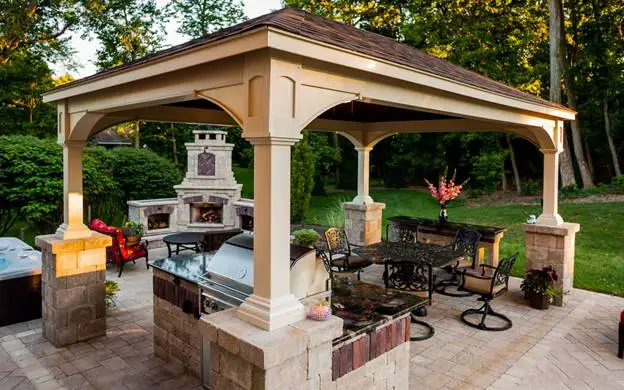
1. Outdoor Kitchen and Fireplace
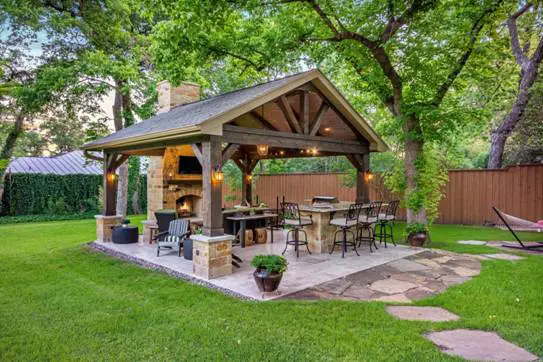
This freestanding covered patio houses an outdoor kitchen and a dining area that features a fireplace. With enough seating area, this makes a perfect retreat for every member of the family.
The wooden posts come with an exposed brick foundation that matches the fireplace and kitchen counter. Additionally, lighting fixtures in different styles are found all around the space for added illumination.
Pros:
- Surrounding trees offer additional shade for more comfortable outdoor activities.
Cons:
- This freestanding patio idea is not suitable for a narrow yard.
2. A Small Patio with Pergolas
If you have a small yard and still wish to keep the size of the garden, copy this layout to create your freestanding covered patio.
It does not take much space and the furnishing is pretty simple as well. Besides, the dark-painted pergolas give the cream and beige tones underneath an interesting contrast.
Moreover, a pair of white pendant lights hang over the seating area for added beauty both night and day.
Pros:
- The pergolas allow some light to enter the seating area without making it too overwhelming.
Cons:
- You may need to store your outdoor furniture elsewhere during rainy weather.
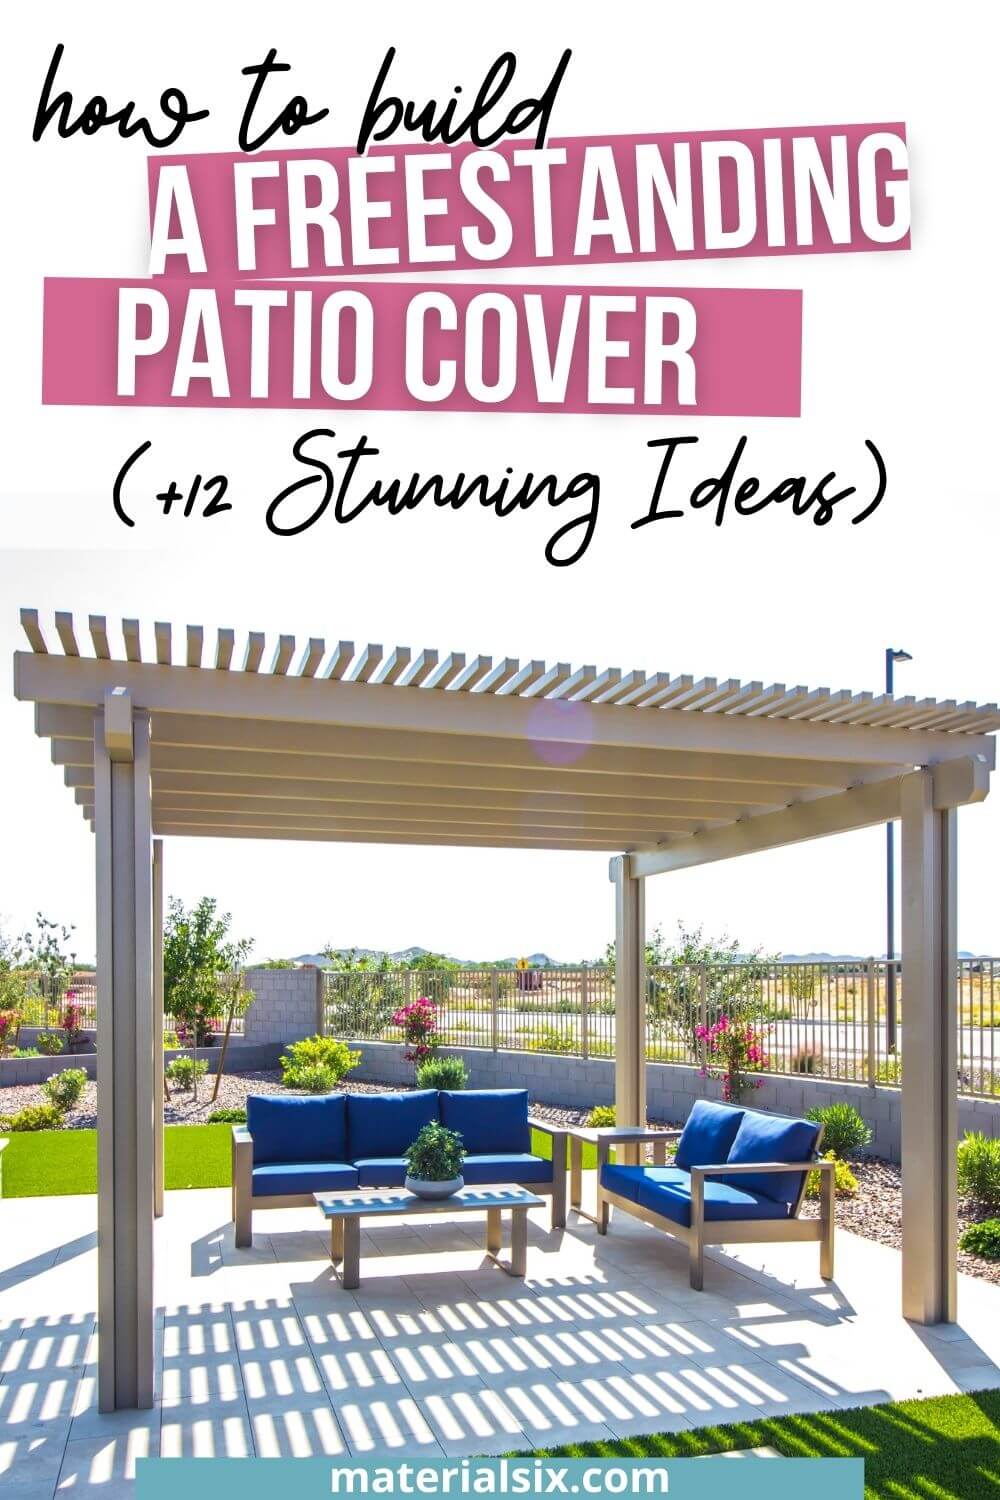
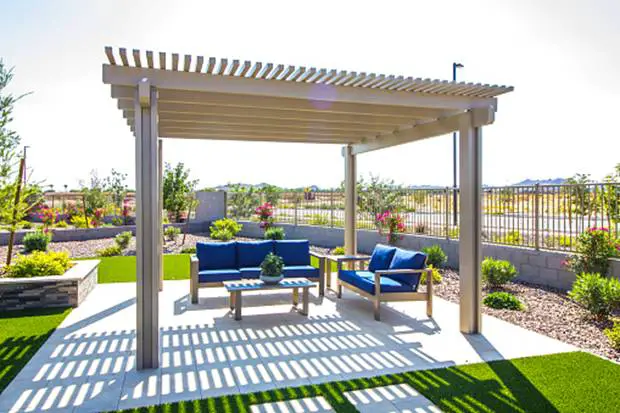
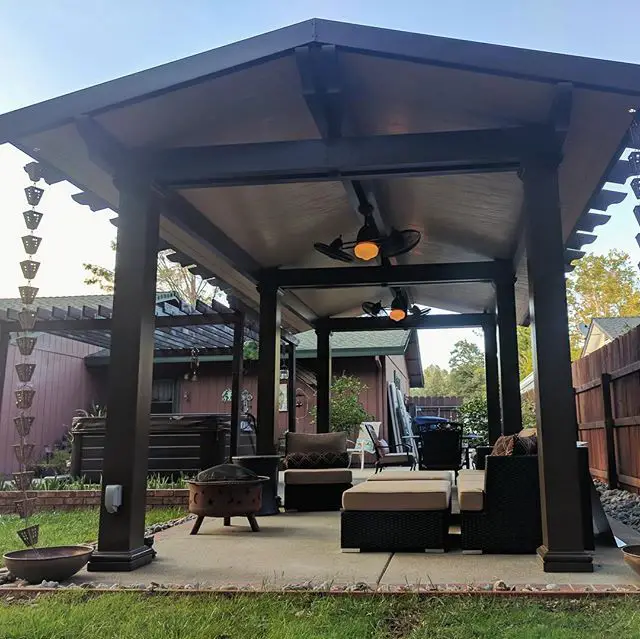
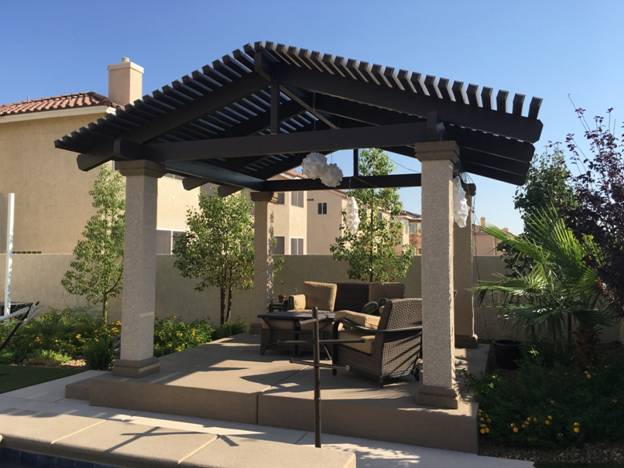
3. Aluminum Patio Cover
Nowadays aluminum becomes a popular patio cover because it can appear like wood but has a cheaper price.
This custom aluminum patio cover makes a great example if you want a freestanding design that will look good for a long time.
Likewise, it comes with a ceiling-mounted fan for an added cool breeze. The sofas and chairs also make this outdoor space a comfy place to enjoy.
Pros:
- The aluminum patio cover requires little to no maintenance and it will not rot.
Cons:
- Expect an aluminum patio cover to be noisy, particularly during a light wind storm.
4. Freestanding Louvre Roof
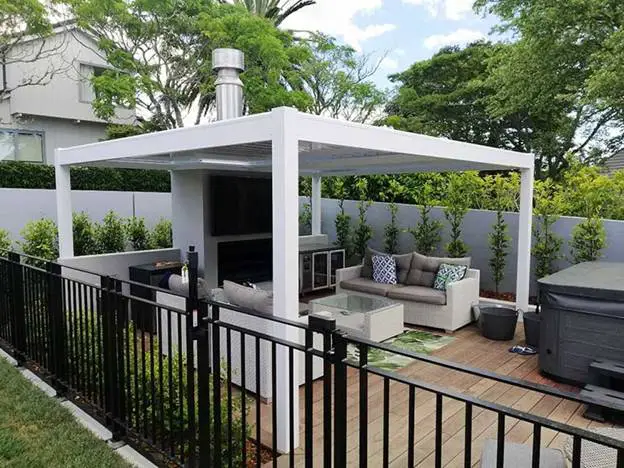
A freestanding louvre patio cover can create an instant outdoor living room with a chic and outstanding design.
Standing on a wooden deck, this all-white patio cover comes with cozy furniture pieces that are ready to hug you after a long tiring day.
Furthermore, the subtle palette of this outdoor space makes the small trees stand out with their vibrant green color.
Pros:
- Freestanding louvre patio covers are generally not complicated to install.
Cons:
- Depending on the built quality, louvered patio covers can be pretty noisy.
5. A Stylish Freestanding Patio with Traditional Accent
The unstained wooden posts and beams give this freestanding patio an elegant appearance that blends well with nature.
Coming with no roof, the string of lights is hanging right on the beams for added beauty and illumination. Additionally, a pair of sconces mounted on the posts complete the lighting needs.
Pros:
- Earthy tones on the furnishing match the natural wooden structure for a beautiful-looking patio.
Cons:
- The lack of a roofing system makes this freestanding patio inhabitable during extreme weather.
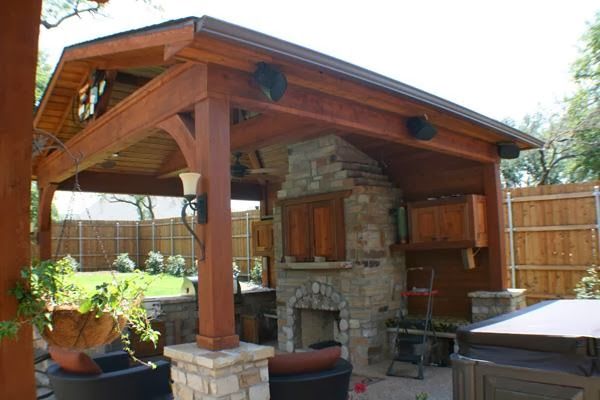
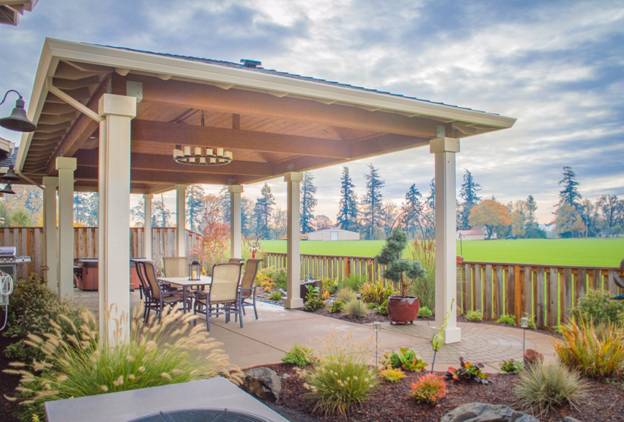
6. A Nice Spot to Enjoy the Backyard
This freestanding patio makes a perfect place to spend your afternoon or to entertain your guests with the view of your beautiful garden.
Then, each post comes with a simple design and color that suits the concrete flooring. A statement chandelier is hanging over the outdoor table and chairs for an outstanding adornment.
Pros:
- The wooden roof looks sturdy and dependable enough to protect you from the glaring sun or rain.
Cons:
- Coming with a complicated design, a novice woodworker may find it hard to install the roof.
7. Plastic Freestanding Patio
You do not need to travel to have a fun outdoor breakfast with the family. With a freestanding covered patio right in your backyard, you can make it true easily.
Featuring a plastic cover that sits on the beamed ceiling, this small patio also offers a perfect dining area with a view of nature.
Thanks to the water-resistant cover, you can enjoy this outdoor space while raining as well.
Pros:
- Plastic materials are generally less costly than wood.
Cons:
- Be aware of annoying insects and bugs with such an open layout.
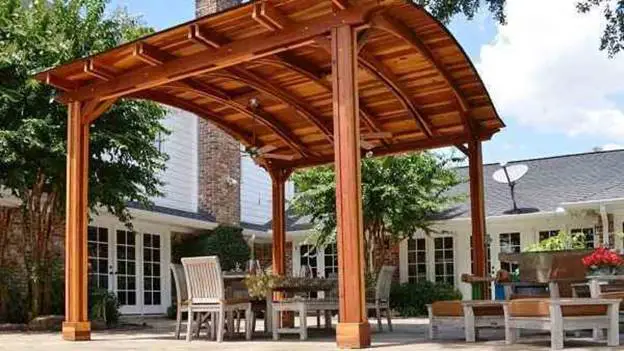
8. Curvy Roof Design
This stylish design does not take up much of your backyard space but still gives your outdoor area a striking look.
Boosting the aesthetic appeal of this patio is the curvy roof design. Then, the DIY pergolas are well-built to grant a cozy relaxing time.
Pros:
- The patio cover kit is easy to assemble without the need for drilling or sawing.
Cons:
- Made of wood, the patio cover is prone to rot and other damages caused by common environmental hazards.
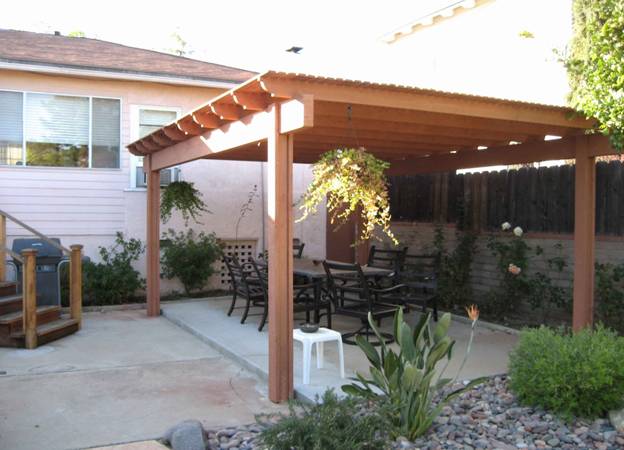
9. Patio Cover for a Narrow Space

If you are looking for a great way to add function to your backyard patio without breaking the bank, this picture makes a perfect example.
This small and simple design sits flush on a narrow backyard patio. Since it only features a seating area, you will be able to save the budget to carry out this project.
Pros:
- It does not require much budget and can fit on a narrow backyard patio.
Cons:
- The space only serves as an additional living room due to the small coverage.
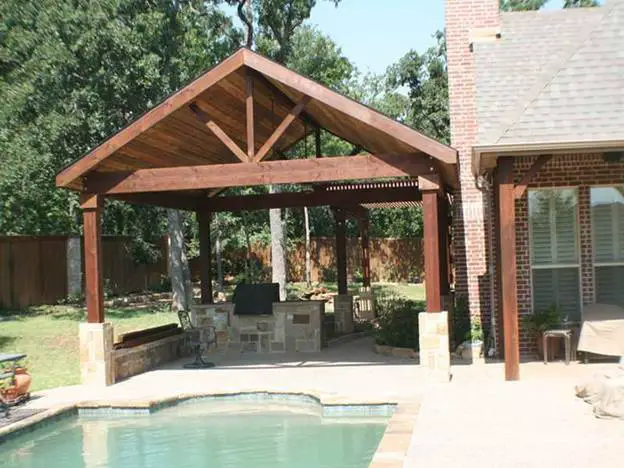
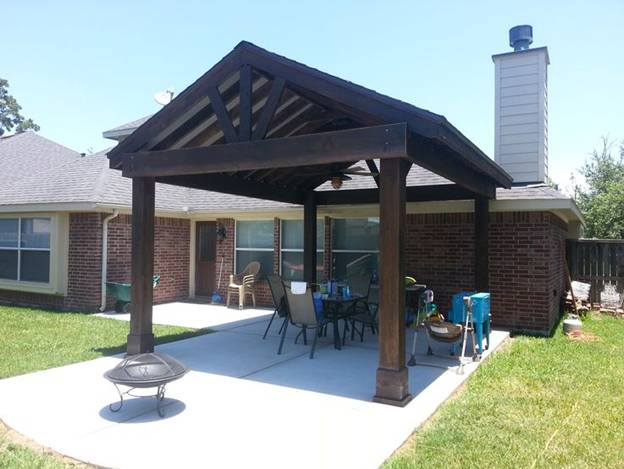
10. Outdoor Space with a Classic Flair
Create an extension of your home in the backyard for a fun BBQ party or a cozy reading spot by replicating this freestanding patio layout.
Furthermore, featuring a BBQ set, spacious dining area, and a freestanding fireplace, this patio cover will turn into a favorite place for entertainment.
Pros:
- The brick posts add natural charm to the design while connecting the patio cover and flooring perfectly.
Cons:
- Like the common problem of other covers, this one can be hard to move as well.
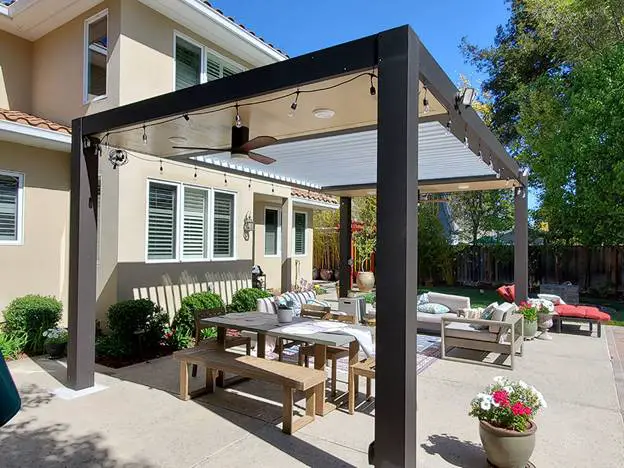
11. Pergola Style Patio with Bright Tones

If a little amount of sunlight is not an issue for you, using a pergola-style patio as shown in this photo must be a great choice.
Likewise, this cover style can shade you against the glaring sunlight but does not block the sun completely. Thus, it should be airier as well.
In addition, consider incorporating creeping plants or roses on the roof for added beauty.
Pros:
- The natural growing fence gives this freestanding patio cover an eye-catching backdrop.
Cons:
- You cannot use this outdoor area during the rainy season.
12. A Romantic Backyard Retreat
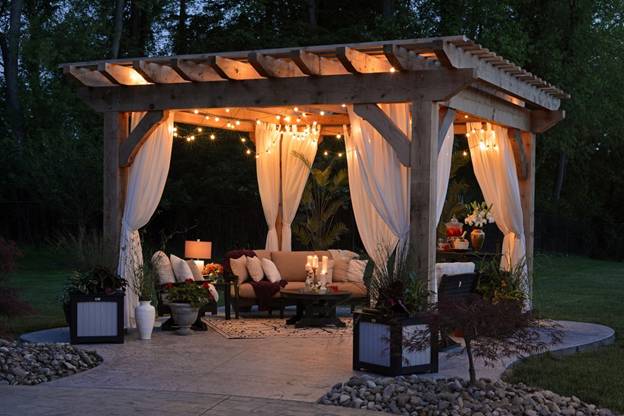
With a beamed ceiling, wooden posts, and shingles, this freestanding covered patio creates a cozy retreat for the homeowners.
The string lights add a dramatic touch to this patio cover, whereas offering adequate illumination for a relaxing night with your loved ones.
Pros:
- White curtains hanging on each post not only creates a dramatic effect on the patio cover but also improve its privacy.
Cons:
- This plan requires more budget considering the furniture and decoration pieces used in the project.
Final Thoughts
Now you know the tutorials to build a functional freestanding patio cover in your yard and some ideas to copy. The steps may sound simple, but you should not hesitate to get professional assistance when needed. Good luck!
More from Materialsix.com:
- How To Attach A Patio Roof To An Existing House
- Can You Have a Fire Pit Under Covered Patio? (Explained)
- How Much Does It Cost To Build A Covered Patio?
- What’s the Cheapest Way to Level Concrete Floor?