There are plenty of ways to install a tongue and groove ceiling. It is fast and inexpensive. It conveniently installs over bare framing. It can also cover a lousy ceiling.
Many people are interested in learning how to install a tongue and groove ceiling due to its authentic wood looks that result as a decorative focal point to the room.

Colors, Tools, and Materials
Choosing the right wooden color is essential in creating the desired effect in the room. If you are aiming for a big and bright room, choose a light-colored wood that reflects light such as bamboo and ash.
On the contrary, if you are aiming for a warm feel to the room, choose dark wood as it creates an illusion of a smaller room.
The tools that you will need are a tapping block, hammer, hole-saw, measuring tape, and cordless framing nailer. The materials needed are furring strips and planks. The most accessible planks sizes for tongue and groove are 1 x 6 and 1 x 8. If you are looking for a personalized size, it usually takes time to order.
READ: How to Texture A Ceiling with Style
Here are the details on how to install a tongue and groove ceiling:
Step 1: Furring Strips Attachment to the Ceiling
Lock up furring strips to the ceiling using the cordless framing nailer. These are going to be the nailers to enclose the planks to. Before installation, make sure to finish the tongue and groove boards and wood plank ceiling first.
Finishing the tongue and groove boards is necessary as they are well-known to shrink and expand according to temperature change. Installing unfinished tongue and groove boards in humid temperatures will result in a mess in the wintertime.
With finished tongue and groove boards, unfinished stripes will not appear later. It is also optional to finish the boards with paint to achieve a white shiplap ceiling.
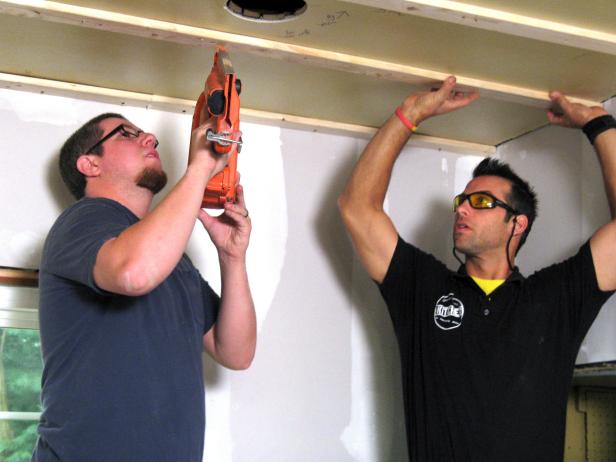
Step 2: Installing Planks
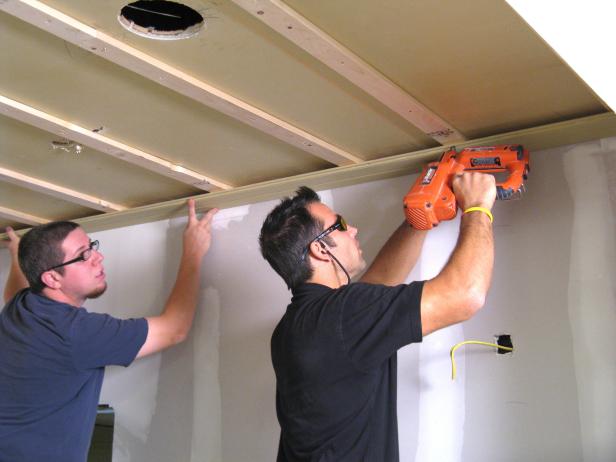
Be careful and conscious about where the tongue and groove are facing. Make sure the first piece of the groove is facing the wall and the tongue is facing out. Grab your framing gun and add a nail to the tongue of the plank. Secure it in place.
For the following piece, link the new piece of groove to the first piece of tongue. Remember to always plan the installation. The tongues must point toward the track of installation.
Insert the nails across the shoulder of the tongues into the frame at an angle of approximately 45 degrees. The subsequent ribbed edge will conceal the nail pit. A 15 or 16-gauge nailer with 2-inch nails is the optimal preference for attachment.
However, an 18-gauge nailer will also do the job. This technique is called “blind nailing”, if done properly, there will not be any pits and holes to fill on the ceiling.
Step 3: Securing the Planks
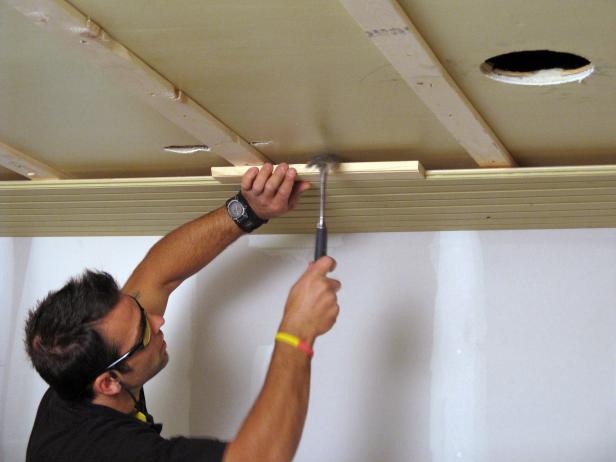
Secure the planks by fastening a tapping beam toward the tongue. Lightly hit the tapping beam with a hammer into the lining. Avoid hitting the tongue with the hammer directly because it will ruin the interlink with other pieces.
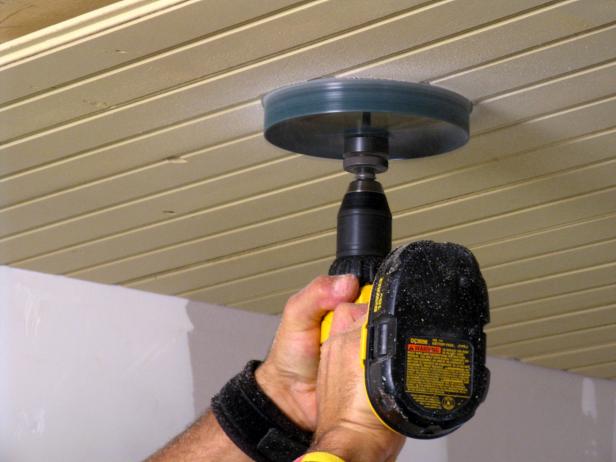
Step 4: Creating Holes for Recessed Lighting
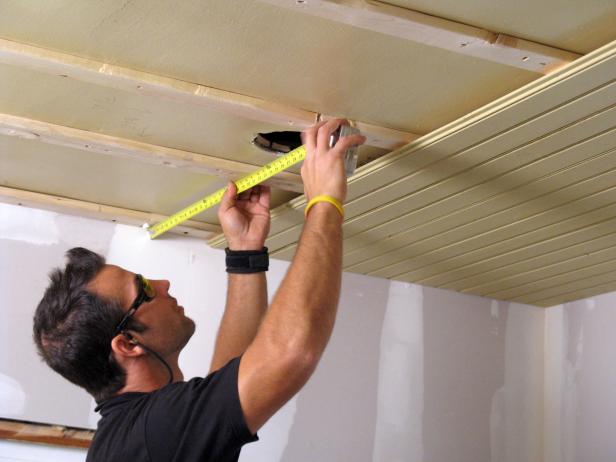
Upon moving toward the holes in the ceiling to create recessed lighting, make sure to scrupulously evaluate the location by measuring the center of the light. Keep on planking the ceiling, and then return and cut a light hole with a hole saw.
Accurately marking cutouts can be tricky when it comes to tongue and groove ceiling openings. The key is to mark as detailed as you can on the shiplap ceiling for a visible guide.
Avoid measuring without a visual guide as this will mostly lead to disappointments and redoing the job.
However, if you think you made a mistake in cutting holes for recessed lighting, take it easy and cut out the bad spot.
Take other parts to cover the part, be mindful that this will waste a few inches of material.
Conclusion
Learning how to install a tongue and groove ceiling can be useful for a do-it-yourself project at home. Regardless of your home decor, a tongue and groove ceiling can always enhance the visual of a room as its natural wooden colors never fail to captivate the eyes.