Have you been dealing with a broken bathroom sink? Are you having trouble with the plumbing in your bathroom? If you said yes to both the questions, then you should keep scrolling down because we have just the solution for you.
The thing with plumbing tasks is that they are usually a long process. No matter how much time and effort you put in, you will eventually have to seek professional help if things get way out of hand.
The process of floor plumbing might be a lengthy one but once things get sorted, you will feel at ease. After all, who does not like going to a bathroom that has good flooring and a functioning pedestal sink.
If you do some research before getting professional help onboard, you will realize that a wall drain is more convenient instead of a floor drain when it comes to easy usage.
Here is everything you might need to install a pedestal sink with floor plumbing:
| 1. Measuring tapes | 8. Drills |
| 2. Safety glass | 9. Silicon glue |
| 3. Wrenches | 10. Hanger bolts |
| 4. Knife | 11. Slip bolt |
| 5. Buckets | 12. Washers |
| 6. Handsaw | 13. Wall paint |
| 7. Circular saw | 14. Drywall supplies |
How to Install a Pedestal Sink with Floor Plumbing (7 Steps)
To be able to install a pedestal sink, here is all that you need to do:
1. Remove the sink
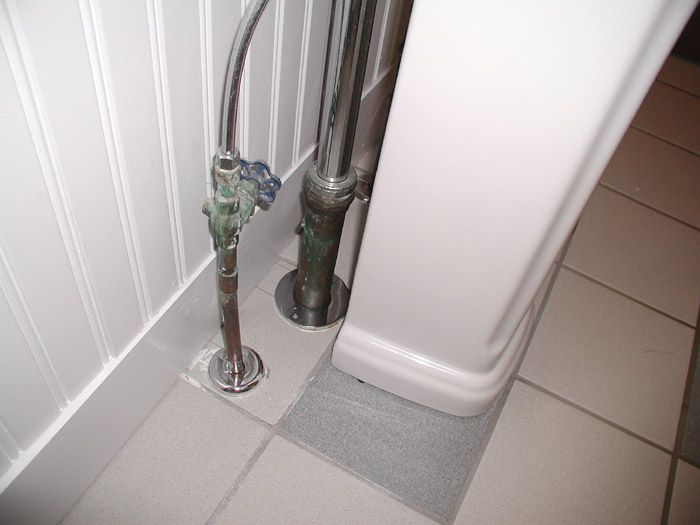
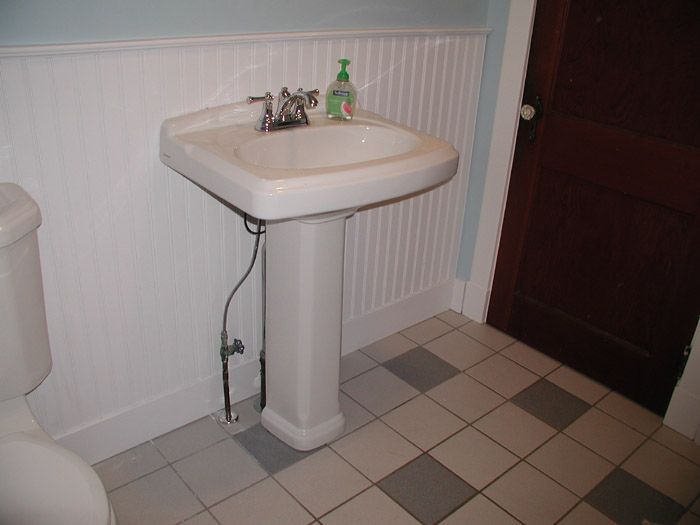
The first step that you need to take is to remove your old bathroom sink. The water supply line inside your bathroom might have both hot and cold water.
You need to first turn both these taps off so that there is no water leakage when the sink is removed. If you see the sink from underneath, you will notice a tube in the shape of a P. You will also have to remove it once you find it. You can then place a bucket in its place so that excessive water does not make any mess.
Once you have that, the next step for you is to make sure that you push that bucket in place of the water lines and then immediately turn off the taps. This way, whatever water might drip, will drip directly into the bucket.
Finally, once you get a hang of the P tube and the water lines, you can easily get rid of that old sink. You need to keep a balance while removing the old sink because due to excessive water dripping, you might even drop it down.
If the old sink falls on your bathroom floor, it might cause damage to the tiles or other pipes lying around. One thing to remember here is that if the sink is attached to the wall on its own without a vanity underneath it, it will be easier to take off as compared to when there is vanity.
2. Measure the area
Now that the sink is finally removed, it is important that you take the necessary measurements in order to save yourself from any further trouble that might arise.
Here is a list of all the measurements you should consider taking after removing an old sink:
- The area from the P tube to the bathroom floor.
- The area from one water line to another.
- The area between the bathroom floor to any mirrors on the wall.
Now, you might be wondering as to why these measurements are so important? These measurements are important to help you decide on a new pedestal sink.
You cannot just walk into a sanitary showroom and get any sink you like. No matter how much you like a pedestal sink, it needs to be the accurate size in order to become your bathroom accessory.
3. Assembling the sink
You cannot just assemble a new pedestal sink in one go. No matter how much you try, at first, you would need to loosely assemble the sink in the bathroom.
Make sure you are satisfied with what you have got for your bathroom. You also need to check it for the measurements and if they were correct or not.
4. Install a support board
When you buy a pedestal board, you also get an assembling manual with it. The manual has pretty clear guidelines on how to put it together and if it needs any extra support or not.
If the manual on your pedestal sink says that you need to install an extra support board, do it so that the sink gets the support it requires. If it does not then there is literally no reason why you should invest in an extra support board for the assembling.
Just in case you need to install an extra support board for your pedestal sink, here is how you can easily do it:
- You need to first mark the center point or line of the pedestal sink to be able to figure out the exact place it needs to be.
- Make sure that the water lines come together with the pedestal sink’s faucet holes.
- You need to mark its height on the wall of your bathroom.
- Make sure that the pedestal sink can easily get attached to the mounting bracket on the drywall.
5. Prepare the surface
After you decide to give extra support to your pedestal sink with or without using the option of installing a support board, the next step is to prepare the surface for installation.
Once you know the place of the mounting board, you need to make sure that the center point of the pedestal sink is marked. This is an important step because this will directly enable the pedestal sink to flush against the board.
You need to be sure about the levels so that there is no trouble in the installation phase. Make sure that you have some extra help on you to hold the pedestal sink if it is too heavy for you.
After you are completely sure about the sink’s placement, make sure that you mark the holes on the wall of the bathroom so that it sits right in place later on. When you are marking the wall, make sure that you do not forget the marking that needs to be done on the bathroom floor. Another thing that you need to be mindful of is the hanger bolts and their size. Be sure that they are long enough to hold the pedestal sink together.
6. Plumb the pedestal sink drain
After the surface installation and putting the pedestal sink in its place, you need to make sure that you plumb the drain along with the faucet.
Here is how you can do it:
- First, you need to thoroughly wipe the pedestal sink’s hole and make sure that it is clean.
- You need to put some silicon glue underneath it.
- The glue will keep the flange of the pedestal sink intact and keep any excess water from overflowing.
- Then, you need to drop the sink’s drain hole by pressing it.
- Next, you need to slide the gasket off the drain.
- Do the same with the washer part before you thread the nuts into the drainage.
- Make sure that the wrench is tightened now.
- Do not tighten the wrench so much that your bathroom walls get damaged and there are prominent cracks.
- You need to clean any extra silicon glue from the surface.
There are literally no special steps taken for the faucets. The same steps can be easily taken for them. However, there is only one evident difference between the two which is the multiple holes that you can easily see on the pedestal sink’s lip. They are a good reminder of where exactly the faucet is supposed to go.
Something to know about the holes:
- The four holes on the faucet reflect the three holes that are on the left.
- They are there to help you differentiate between the hot and cold water supply.
- The one hole which is on the far right is for the spray hose.
- When you see two holes, know that you can install one faucet and a spray hose.
7. Mount the sink
After you have prepared the pedestal sink with the sink drain and the faucet installation, you need to know how to mount the whole thing together.
The sink needs to be perfectly mounted on the hanger bolts by securing the washers and the cap nuts. You need to make sure that these nuts and washers are tightened properly. Again, tighten them properly but not too hard that there are cracks in the bathroom walls.
Afterward, here is what you will need to do:
- Hold the sink together so that it does not fall on you or the bathroom floor.
- Install the P tube back in its place.
- Now check for any water leakage.
- Tighten the nuts and washer with a hand plier if need be.
- You need to make sure that the hot and cold water supply faucet valves are in the right place.
***
Congratulations on putting together a pedestal sink all by yourself!
Did you find this article useful? Let us know in the comments below.
More from Materialsix: