Insulating a shed is an important step in making it a more comfortable workspace or storage area. During the winter months, a poorly insulated shed can become extremely cold, making it difficult to work or store items. Insulation helps to keep the heat inside the shed, making it a more comfortable environment. Additionally, insulation can help to prevent moisture buildup, which can lead to mold and mildew growth.
In this guide, we will provide you with all the information you need to properly insulate your shed like a pro. We will discuss the benefits of insulating a shed, the different types of insulation materials available, and the factors to consider before insulating your shed. We will also provide you with a step-by-step guide to insulating your shed, as well as common mistakes to avoid during the insulation process.
Insulating a shed may seem like a daunting task, but with the right tools and materials, it can be done easily and efficiently. By properly insulating your shed, you can create a more comfortable workspace or storage area, and protect your belongings from the harsh winter weather. So, whether you’re looking to use your shed as a workshop, storage area, or just a cozy retreat, insulating it is a great investment that will pay off in the long run.
Benefits of Insulating a Shed
Insulating a shed can provide numerous benefits, making it a worthwhile investment for those who use their shed frequently or want to protect their belongings from harsh weather conditions. Here are some of the benefits of insulating a shed:
1. Temperature Control: Insulating a shed can help regulate the temperature inside, keeping it warm during the winter months and cool during the summer months. This makes it a more comfortable workspace and can also protect any items stored inside from extreme temperatures.
2. Energy Efficiency: Insulating a shed can also make it more energy-efficient, as it reduces the amount of heat or cool air that escapes. This can lead to lower energy bills and a smaller carbon footprint.
3. Moisture Control: Insulation can also help prevent moisture from entering the shed, which can cause damage to any items stored inside. Moisture can also lead to mold and mildew growth, which can be harmful to your health.
4. Noise Reduction: Insulation can also help reduce noise levels inside the shed, making it a more peaceful and quiet workspace.
5. Increased Property Value: Insulating a shed can also increase the value of your property, as it adds an extra layer of protection and functionality to your outdoor space.
Overall, insulating a shed can provide numerous benefits, making it a smart investment for those who want to protect their belongings, create a comfortable workspace, and increase the value of their property.
Types of Insulation Materials
Insulation is key to transforming your shed into a warm sanctuary during winter or a comfortable workspace. Given the array of insulation materials available, the selection process can seem daunting. To simplify your decision, we’ve listed the five most common types of insulation materials:
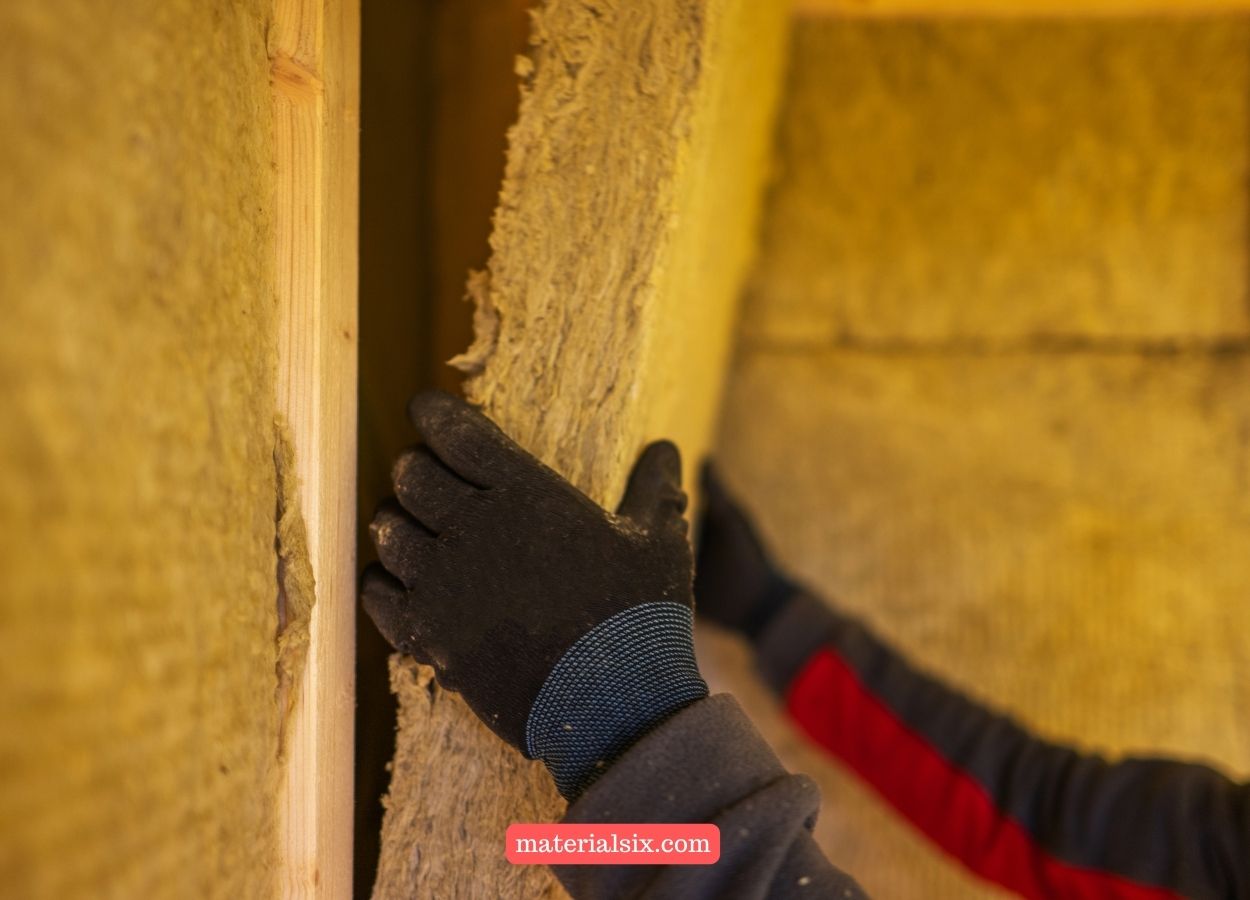
- Fiberglass Insulation: These are made from minute glass fibers and can be purchased as batts or rolls. Key characteristics include:
- Pros: Easy to install and relatively inexpensive.
- Cons: Can irritate the skin and lungs – use protective gear while handling.
- Cellulose Insulation: Made from recycled paper, it is available in loose-fill or blown-in forms.
- Pros: Environmentally-friendly and excellent soundproofing properties.
- Cons: Installation may be challenging, potentially requiring professional assistance.
- Foam Board Insulation: Crafted from polystyrene or polyurethane, it comes in rigid panels.
- Pros: Easy to install with superior moisture resistance.
- Cons: Pricier compared to other insulation materials.
- Reflective Insulation: Manufactured from aluminum foil, it can be bought as rolls or sheets.
- Pros: Works by reflecting heat away from the shed, ideal for hotter climates.
- Cons: Not as effective in colder climates.
- Spray Foam Insulation: Created from polyurethane, it’s applied as a liquid that expands and hardens.
- Pros: Excellent for sealing gaps and cracks; provides an effective air barrier.
- Cons: More expensive and may require professional help for installation.
Selecting the ideal insulation material for your shed depends on your budget, the local climate, and personal preference. Extensive research and comparison of the different insulation materials are vital to making an informed decision. With the right insulation, your shed can become a comfortable space tailored to your needs.
Factors to Consider Before Insulating a Shed
Before initiating the process of insulating your shed, it’s vital to consider several factors that could influence your choices and the effectiveness of the insulation.
- Climate: The climate in your area significantly influences the type and amount of insulation required. For colder climates with harsh winters, consider a higher R-value insulation for enhanced warmth. Conversely, for milder climates, a lower R-value insulation might suffice.
- Size of the Shed: The size of your shed directly impacts the quantity of insulation material needed. Larger sheds will naturally require more insulation.
- Insulation Material: Selection of the appropriate insulation material is pivotal. Options like fiberglass, spray foam, and cellulose each have their pros and cons. Ensure you research and choose the best option that suits your specific requirements.
- Location of the Shed: If your shed is located in an area with high humidity, consider using a vapor barrier to prevent moisture from seeping into the insulation. Similarly, sheds in areas prone to high winds might need more durable insulation to withstand wind pressure.
- Purpose of the Shed: The intended use of your shed also dictates the insulation needed. For example, if you’re planning to use your shed as a workspace, a higher R-value insulation is beneficial to maintain warmth and comfort. On the other hand, if it’s intended for storage, you could opt for a lower R-value insulation.
By considering these factors, you can make informed decisions about how to best insulate your shed, ensuring the process is effective and meets your specific needs.
Tools and Materials Needed for Insulation
To ensure your shed insulation is effective and durable, you’ll need certain tools and materials. Here’s a comprehensive list to guide you through the process:
- Measuring Tape: This is essential to calculate the dimensions of your shed, which in turn determines the amount of insulation material you’ll need.
- Utility Knife: This tool is useful for cutting insulation material to the appropriate size.
- Staple Gun: You’ll need this to attach the insulation material to the shed’s walls and ceiling.
- Insulation Material: Various types of insulation materials are available, including fiberglass, foam board, and spray foam. Each has its own set of advantages and disadvantages, making it crucial to select one that fits your specific needs.
- Vapor Barrier: This is necessary to stop moisture from entering the shed. You can use a plastic sheet or opt for insulation material that comes with a built-in vapor barrier.
- Caulk and Weatherstripping: These materials are used to seal any gaps or cracks in the walls and ceiling, preventing air leaks and enhancing the insulation in your shed.
- Safety Equipment: Safety is paramount when handling insulation work. Equip yourself with gloves, safety glasses, and a dust mask to protect against potential hazards from the insulation material.
Arming yourself with the correct tools and materials is a decisive step towards successfully insulating your shed. By following a step-by-step guide and using the recommended tools and materials, you can confidently transform your shed into a well-insulated, comfortable space, suitable for use throughout the year.
Step-by-Step Guide to Insulating a Shed
To simplify the shed insulation process, particularly for novices, we’ve compiled a concise guide to steer you through each step. Following this guide will equip you with the know-how to insulate your shed correctly and efficiently:
- Preparation: Begin by thoroughly cleaning the shed and removing any debris or dirt that may prevent the insulation material from adhering properly to the walls and ceiling.
- Seal Gaps: Seal any gaps or cracks in the shed’s walls and ceiling to prevent cold air from entering. Even tiny gaps can reduce the effectiveness of your insulation. The guide offers tips on how to identify and seal these gaps.
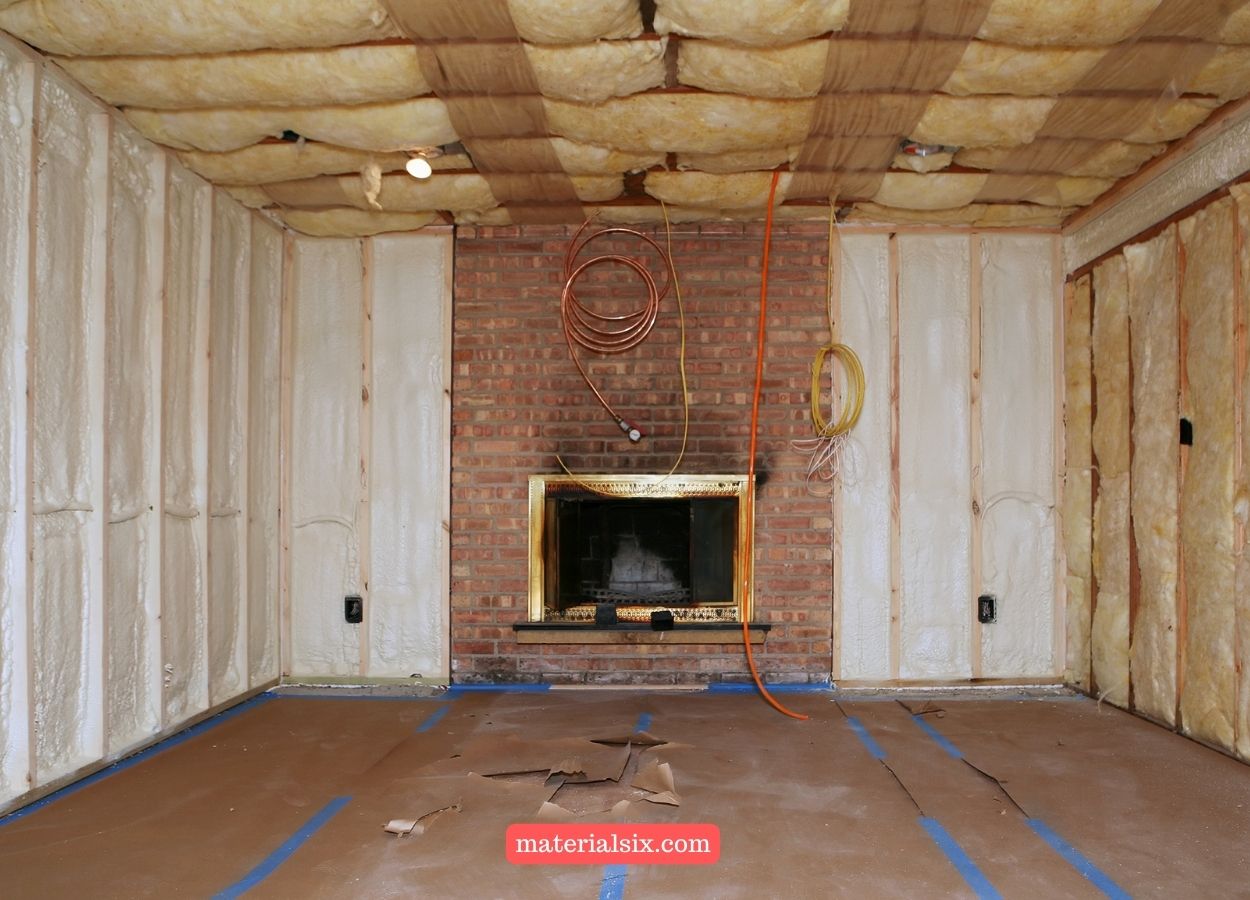
- Install Insulation Material: With a clean and sealed shed, you’re ready to install the insulation material. This guide provides information on the various types of insulation materials and advice on selecting the one best suited for your shed. It also offers tips on correctly installing the insulation material, such as cutting it to the right size and securing it to the walls and ceiling.
- Install a Vapor Barrier: After the insulation material is in place, it’s time to install a vapor barrier. This barrier prevents moisture infiltration which could compromise the insulation’s efficiency.
- Finishing Layer: Adding a finishing layer to your walls and ceiling not only protects the insulation but also gives your shed a neat and tidy appearance.
This step-by-step guide is a crucial tool, instilling you with the knowledge and confidence required to correctly insulate your shed and create a warm, comfortable workspace. By adhering to these steps, you can ensure a successful insulation project and prepare your shed for all seasons, especially the colder ones.
Common Mistakes to Avoid When Insulating a Shed
Insulating a shed is a fantastic way to enhance its usability throughout the year. However, avoidable errors could lead to complications later on. Here’s a table highlighting common mistakes and their preventative measures:
| Common Mistake | Prevention |
|---|---|
| Using Incorrect Insulation Material | Choose an insulation material suitable for the shed’s intended use and local climate. For instance, a workspace might necessitate fire-resistant insulation. |
| Not Sealing Air Leaks | Air leaks can compromise insulation effectiveness and cause drafts or moisture issues. Ensure you seal all gaps or cracks in the walls, roof, and floor before applying insulation. |
| Improper Installation of Insulation | Follow the manufacturer’s instructions to install insulation evenly and without gaps. Improper installation can create areas where heat can escape, diminishing insulation effectiveness. |
| Overlooking Ventilation | Adequate ventilation is essential to prevent moisture buildup and mold growth. Whether through vents or windows, ensure that your shed has sufficient air circulation. |
By steering clear of these common errors, you can enhance the effectiveness, comfort, and safety of your insulated shed. Though insulating a shed can provide year-round benefits, it’s essential to take the necessary time and effort to do it correctly. With appropriate materials, tools, and methods, you can create a warm, comfortable workspace or storage area that endures for years.
Cost of Insulating a Shed
The cost of insulating a shed hinges on several factors, including the shed size, the type of insulation material used, and whether the insulation is installed professionally or as a DIY project. Here’s a table detailing the costs and considerations associated with different types of insulation:
| Insulation Material | Cost Factors | Considerations |
|---|---|---|
| Fiberglass | One of the more affordable options. | Can be challenging to install correctly and might not be as effective as other insulation types. |
| Spray Foam | More expensive but offers excellent insulation. | Can be quickly and easily applied, however, the cost might be prohibitive for some. |
| Rigid Foam Board | Costly but effective. | Installation can be tricky and might require professional installation, adding to the cost. |
Furthermore, the method of installation also influences the cost:
| Installation Method | Cost Factors | Considerations |
|---|---|---|
| Professional Installation | More expensive due to labor costs. | Ensures the insulation is installed correctly and effectively. |
| DIY Installation | More affordable, as labor costs are eliminated. | Requires more time and effort to ensure proper installation. |
Understanding these cost factors will enable shed owners to make an informed decision regarding the most suitable insulation material and installation method for their needs and budget. Though it may require a considerable initial investment, a well-insulated shed will provide long-term comfort and functionality.
Maintenance and Upkeep of Insulated Shed
Preserving the efficiency of your insulated shed requires ongoing maintenance and attention. Here’s a systematic approach to help maintain your shed’s insulation:
- Regular Insulation Checks: One of the keys to conserving your shed’s insulation is to conduct regular checks. Insulation can deteriorate over time due to wear and tear or temperature fluctuations. If you notice any gaps or holes, promptly fill them with additional insulation material to keep your shed optimally insulated.
- Proper Ventilation: An insulated shed can trap moisture if not adequately ventilated, potentially causing mold and mildew problems. Ensuring your shed is well-ventilated will help avoid these issues. You can achieve this with the aid of vents or windows that can be opened.
- Regular Cleaning and Organization: A tidy shed is easier to maintain. Clutter can prevent you from accessing the insulation and may attract pests or rodents. Regular cleaning and organization will help keep your shed a comfortable and functional workspace.
- Addressing Pest Problems: Rodents and insects can damage your insulation. Regularly check for signs of pests and act quickly if any are found. This may involve setting traps, using pesticides, or calling a pest control professional.
By following these steps and dedicating regular attention to the maintenance of your shed, you can prolong the efficacy of your insulation, ensuring that your shed continues to provide a warm and comfortable environment for years to come.
Conclusion
In conclusion, insulating a shed can greatly improve its functionality and longevity. A well-insulated shed will save energy, provide a comfortable workspace or storage area, and protect the contents from harsh weather conditions. However, this is a task that requires careful thought and proper execution. It’s not merely about choosing the right insulation material but also about ensuring it’s installed correctly to avoid any inefficiencies or potential damage.
If you’re considering insulating your shed, it’s recommended to weigh the cost, effort, and potential benefits against each other. If the benefits outweigh the costs, insulating your shed is a valuable investment that will serve you in the long run. But bear in mind that the task doesn’t end with installation. To maintain its effectiveness, regular checks and necessary maintenance of the insulation is required.
With the knowledge gained from this article, you should now have a clearer understanding of what the process entails, enabling you to make an informed decision. Remember, the goal isn’t just to insulate your shed, but to do it well. The confidence to take on this task will yield rewarding results – a comfortable, energy-efficient, and well-protected shed. Let this be the motivation you need to kickstart your shed insulation project. Here’s to enhancing your shed and making it a space that truly works for you.