Tired of the same old lighting in your home? It’s time to light up your life with some fabulous DIY lampshade makeovers! Transforming your space can be as simple as a lampshade upgrade, and the options are endless.
From whimsical to chic, these fun ideas will not only brighten up your room but also spark your creativity like never before. Get ready to roll up your sleeves and dive into a world of craft lampshade possibilities that are not just visually striking but also a reflection of your personal style!
Get inspired and let your imagination run wild as we explore these stunning makeovers.
1. Fabric Frenzy: Cozy Textures
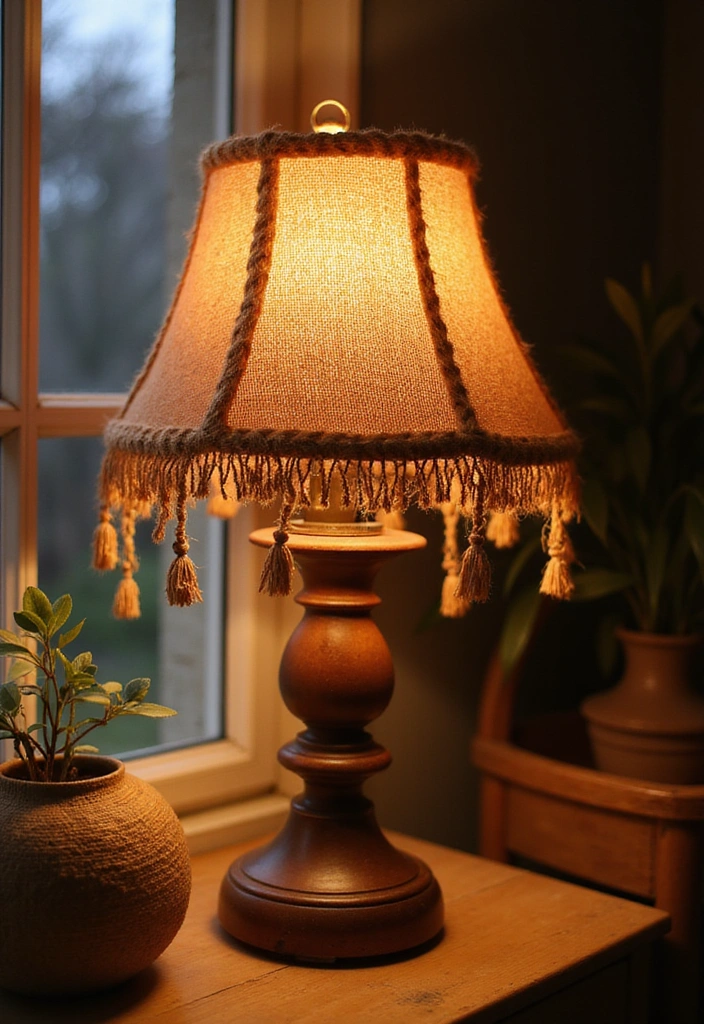
Give your lampshade a warm embrace with soft, cozy fabrics! Think of using burlap, linen, or even an old sweater to create a snug, inviting look. You’ll love how the light diffuses through the fabric, creating a soft glow that’s perfect for those chilly evenings.
Consider these steps to transform your lampshade:
- Measure your lampshade and cut the fabric accordingly.
- Use fabric glue to adhere the fabric, ensuring it’s taut and smooth. This permanent adhesive is perfect for various fabrics and will help you achieve a clean finish.
- For a personal touch, add lace, trim, or even assorted trims and buttons set to enhance your design! These fun embellishments can give your lampshade that unique flair.
If you prefer a quicker approach, a hot glue gun is an excellent option. It heats up fast, making it ideal for applying fabric and decorative elements efficiently.
This makeover not only adds warmth but also textures that can completely change the look of your room. Embrace your creativity and mix and match to create something truly unique.
2. Paint Party: Bold Colors
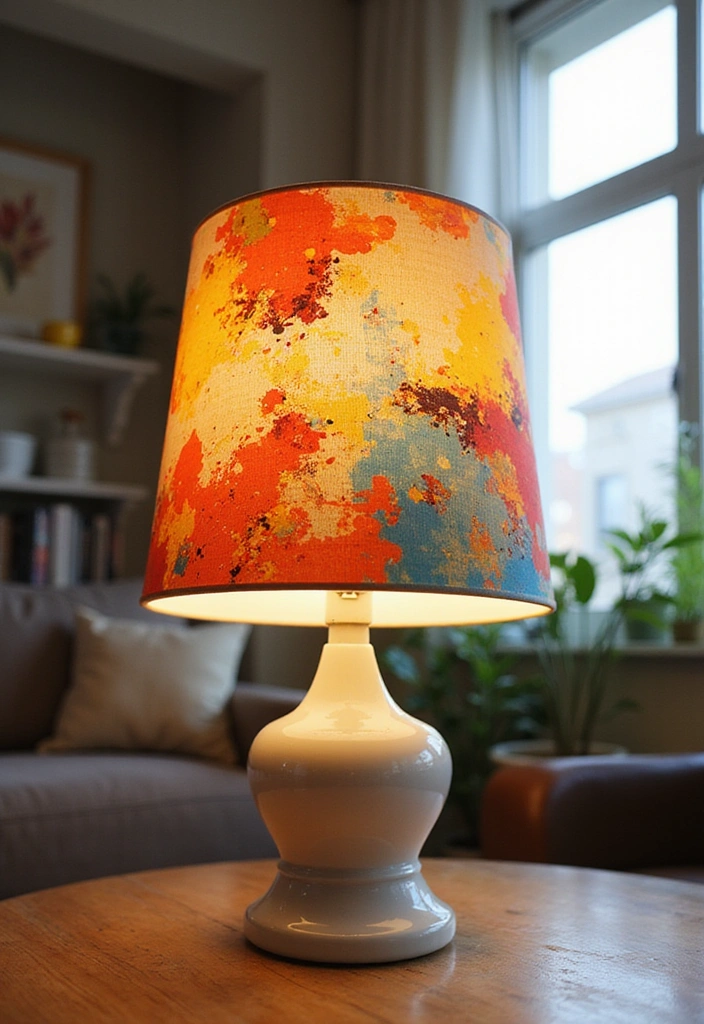
Nothing says fun quite like a splash of color! Grab your paintbrushes and unleash vibrant shades to elevate your lampshade from drab to fab. This DIY project is not only affordable but also incredibly rewarding.
Here’s how you can add life with paint:
- Choose a color palette that resonates with your style. For a wide variety of options, consider the Apple Barrel, vibrant spectrum collection acrylic craft paint. It comes in 16 assorted matte colors, offering plenty of choices to get creative.
- Use acrylic paint for a durable finish; apply it with sponge brushes for a smooth look. They come in various sizes (1”, 2”, and 3”), making it easy to cover different areas of your lampshade.
- To add dimension, try using stencils for painting. With 66 reusable designs, you can create intricate patterns that add character and flair to your project.
Not only is painting a great way to customize your lampshade, but it also allows for experimentation—don’t be afraid to mix colors and create gradients. This will surely brighten up any corner of your home!
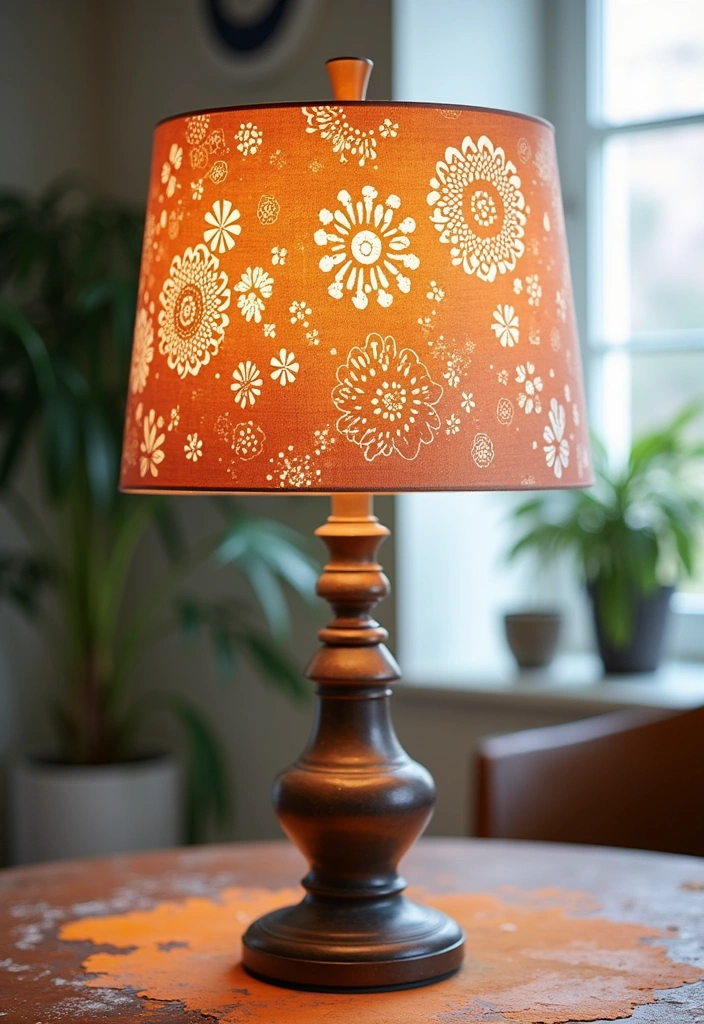
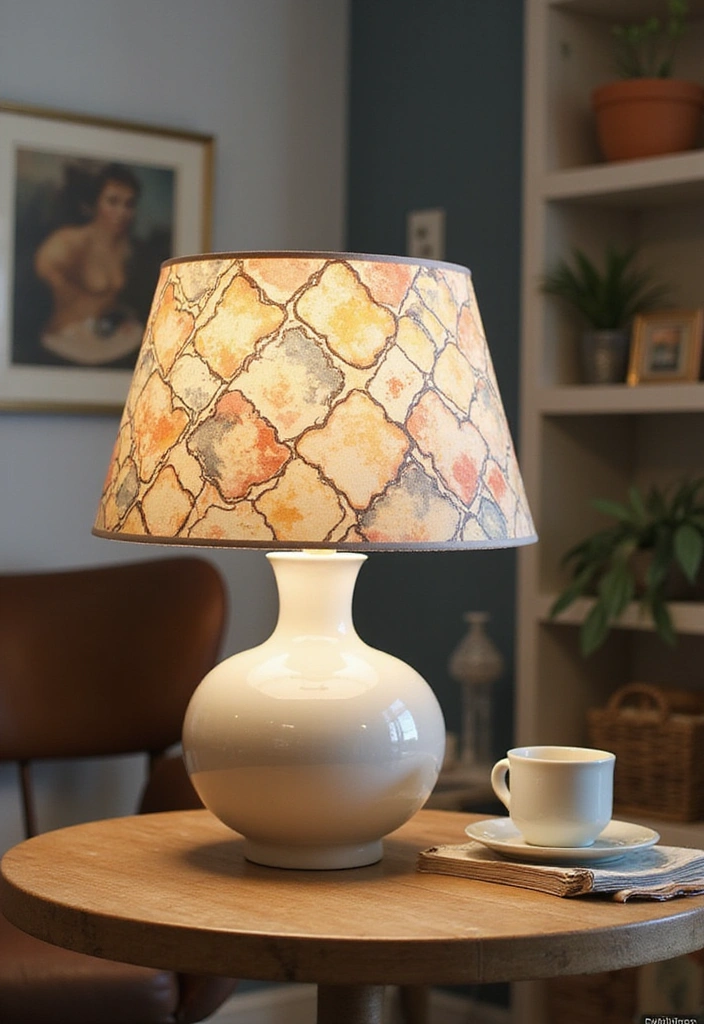
3. Paper Delight: Crafty Collage
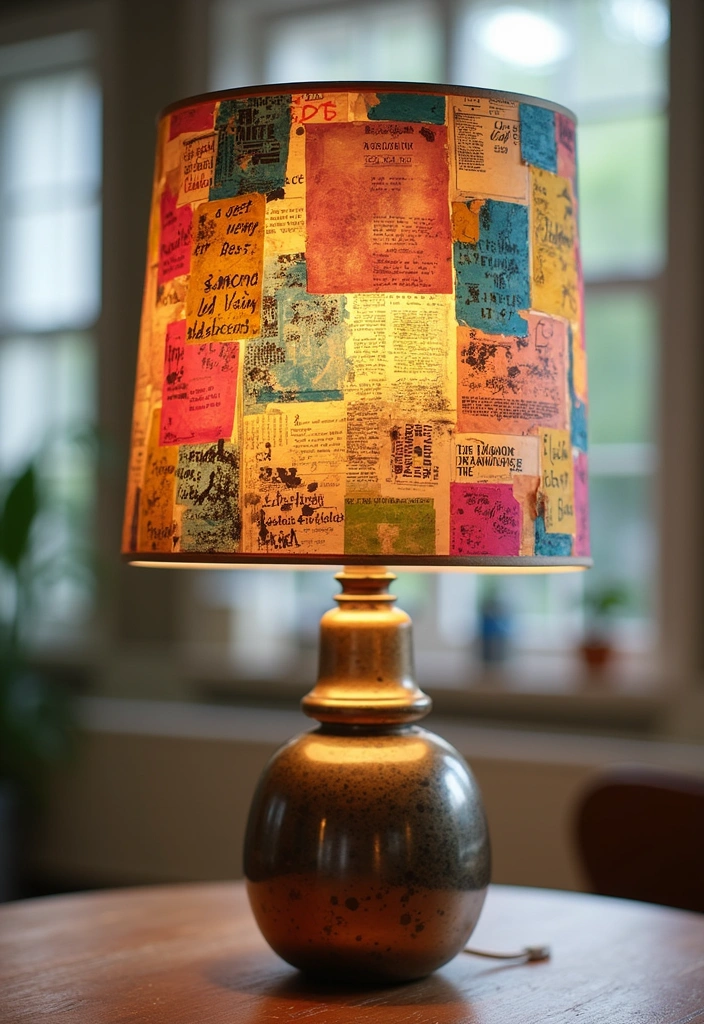
Recycle those old magazines or scrap paper to create a lampshade collage that’s bursting with personality! This fun idea combines sustainability with creativity, and the results are bound to be eye-catching.
Follow these steps for a delightful paper makeover:
- Tear or cut out beautiful images and patterns from magazines. For a precise and easy cutting experience, consider using the Craft Paper Cutter. Its automatic security safeguard makes it safe to use while the side ruler helps you achieve clean lines.
- Use Mod Podge to adhere the paper to the lampshade, overlapping pieces for an artistic effect. This all-in-one craft solution dries quickly and is non-toxic, allowing you to craft with confidence.
- Finish with a layer of Mod Podge on top to seal everything in, ensuring your masterpiece remains intact.
The best part? You can change your design whenever you like, making it a dynamic piece for your room. Dive into your paper stash and unleash your creativity!
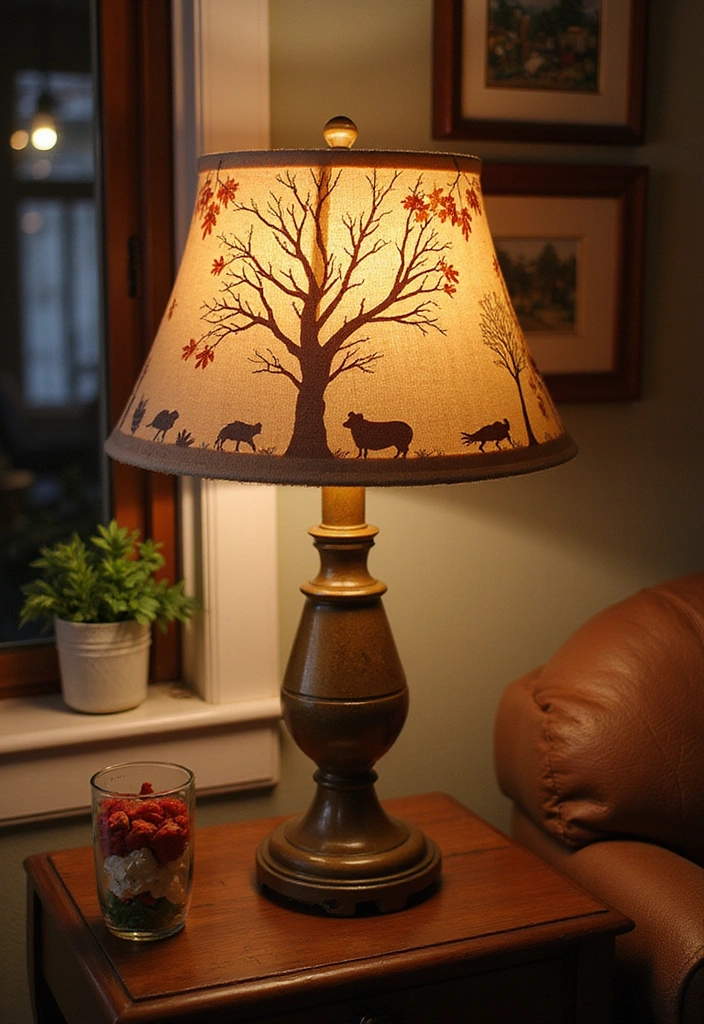
4. Natural Wonders: Leafy Greenery
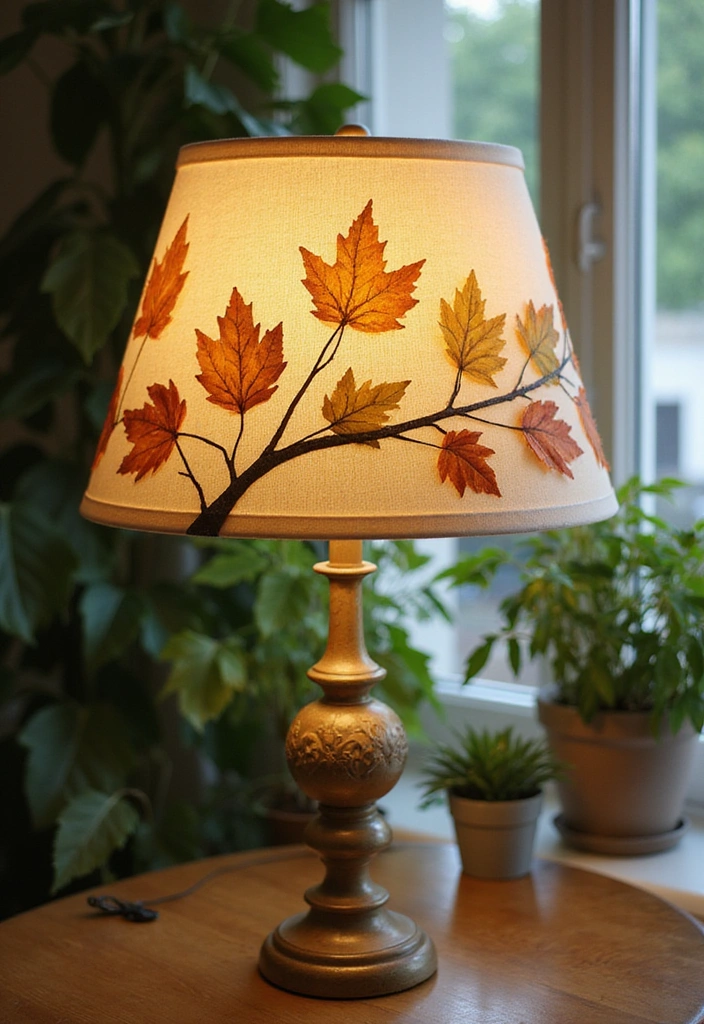
Bring the outside in with a nature-inspired lampshade! Using real or faux leaves can create stunning effects that merge your home with nature. Imagine a soft, green glow illuminating your space!
Here’s how you can create this look:
- Start by collecting real leaves or, for a more convenient option, consider using faux leaves for crafts from a craft store. These artificial options offer the same lush vibe without the worry of wilting.
- Attach the leaves to the lampshade using a hot glue gun, layering them for that full, vibrant appearance. The hot glue gun ensures that your leaves stay in place securely, letting you focus on your creative design.
- Lastly, make sure there’s enough room for light to shine through, enhancing the serene atmosphere you’re aiming for.
This project not only adds a touch of the outdoors but also creates a tranquil setting, perfect for a reading nook or a calming bedroom corner. If you need a sturdy base for your lampshade, consider a lampshade making kit to ensure everything stays well connected and beautifully displayed. Happy crafting!
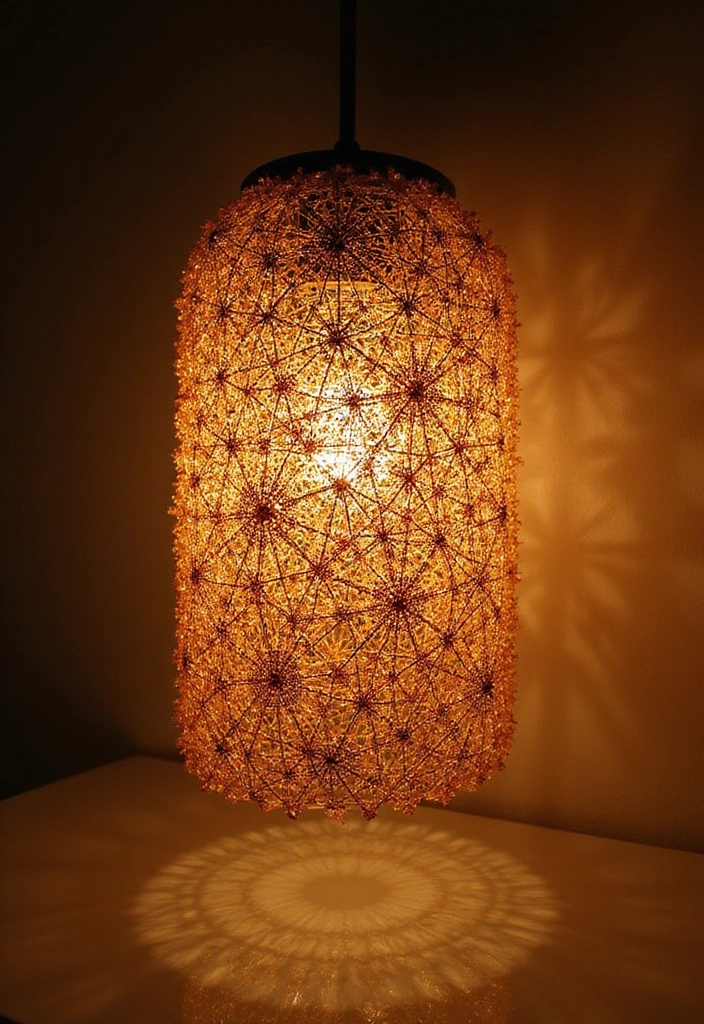
5. Whimsical Wire: Artful Shapes
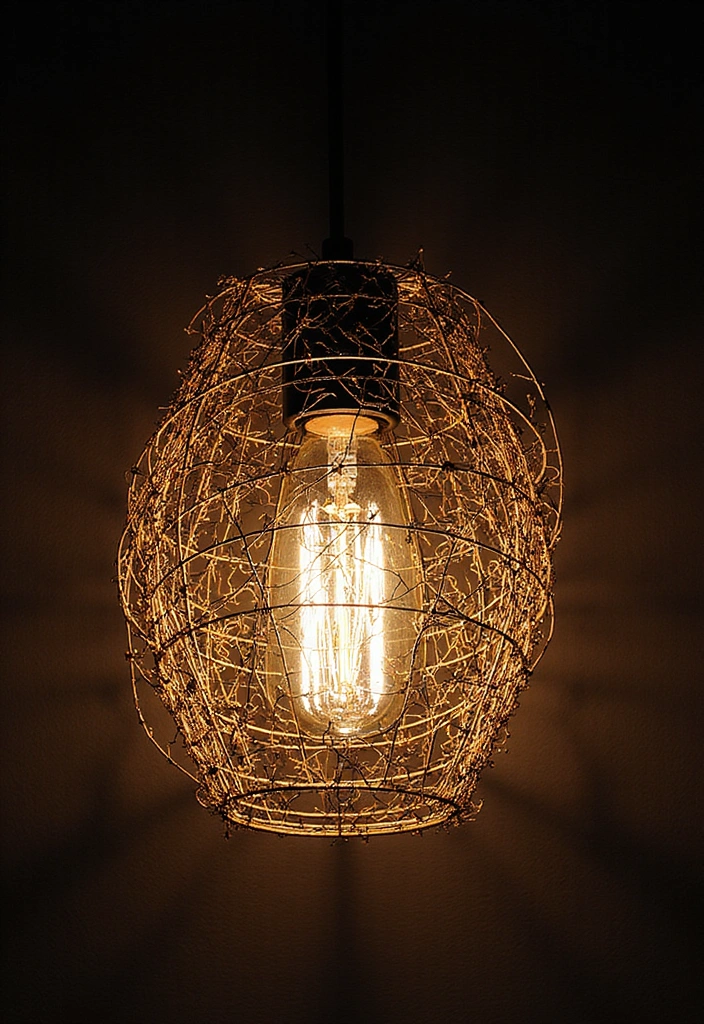
Get crafty with wire to create a lampshade that’s more like a piece of art! This DIY project is perfect for those who love unique, sculptural designs. You can bend and twist wire into fun shapes or intricate patterns.
To start, use craft wire, which is flexible yet sturdy, making it ideal for shaping your artistic vision. Create a frame by bending it into a circular or any desired shape that suits your style.
To add some flair, consider wrapping the wire with colorful yarn. This 20-skein kit offers a variety of colors, perfect for infusing your design with vibrancy.
Finally, grab a jewelry pliers set to help you manipulate the wire with precision. The needle nose and wire cutter make it easier to shape your wire and finish your masterpiece.
This innovative design will be the centerpiece of any room and can be customized to your heart’s content. Get your pliers ready and let your imagination roam free!
6. Stunning Stencils: Patterns Galore
Stencils are a crafty person’s best friend! With just a few simple shapes, you can transform a plain lampshade into a patterned delight. This technique is not only easy but also yields impressive results.
Here’s how to do it:
- Select a stencil that complements your décor style. Consider the Stencil Set for DIY Projects, which includes 42 reusable alphabet templates that are perfect for adding a personalized touch to your lampshade.
- Use spray paint or sponge application to fill in the stencil. The Acrylic Spray Paint for Crafts by Aleene’s provides a glossy finish that will elevate your design, ensuring it stands out beautifully.
- Remove the stencil carefully to reveal your design. For a smoother application, try using Sponge Applicators for Painting, which allow for effortless control while you fill in the patterns.
From florals to geometric designs, the possibilities are endless. This method enables you to create repeatable designs, making it a fun project for you and your friends. Why not invite them over for a stencil party?
7. Upcycled Wonders: Vintage Fabrics
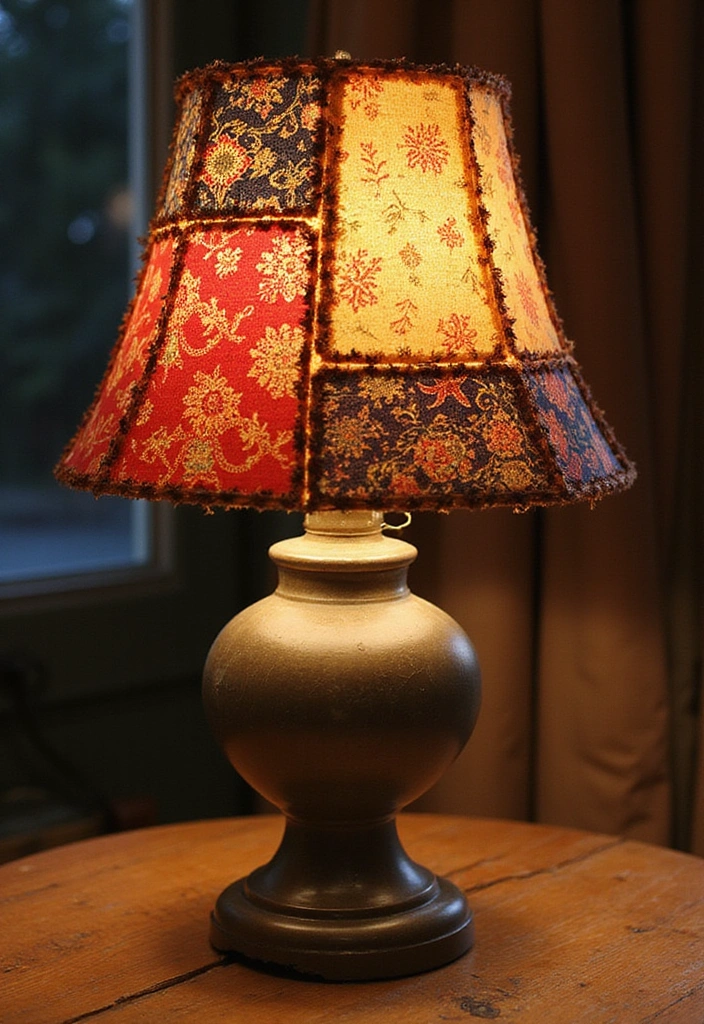
Older fabrics can tell a story, and now they can transform your lampshade too! Using vintage fabrics not only adds character but also keeps sustainability in mind.
Here’s how to give those treasured textiles a new life:
- Gather old scarves, tablecloths, or fabric remnants. A great option is the vintage fabric remnants bundle, which includes a variety of multicolored silk pieces for your project.
- Cut the fabrics to size and adhere them to your lampshade using fabric spray adhesive. This all-purpose spray will ensure a strong bond while allowing you to reposition the fabrics as needed.
- Ensure to overlap pieces for a unique patchwork look. If you’re starting from scratch or want to create a completely new shade, consider using a lampshade making kit that includes a sturdy metal ring to support your creative design.
This project can add a touch of nostalgia and charm to your decor, making your lampshade a conversation starter. Explore your local thrift store for more fabric treasures!
8. Glow in the Dark: A Magical Effect
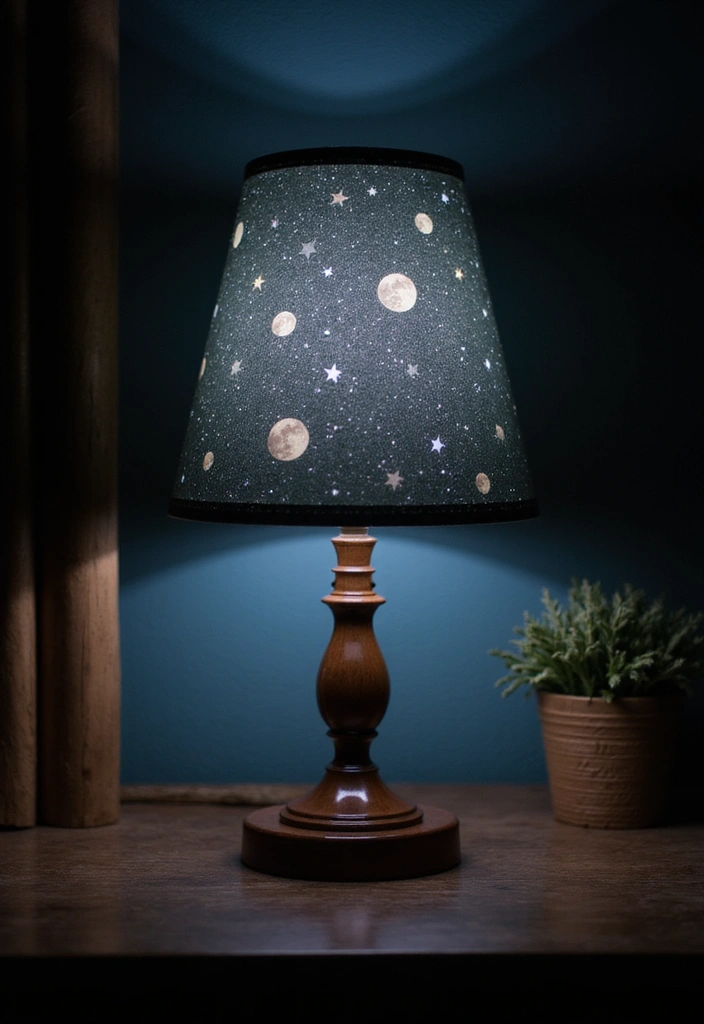
Add a sprinkle of magic to your lampshade with glow-in-the-dark paint! This fun DIY idea is perfect for kids’ rooms or anyone who loves a bit of whimsy.
To get started, you’ll need some quality materials. The ABEIER glow in the dark acrylic paint is a great choice, offering 10 bright colors that will last and shine beautifully. Simply paint your design using this vivid paint, creating stars, moons, or any fun shapes you adore.
Next, to ensure your design comes out just right, use a paintbrush set. With 24 pieces included, you’ll have the perfect tools for any detail work you want to achieve.
Once your design is complete, let it dry and watch as it glows softly when the lights go out! This project not only adds a playful element but also serves as a night light. Who wouldn’t love a glittering nighttime sky right in their room? If you need a sturdy base for your lampshade, consider the Aspen Creative lampshade making kit, which includes a strong ring that connects to your lamp harp perfectly.
With these materials, you can create a delightful glow-in-the-dark lampshade that will truly reignite your creativity!
9. Natural Twine: Rustic Charm
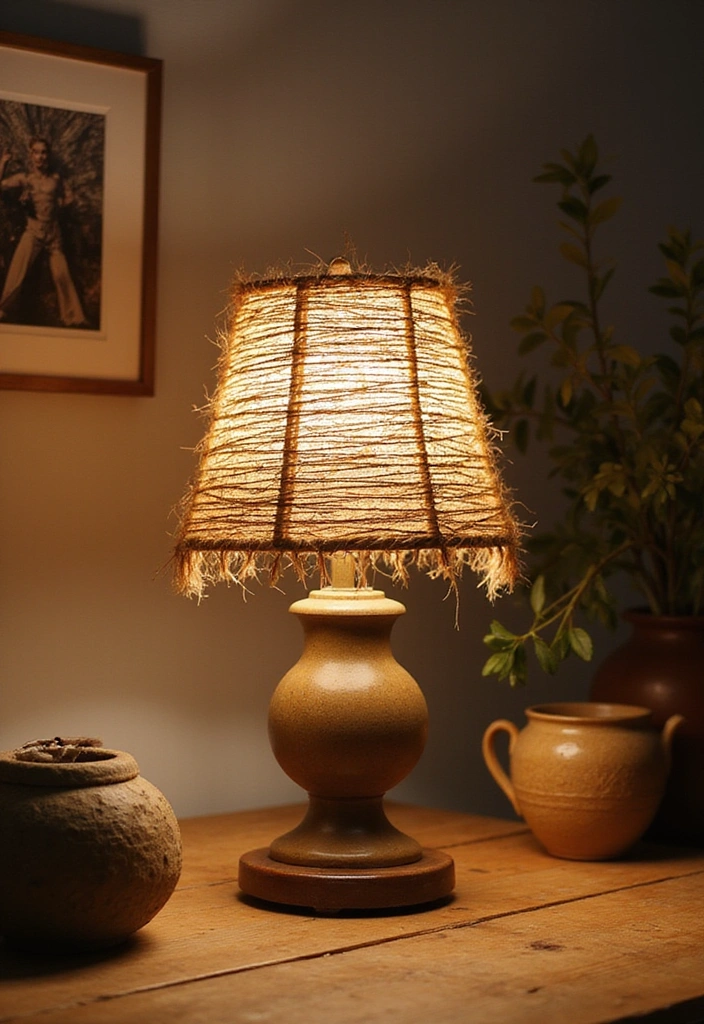
For a rustic look, consider using twine to wrap your lampshade! This DIY project is simple yet adds a beautiful, organic feel to your home.
To create this charming effect, start by gluing the end of natural jute twine to the bottom of the lampshade. Wrap it tightly around, adding glue from a hot glue gun as you go to secure it in place. This glue gun’s fast preheating feature makes the process quick and efficient, perfect for your crafting needs.
You can also add embellishments like shells or decorative beads assortment for a beachy vibe. The beads can enhance the rustic charm of your project while personalizing your lampshade.
This minimalist style works well in many decor themes, making it super versatile. Not to mention, the texture of the twine adds depth to your lighting!
10. Modern Mosaic: Colorful Glass
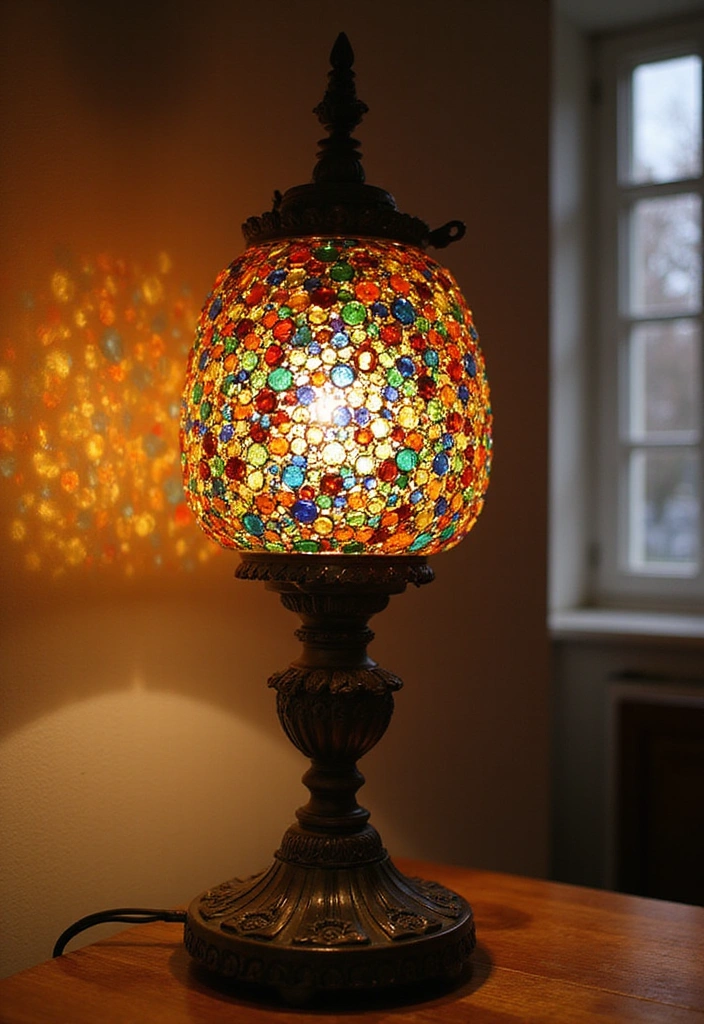
Get crafty with mosaics for a truly stunning lampshade! This project allows you to work with colored glass pieces or tiles to create a vibrant work of art.
To make your mosaic lampshade, you’ll want to start by cutting your glass into small pieces. A great tool for this is the Glass Cutter Tool, which features a pencil style oil feed carbide tip, making it easier and more precise to cut glass, tiles, or even mirrors.
Once your pieces are ready, arrange them on your lampshade and use an adhesive like Mosaic Adhesive Glue to secure them in place. This non-toxic and water-resistant glue is ideal for all tiles and surfaces, ensuring that your mosaic stays intact.
Once the glue has dried, grouting can add an extra dimension to your creation. Consider using Grout for Mosaics, which is pre-mixed and perfect for filling in the gaps between the tiles. It provides a professional finish and enhances the beauty of your mosaic.
This method not only provides a beautiful glow when lit but also allows you to explore different patterns and colors. It’s a more complex project but incredibly rewarding!
11. Felt Fun: Soft and Cozy
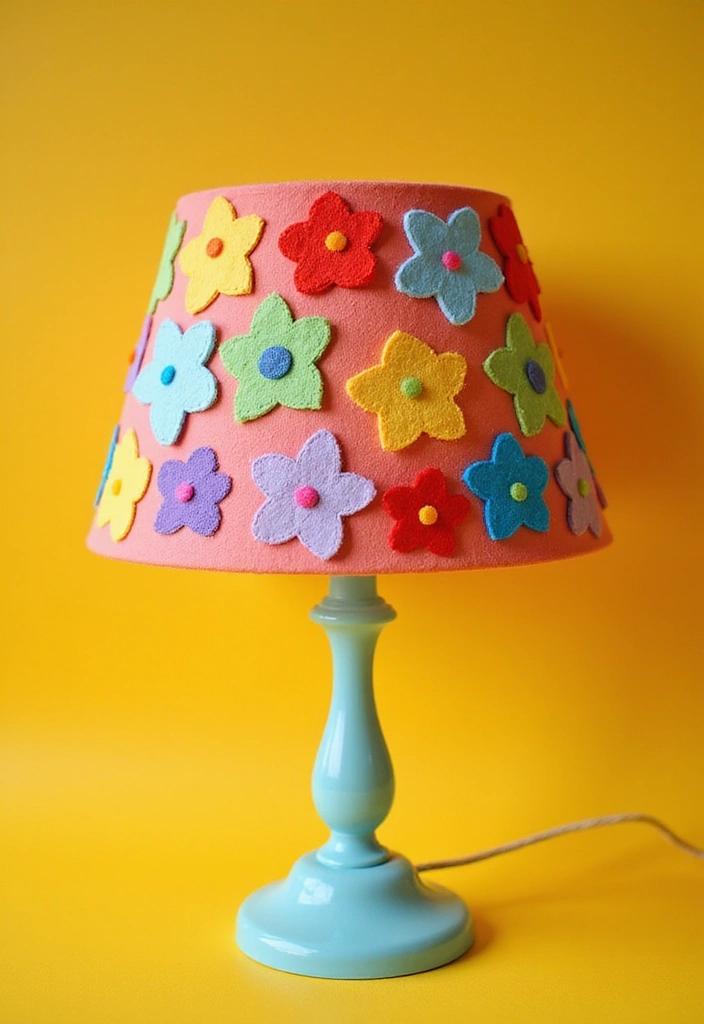
Felt is a wonderful material that allows for endless creativity! With various colors available, you can create soft, fun shapes to adorn your lampshade.
Here’s how to use felt:
- Cut felt into the desired shapes—think flowers, stars, or even geometric designs. You can grab a set of felt sheets variety pack that includes an assortment of colors, perfect for mixing and matching.
- Glue them onto the lampshade, layering as you go for a three-dimensional look. A reliable option is fabric glue for crafts, which provides a strong bond for all your felt creations.
- Mix textures and colors for a vibrant appearance! To achieve clean and precise shapes, scissors for crafting can be your best friend, ensuring that you have the right tools for your DIY project.
This project is perfect for kids’ rooms or play areas, adding a whimsical touch that’s both soft and inviting. Plus, felt is easy to work with, making it a fun choice for beginners.
12. String Art: A Creative Twist
If you love string art, why not bring that into your lampshade design? Creating a string art lampshade will not only look stunning but also let your creativity shine.
To embark on this project:
- Choose a design and lightly transfer it to your lampshade.
- Use a needle and thread set to follow your design, creating a beautiful pattern. This set is portable and comes with all the essentials you need to get started.
- Consider using colorful twine or string for added flair. With 600 feet of natural jute twine at your disposal, you can layer different colors for depth and texture, giving your lampshade a unique look!
This artsy lampshade will surely become a centerpiece in your room, showcasing your artistic skills. Plus, the glow of the light will bounce off the strings beautifully, creating a warm ambiance. To ensure your project goes smoothly, you might also want to consider using the lampshade making kit, which includes a sturdy metal drum lamp shade that will provide a great base for your creative twist.
13. Timeless Tiles: Chic and Classy
Create a chic lampshade with ceramic tiles for a modern, sophisticated look! This DIY project is perfect for those who appreciate a touch of elegance in their decor.
Here’s how to do it:
- Gather ceramic tiles assortment that complement your color scheme. These blank white unglazed tiles are ideal for painting or adding your own designs, allowing you to customize your lampshade to match your style.
- Use strong adhesive for crafts to attach the tiles to the lampshade. This Gorilla Max Strength Construction Adhesive offers a clear, gap-filling solution that is also waterproof, ensuring your tiles stay securely in place.
- Make sure to leave space for light to shine through!
This project not only adds style but also gives your lampshade a unique texture. Consider using a lampshade frame to create a stable base for your design. The strong metal ring can connect to your lamp harp, making it easier to build your elegant fixture.
It’s a great conversation starter and will add elegance to any room!
14. Bohemian Bliss: Feathers and Beads

Get ready for a mind-blowing makeover with a bohemian lampshade adorned with feathers and beads that will steal the show!
Hang colorful feathers or strings of beads from the bottom of your lampshade for a whimsical, textured look. To achieve this, start by selecting feathers in various shades that complement your decor. A great option is the Soarer colorful craft rooster feathers, which come in a bulk pack of 300 pieces and are perfect for DIY crafts and decorations.
Attach the feathers with hot glue or strings for a flowing effect. For this task, a reliable hot glue gun will make your project much easier. This kit includes 30 glue sticks and is perfect for quick and efficient bonding of your feathers to the lampshade.
Incorporate beads to add sparkle—beads can be strung together or scattered around for a playful vibe. For stringing your beads, consider using the bead stringing kit that features a clear elastic string and two beading needles, making it a breeze to create beautiful bead designs.
This fabulous transformation will not only lighten up your space but also add a free-spirited ambiance that’s oh-so-chic. You’ll love how the light dances through the feathers, casting enchanting shadows and creating an inviting atmosphere.
15. Seasonal Switch: Holiday Themes
Why not switch your lampshade with the seasons? Creating a DIY lampshade that reflects the various holidays or seasons throughout the year can keep your decor fresh and fun!
Here are some ideas:
- In spring, consider using floral fabrics or pastels. A great option for this is the Whaline 12Pcs Spring Cotton Fabric Bundles, which offers beautiful retro floral printed fat quarters perfect for your spring lampshade project.
- For summer, bring in bright colors and patterns to brighten up your space.
- Autumn can be reflected with warm tones and leaves, enhancing the cozy vibe of the season.
- Winter can be adorned with snowflakes or holiday motifs. To achieve this, you might add some OuMuaMua Winter Christmas Hanging Snowflake Decorations for a touch of festive flair.
Additionally, if you’re looking to create your own lampshade from scratch, you’ll need a sturdy base. The Aspen Creative Metal DIY Drum Lamp Shade Making Kit provides a solid ring that connects to your lamp harp, making it easy to assemble your design.
This seasonal swap allows you to express your creativity throughout the year while keeping your home atmosphere inviting and exciting. Plus, it’s a fun project to involve the whole family in!
16. Kids’ Crafts: Fun and Playful Designs
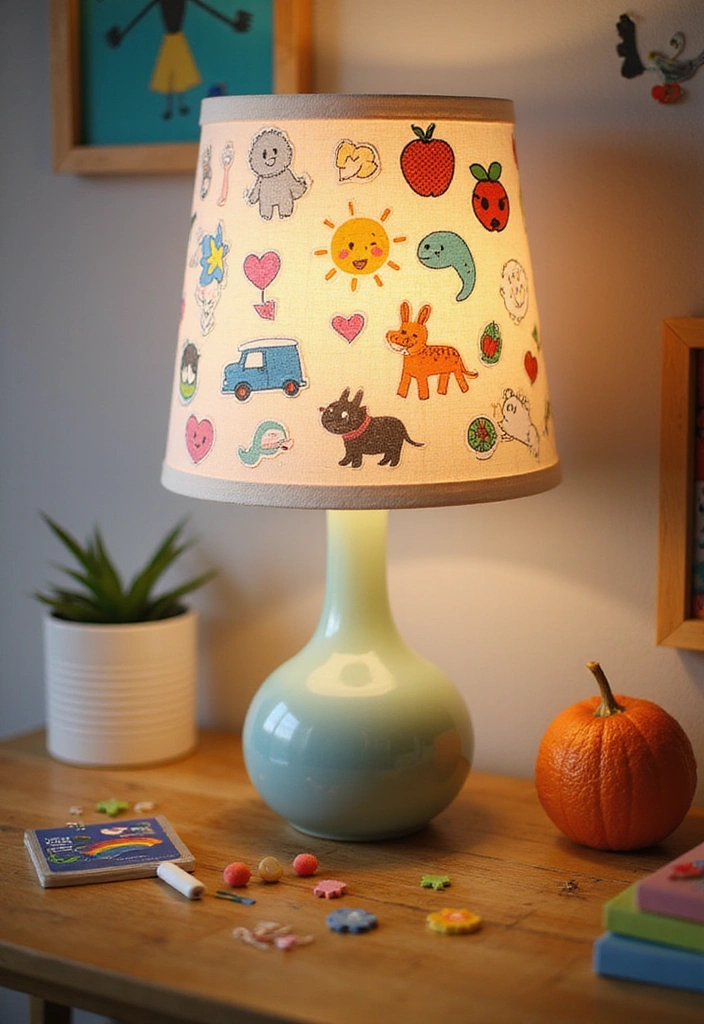
Get your little ones involved in crafting their very own lampshades! Children love expressing their creativity, and a DIY lampshade is a perfect project for their artistic flair. To make this fun and engaging, consider using Crayola Ultra-Clean Washable Markers for decorating. These washable markers are easy to clean up and come in vibrant colors, allowing kids to paint directly on the lampshade with shades they adore.
You might also want to include some fun elements through colorful stickers. With over 1000 stickers featuring cute designs, kids can personalize their lampshade with their favorite cartoon characters or animals, making the project truly special.
To get started, a DIY lampshade kit can provide a sturdy foundation for your crafting adventure. The metal drum lamp shade with a strong ring will make it easy for your little ones to create something they can be proud of.
This project not only serves as a delightful way to spend time together but also adds a personal touch to their room that they will cherish for years. Plus, it’ll brighten up their space with their unique creativity!
17. Mix and Match: Personal Style
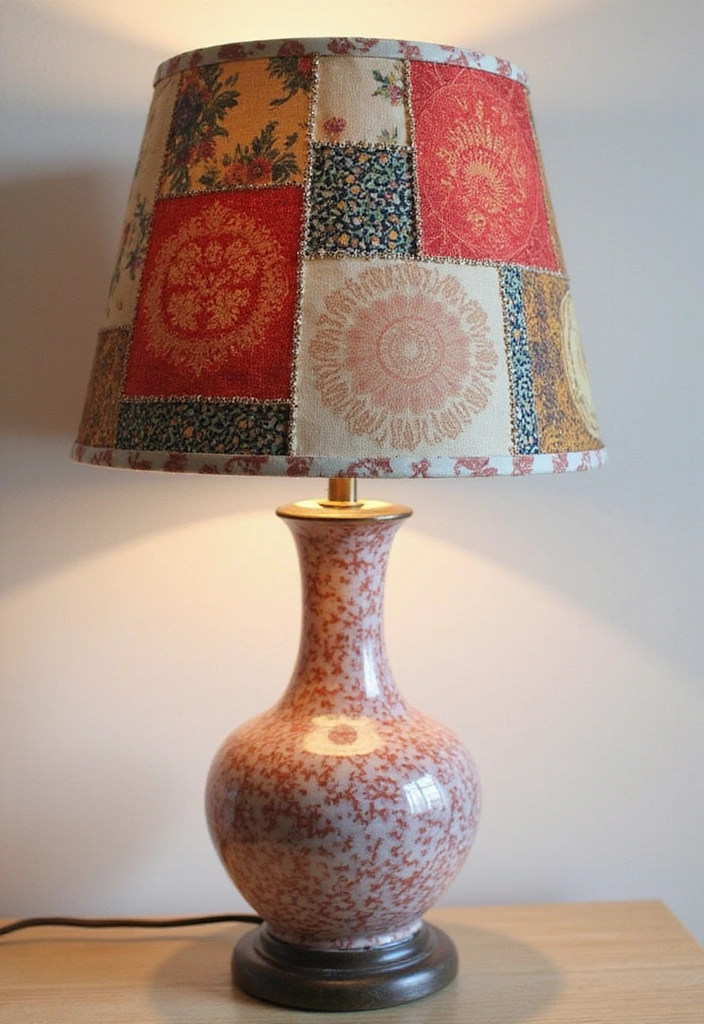
Why stick to one style when you can mix several? A mix-and-match lampshade combines different fabrics, patterns, and materials to create a unique look that showcases your personality. Here’s how to achieve this eclectic look:
- Gather various materials such as lace, denim, and cotton in different colors. For a great resource on fabric choices, consider using Fabric Swatch Book to explore a variety of textiles that can add depth to your design.
- Mix prints and textures, adhering them to the lampshade in a layered pattern. The Hot Glue Gun Kit will help you attach all these materials securely. Its precision nozzle and easy squeeze trigger make it perfect for detailed work.
- Don’t be afraid to use contrasting colors and patterns for a bold statement! To create a sturdy base for your design, you might want to start with the Lampshade Making Kit. This kit comes with a strong metal ring that connects easily to your lamp harp, ensuring your new creation stands the test of time.
This project is all about self-expression and can result in a one-of-a-kind piece that reflects your style. It’s perfect for those who love to stand out and celebrate individuality.
18. Glitter Glam: Shimmer and Shine
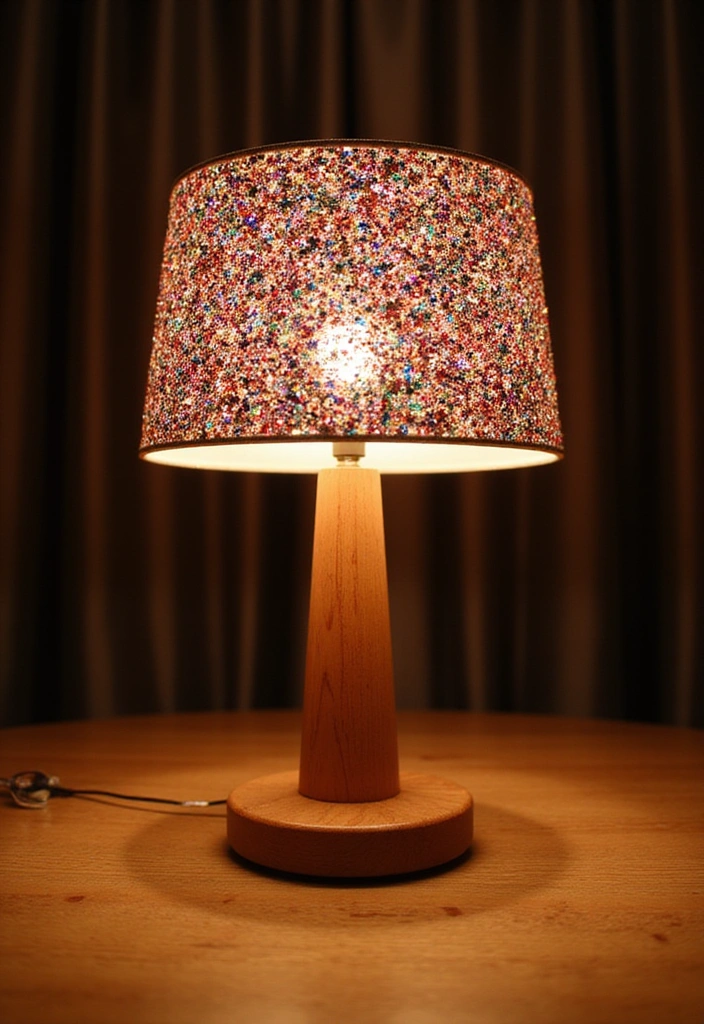
Add a touch of glamour with glitter! Transform your lampshade into a sparkling masterpiece that catches the eye and dazzles anyone who steps into the room.
Here’s how to create a glittery lampshade:
- Brush on a layer of glue in desired sections of the lampshade. Using a versatile adhesive like Mod Podge Glue can make the application process easy, as it dries quickly and is safe for various materials.
- Apply glitter over the glue while it’s still wet. For a vibrant selection of colors, consider a Glitter Craft Set, which includes 32 different glitter shades to match your mood or theme.
- Shake off the excess and let it dry completely before displaying it.
This project is perfect for special occasions or just to add a bit of sparkle to your everyday life. Plus, if you need a solid base for your lampshade, don’t forget to check out the lampshade making kit, which includes metal rings to ensure your new design stays securely in place.
Get creative and enjoy the shimmer!
19. DIY Decoupage: Layered Art
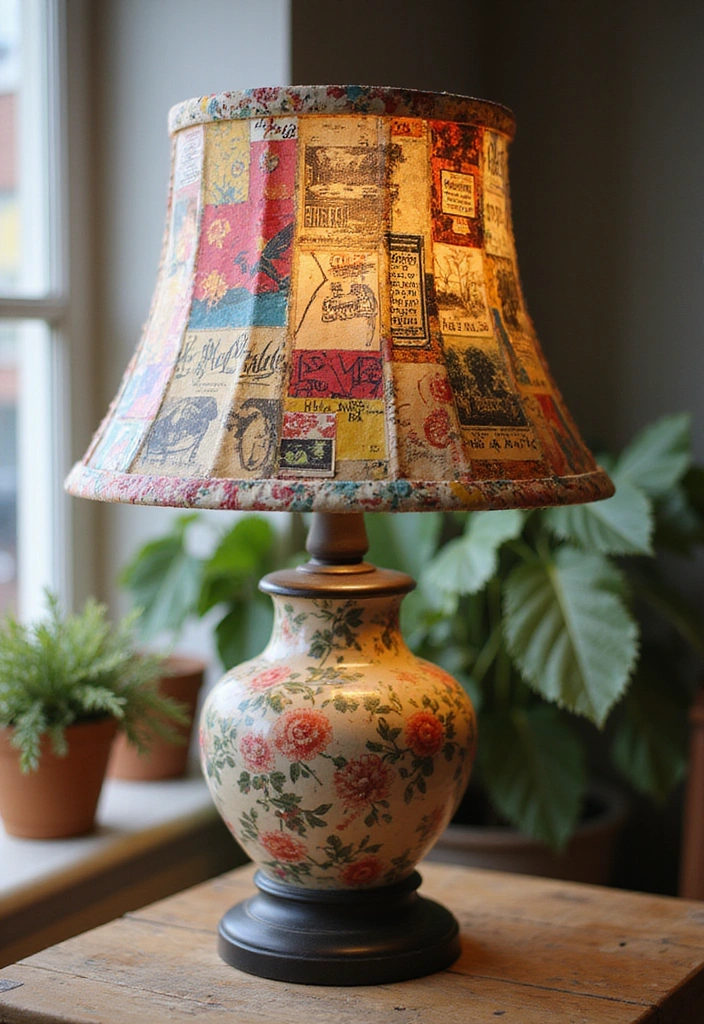
Decoupage can turn any simple lampshade into a layered work of art! This technique allows you to apply printed images, fabric, or even tissue paper for a textured, professional look.
To get started on your lampshade makeover, you’ll need to choose your decorative papers or images. A great option is the decoupage paper pack, which includes 24 sheets of beautiful floral paradise designs. These papers will add a vibrant touch to your lampshade.
Next, you’ll want to use decoupage glue to apply the layers, smoothing out any bubbles as you go. The Mod Podge gloss sealer, glue & finish is an excellent choice for this step, as it dries quickly and offers a non-toxic solution for various surfaces, ensuring that your artistic vision comes to life without hassle.
Finally, seal your work with a top coat of glue for a lasting finish. The DecoArt top coat sealer is perfect for this purpose, providing the durability your decoupage project deserves while enhancing the overall look.
With these products in hand, you can layer different designs and colors for a unique lampshade that tells a story, reigniting your creativity along the way!
20. LED Magic: Modern Touch
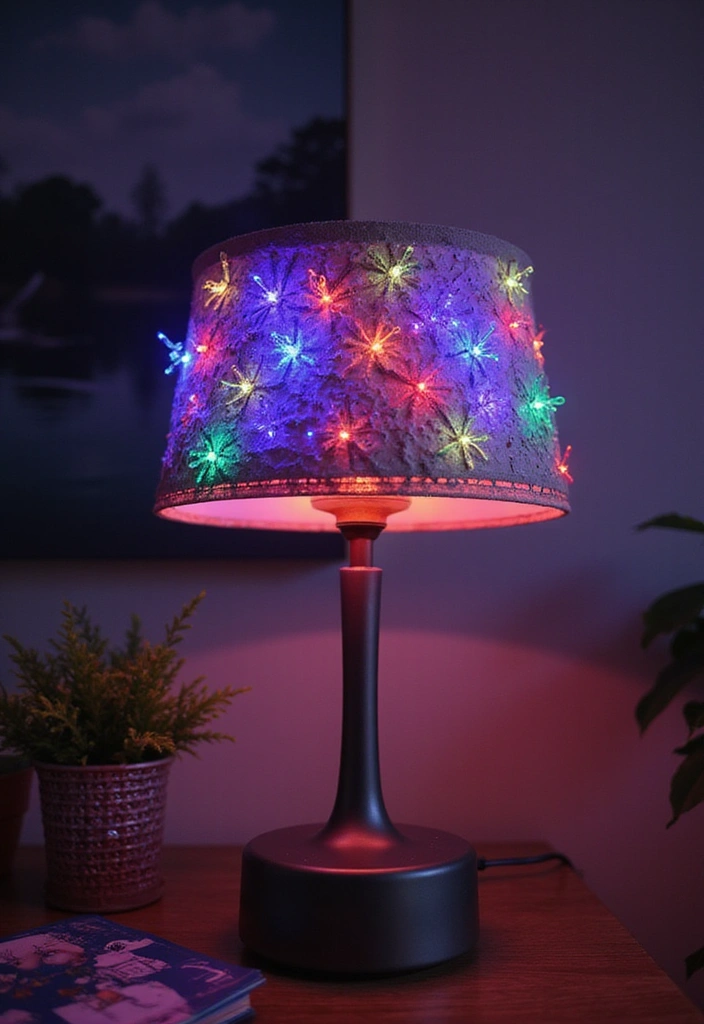
Incorporate LED lights creatively into your lampshade for a modern twist! This high-tech approach will not only illuminate your space but also add an atmospheric vibe.
Here’s how to blend technology with design:
- Choose LED strip lights that can be easily attached to the inside of your lampshade. These flexible lights allow you to experiment with different colors and settings for a dynamic look.
- Enhance your setup with a remote control for LED lights, which makes it easy to change colors and adjust settings without needing to reach for the power source.
- You can even create patterns or shapes with the lights for an innovative design! For crafting a new lampshade or repairing an existing one, consider using a lampshade DIY kit, which provides the adhesive materials necessary for your project.
This project is perfect for tech enthusiasts and will surely impress your guests as they step into your lit-up wonderland!
Conclusion
These fun DIY lampshade makeovers are just a taste of the creativity you can unleash in your home! Whether you’re going for cozy, bold, or whimsical, there’s a style here for everyone to explore. Dive into the world of craft lampshades, and let your imagination run wild!
Which makeover sparked your inspiration? Don’t forget to share your creations with friends and fellow DIY enthusiasts!
Note: We aim to provide accurate product links, but some may occasionally expire or become unavailable. If this happens, please search directly on Amazon for the product or a suitable alternative.
This post contains Amazon affiliate links, meaning I may earn a small commission if you purchase through my links, at no extra cost to you.